If you’re like most digital retailers, you probably focused on getting your online store up and running as quickly as possible in the very start.
But now, things are different.
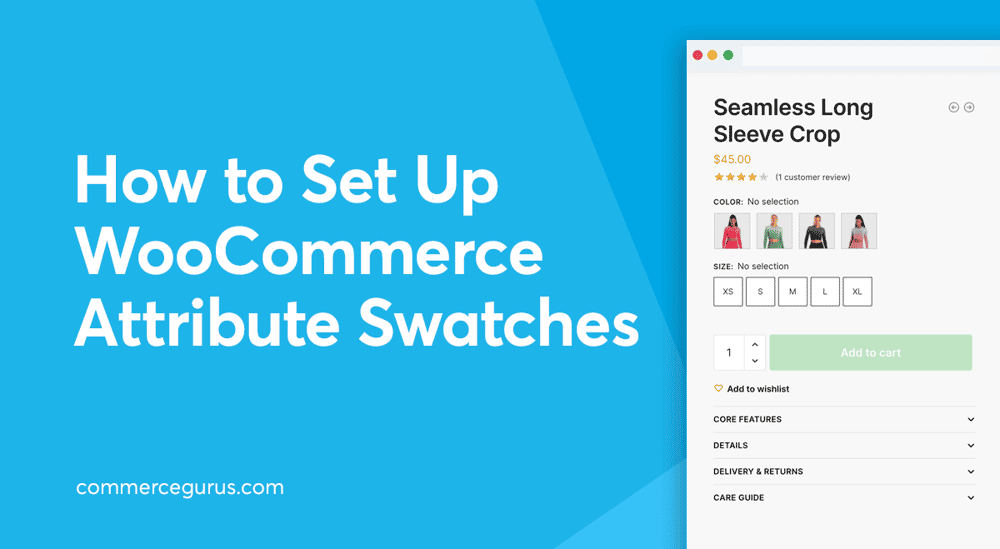
As your store begins to gain traction, you might be thinking of ways to improve it in terms of design and usability. One important way to do this is by setting up attribute swatches for your variable products.
Attribute swatches are a great way to present your products better and they give your online store a professional look. You can display product options in images, buttons, or color swatches instead of using generic-looking dropdown menus.
You’ve seen them on all big-name stores and it’s time to set them up in your own store!
In this article, we’ll explain how WooCommerce handles attributes out of the box and why you should consider using attribute swatches on your product pages. We’ll also show you how you can set this up on your online store using our CommerceKit plugin which is included with our Shoptimizer WooCommerce theme.
What are WooCommerce attribute swatches?
By default, WooCommerce lets you display extra options in a dropdown for variable products. It looks something like this on the single product page (screenshot from the default Storefront theme):
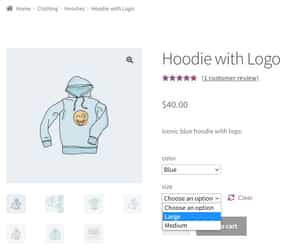
While this may work for some products, it doesn’t showcase the extra product options in the best way possible.
This is because there’s no visual representation of the product option customers can select. Since most people are visual learners, displaying attribute swatches draws attention versus looking at a text-only dropdown menu. It’s also a great way to let customers see the different product variations you sell at a glance.
Ideally, you want to display attribute swatches on product pages on order to represent the available product options better and offer a unique shopping experience.
Let’s take a look at some examples of eCommerce stores using attribute swatches and see what they did right:
Everlane
Everlane uses attribute swatches to display different product options on their site. Customers can use the color swatches to select the color and use the button swatches to select their size.
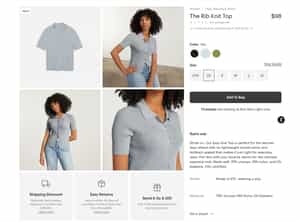
This lets customers easily identify and differentiate between various product options and enhances the overall shopping experience.
Reformation
Sustainable women’s clothing brand, Reformation, does a great job of using attribute swatches on their product pages.
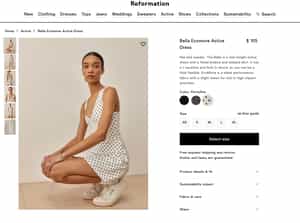
Customers can select colors and patterns using image swatches and select their desired size using intuitive buttons instead of a generic-looking dropdown menu.
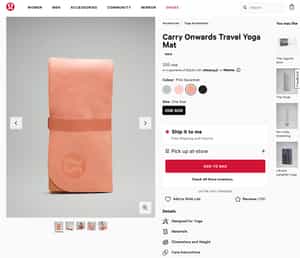
Lululemon
Similarly, Lululemon uses attribute swatches to offer their customers an easy way to differentiate between different yoga mat colors which helps them make informed purchase decisions quickly.
Merrell
Merrel does a great job at showcasing its hiking shoes in easy to select color attribute swatches that have images as thumbnails. This makes it easier for customers to visualize the variation and decide on an option quicker.
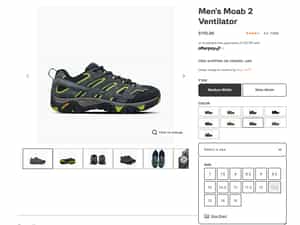
In addition to this, customers can also select the type and size using button swatches.
Why use attribute swatches on your product pages?
There are many ways you can use WooCommerce attribute swatches on your product pages.
Let’s dive deeper into some of these.
- Colors, prints, and patterns. You can use attribute swatches to display different colors, prints, or patterns for products such as clothing items, bedsheets, or customizable posters.
- Sizes, weights, and capacity. A better way to display different size, weight, and capacity options for your WooCommerce products is by using attribute swatches. For instance, if you sell food items, you can offer the product in multiple sizes “Large, Medium, Small” and use an illustration of box sizes instead of using a text-only dropdown menu.
- Materials and fabrics. While attribute swatches work great for displaying different product options, they can also be a great way to let customers easily differentiate between various product variations. For instance, if you sell customizable furniture, you can set up attribute swatches for materials and fabrics so customers can get a better visualization of what their final product will look like.
- Specifications. If you sell computer parts or products that require you to add technical specifications, it’s better to display them in button attribute swatches rather than using an information text field.
While attribute swatches are a great way to display your WooCommerce product better, there are many other benefits to using them on your online store.
Here’s a run-down of why it’s beneficial to use attribute swatches on your WooCommerce product pages:
#1: Make it easier for customers to differentiate between different product options
Attribute swatches work great for letting your customers differentiate between product options when shopping from your online store. For instance, customers can distinguish between the available product options as each one is represented with an image swatch. As a result, it eliminates friction from your buying process and makes your online store more user-friendly.
#2: Make it easier to select the correct variation
If you sell a lot of product variations, consider showcasing them in attractive attribute swatches. This way, your customers will have an easier time selecting the correct variation. This also results in a much smoother and seamless shopping experience on your online store.
#3: Deliver an engaging shopping experience
Using attribute swatches to showcase product options better is always a great idea, especially for delivering an engaging shopping experience on your online store. Customers can view product options much easier and differentiate between them without having to look twice. As a result, this makes it much more enjoyable to shop from your online store.
#4: Help customers visualize the variation better
Attribute swatches make your product options look more attractive to customers and help them visualize the variation better before they add the product to their shopping cart.
While WooCommerce by default doesn’t let you showcase product details using swatches and images, you can use an attributes swatches plugin to personalize your WooCommerce products.
How to set up attributes swatches in WooCommerce using CommerceKit
Here, we’ll show you how you can easily set up attribute swatches in WooCommerce using CommerceKit.
While there are many solutions that let you display attribute swatches instead of the default dropdown menus, the CommerceKit plugin stands out.
Here’s why:
CommerceKit offers an all-in-one solution for customizing the look and feel of your WooCommerce site, without having to touch a single line of code. The best part about the plugin is that it comes completely free as a part of the Shoptimizer theme.
You can use CommerceKit’s Attributes Swatches module to add customizable attribute swatches to your WooCommerce products.
For this tutorial, you’ll need a WordPress site with the WooCommerce plugin installed and ready to go. You’ll also need the Shoptimizer theme along with the CommerceKit plugin which is included free as a part of the robust, performance-optimized theme.
Step #1: Get Shoptimizer and install CommerceKit
Start off by getting the Shoptimizer theme and installing it on your WooCommerce site. Download the theme using the download link provided to you at the time of purchase and navigate to Appearance → Themes and click on the Add New button.
Upload the theme .zip file here and make sure to install and activate the theme as well as the CommerceKit plugin on your WooCommerce site.
Step #2: Enable the Attribute Swatches module
Once the CommerceKit plugin is installed on your WooCommerce site, you will see a new CommerceKit menu item in the sidebar.
This will take you to the CommerceKit dashboard. From here, click on the Attributes Swatches tab and select the Enable checkbox to enable attribute swatches on your WooCommerce product pages.
You can also select the type of button you want to use for displaying attributes on your WooCommerce product pages.
Once you’ve enabled the module, make sure to click on the Save Changes button at the bottom of the page.
Step #3: Create a variable product
Now with everything in place, you can start creating product attribute swatches on your online store. To do this, navigate to the product’s edit page or create a new variable product by going to Products → Add New.
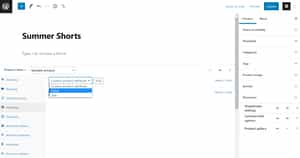
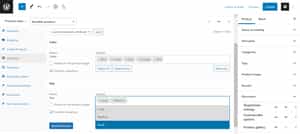
Select Variable product using the Product data dropdown menu and click on the Attributes tab. Add your own custom attribute or select either the Color or Size attribute and click on the Add button.
Now, select the Used for variations checkbox and enter the Value(s) for your attribute. For instance, for colors, you can add all the color options you want to offer for your WooCommerce products using the dropdown selector. Once you’re done adding attributes, click on the Save attributes button to continue.
This will let you add all product variation options automatically using the attributes you just created. Click on the Variations tab and select Create variations from all attributes using the dropdown menu.
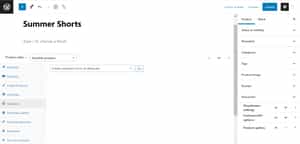
Click on the Go button to automatically add all variation options to your WooCommerce product. Now you can add variation prices and images to each option and click on the Save changes button once you’re done.
You’re almost ready to showcase your WooCommerce products better using attributes swatches.
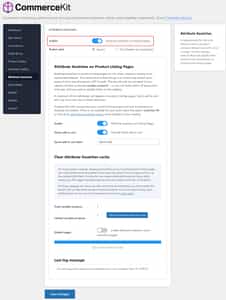
Step #4: Set up WooCommerce attribute swatches
Click on the Attribute Swatches tab to configure and customize how attribute swatches will be displayed on the front-end of your WooCommerce site.
First, select the Enable attributes swatches checkbox to display attributes swatches on your product pages.
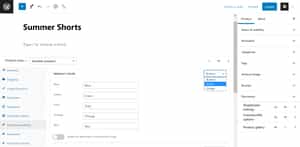
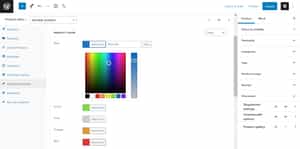
Now, select how you want to display each product attribute from the available options including Button, Color, or Image. For example, you can display product color options better using actual color swatches. Select the Color option using the dropdown menu and set colors for each product variation option.
Similarly, you can also include a stylish button for displaying product sizes on the front-end of your online shop. Simply select the Button option using the dropdown menu and enter the text that will be displayed on the button using the text field next to the variation option.
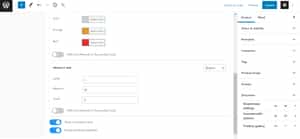
Once you’re ready, click on the Update button to save changes on the front-end of your WooCommerce site.
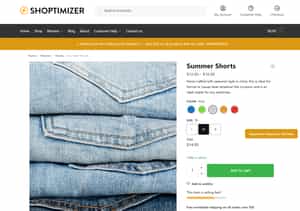
Preview
Customers can now select product options easily using attribute swatches and make informed purchase decisions quickly. It will look something like this on the front-end:
Show attribute swatches on product category pages
Using the Shoptimizer theme and CommerceKit, you can also show attribute swatches on product listings pages. This is particularly useful if your customers browse through the product category pages on your store.

Customers can quickly see the different attribute swatches available for each product before they click through to the single product page. This gives them a better idea of the different variations the product is available in. Customers can also click the attribute swatches to view the variation they’re interested in.
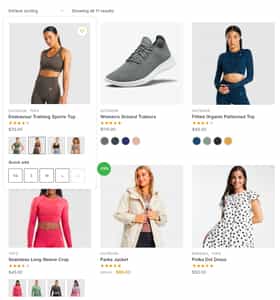
In addition to this, the CommerceKit plugin lets customers select options and add products to their shopping cart directly from the listings page.
To enable this, all you have to do is toggle the Attribute Swatches on Listing Pages setting on from the Attribute Swatches settings page. You can also Activate Quick add to cart and set the Quick add to cart label.
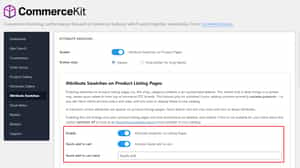
Click the Save Changes button to continue.
Bonus – Video walkthrough!
As a bonus you can see us building a variable product from scratch in our 5-minute video tutorial which you can also find in our Shoptimizer documentation section.
It covers:
- Setting up image and label attribute swatches
- Creating a grid gallery layout, which includes a video
- Creating product attribute galleries
Conclusion
Showcasing your WooCommerce products the right way is important, especially if you want to grab the attention of your site visitors. This is why we recommend displaying products that have extra options or variations using attribute swatches. This helps your WooCommerce product pages look and feel professional and helps your customers easily differentiate between the different available options.
While WooCommerce lets you display product variation options, the default layout isn’t intuitive and doesn’t help your product pages stand out. Instead, you can use the CommerceKit plugin to add attribute swatches to your online store in a few simple steps.
The CommerceKit plugin comes free with the performance-optimized Shoptimizer theme. This is the perfect solution if you’re looking for a single plugin to customize your WooCommerce product pages and add extra product options such as product galleries, product videos, or sales countdown timers.
Also, be sure to check out our WooCommerce variation swatches article for other options to include this type of functionality in your store.
Ready to set up WooCommerce attribute swatches on your online store? Get CommerceKit today!


 14 eCommerce Store Features Inspired by Top Footwear Brands
 From Visits to Journeys: How to Drive Visitors Back to Your Store
 12 Must-Have Features of Top Performing Product Pages
 Outstanding Size Guide Examples in eCommerce
This is great – however the actual money shot would be variation swatches that work with infinite scrolling.
Hi Cheridan, we’ve tested our swatches implementation on product listings pages with various infinite scrolling plugins. If you’ve spotted a problem send us a mail to [email protected] and we’ll be happy to take a look.
Hello, I have this option active, but I would like in mobile version see two products per column in listing pages, how can I do it?