WooCommerce, by default, displays variations as text in dropdowns. Research on the topic has found that users often overlook color indicators shown in text.
A better solution is to display swatches which immediately show the user just what variations are available.
CommerceKit’s attribute swatches includes a number of fantastic features which transform variable products into something far better.
- Can present variations as images, colors, or labels.
- Display swatches on product pages and on your catalog/listings pages.
- Enable ‘Quick add’ on listings pages to immediately add variations to the cart. Brilliant for conversions.
- Beautiful mobile-first design pattern.
- Full compatibility with the CommerceKit Product Gallery module.
To get started go to CommerceKit > Attribute Swatches and activate the module.
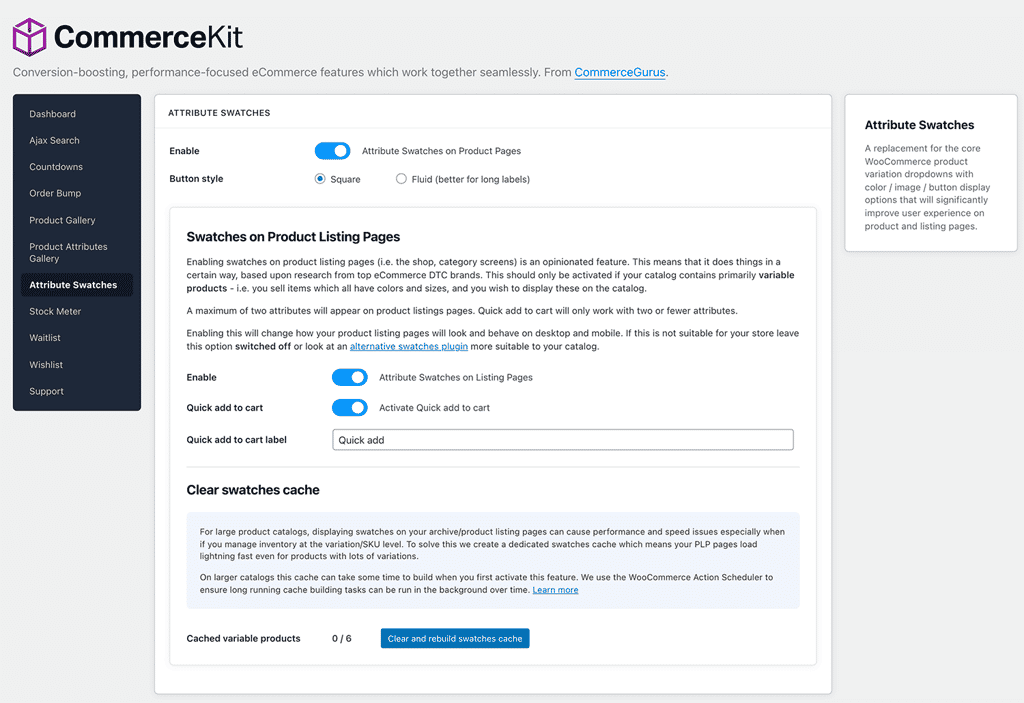
You can enable this module on both product pages and on listings pages.
If you have short labels, e.g. you sell clothing and you use ‘S’, ‘M’, ‘L’, ‘XL’ for sizes, then the Square style works best. If you use longer labels, it’s best to switch to the Fluid option.
Swatches on Product Pages
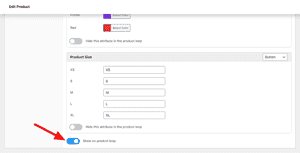
You need to assign swatches on a per-product basis. So, edit a product and scroll to the Product data section and click on Attribute Swatches.
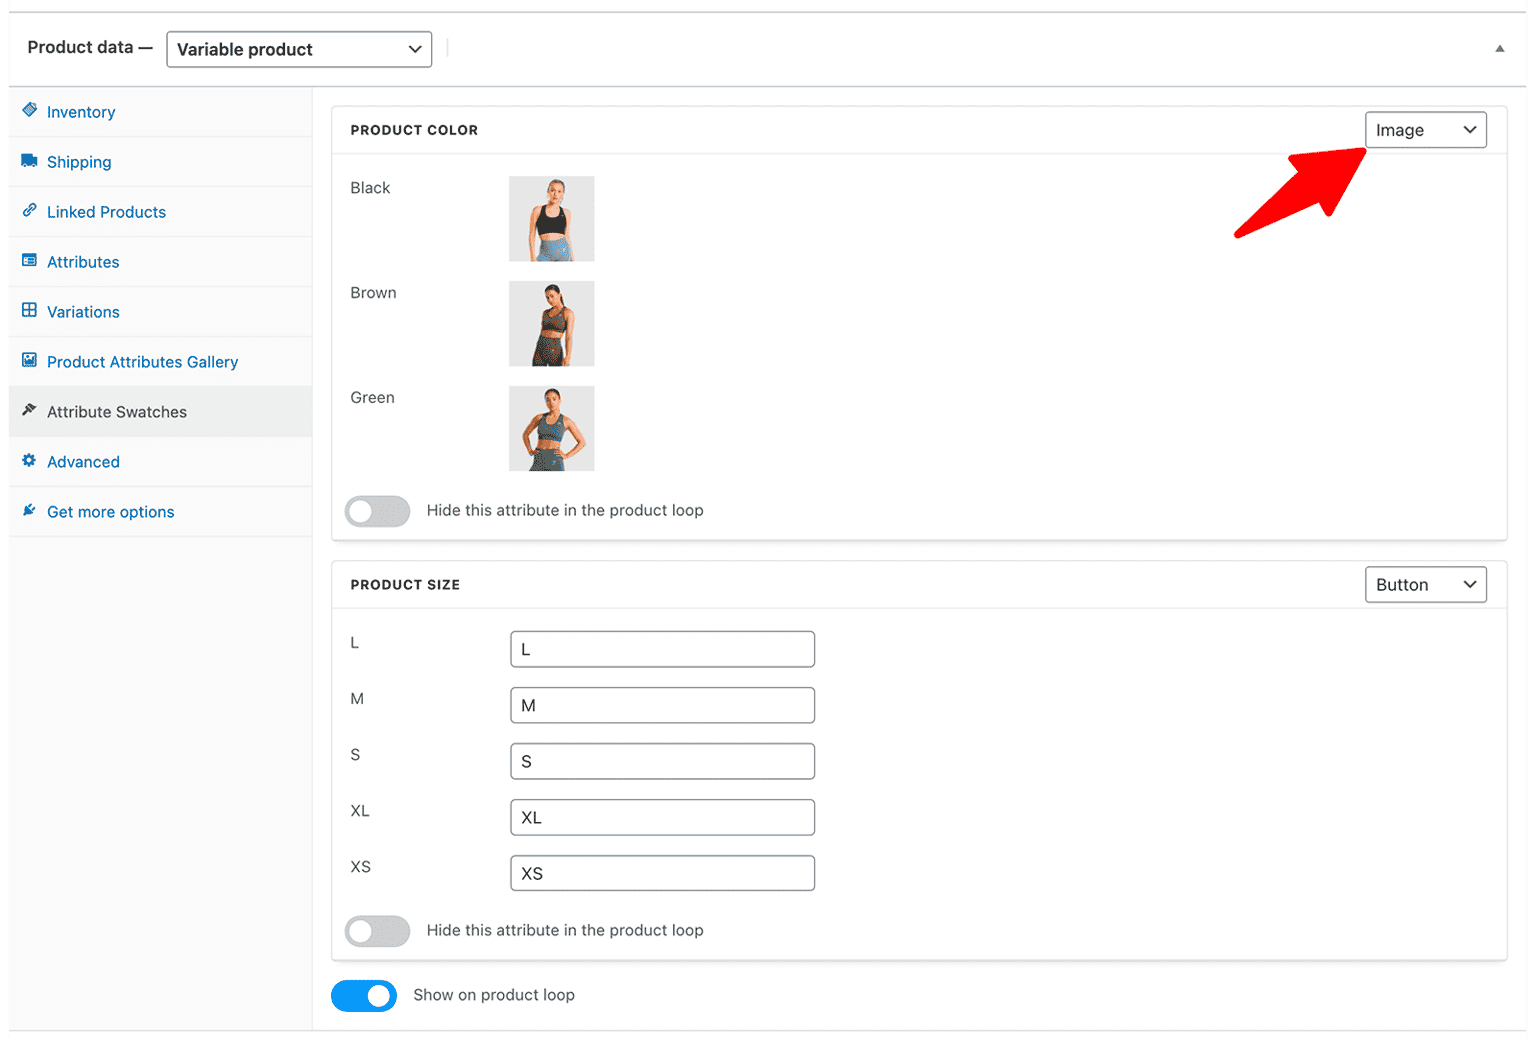
You can see each variation for this product and set a “swatch style” which should be displayed. It can be a Button, Color, or Image.
If you use a Button, it will display a separate, clickable button for each. This is much better than hiding the options within a dropdown. If you choose a Button, it displays best if you display a small number of characters, e.g. “M” for Medium, or “12.5” for a shoe size.
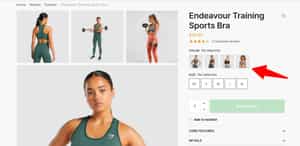
Here is what it looks like on the front-end, after you set up your attribute swatches.
Swatches on Product Listing Pages
Our swatches module also includes the facility to include swatches on product listings or category pages. Here’s how to set this up.
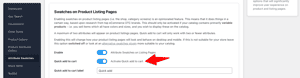
Go to CommerceKit > Attribute Swatches and click Enable next to Attribute Swatches on Listing Pages.
You must then click the Clear and Build Cache button in order to create the cache for the first time.
Next, you’ll need to edit a product and within Product Data > Attribute Swatches ensure that Show on product loop is enabled.
There are the primary options.
- Show on product loop – this will display these attributes on the catalog/product listings screens if active and you have chosen to display them in the main CommerceKit Product Swatches settings panel.
- Hide this attribute in the product loop – this will hide a particular attribute from displaying on the catalog/listings screens. Note that if an attribute is hidden, you will not be able to ‘Quick add’ an item to the cart.
This module will display a maximum of 2 attributes on listings pages, to keep things usable.
Note: Shoptimizer’s ‘Image flip’ option is disabled for variations with swatches on product listing pages. Instead, the image changes when an attribute has been selected if you have set up a product attribute gallery.
Showing a reduced number of swatches on product listings
Since CommerceKit 2.4.4, you can display a reduced number of swatches on the listings pages, and have a “+2” to indicate, that for example, there are two more swatches not displayed. This is useful if a product has a lot of swatches and you would prefer things to look neater by showing a reduced number.
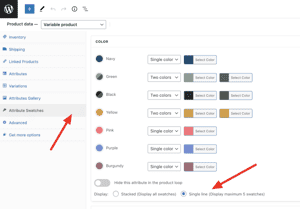
To enable this, go to Attribute Swatches and click the Single line display option. You will also need to clear your CommerceKit cache after making this change.
Note: This display option will only appear if you have a lot of swatches in the first place.
By default, image swatches will display a max of 4 thumbnails and color swatches a max of 5. You can change these defaults with a custom function, added to a child theme.
Changing the maximum image swatch value to 3:
add_filter ( 'commercekit_as_image_single_line_limit', 'commercekit_as_image_single_line_limit', 10, 1);

function commercekit_as_image_single_line_limit($value) {
	return 3;
}
Changing the maximum color swatch value to 4:
add_filter ( 'commercekit_as_color_single_line_limit', 'commercekit_as_color_single_line_limit', 10, 1);

function commercekit_as_color_single_line_limit($value) {
	return 4;
}
Quick add to cart on listings pages
CommerceKit also has a Quick add to cart option which you enable on product listing pages.
You can activate it within the CommerceKit > Attribute Swatches settings area.
Once enabled, a customer will be able to add an item to the cart immediately on product listings pages like so.
If the option is switched off, it will instead link to the single product page.
Note that the Quick add to cart option will only work if:
- There are a max of 2 attributes for a product (e.g. color and size)
- You are not hiding an attribute in the product loop.
Clear swatches cache
CommerceKit uses a background cache to keep the product listings pages snappy to load. If you make any changes which impact on the product listings pages ensure that you click the Clear and rebuild swatches cache button.
We built this feature with the Action Scheduler, so cache is cleared in bite-sized pieces rather than all at once. This makes it much more stable and reliable, especially for stores with large catalogs.
Out of stock swatch display
You can ensure that your swatches display an out of stock style when only the first attribute has been selected. The variation becomes greyed out with a line through it, indicating that it is not available.

You need to go to: WooCommerce > Settings > Products tab > Inventory
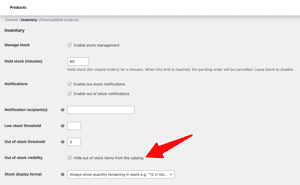
And ensure that Out of stock visibility is ticked.
Note: If you have a single attribute, then an out of stock item will not appear. This is the same as core WooCommerce.
Reorder the swatches
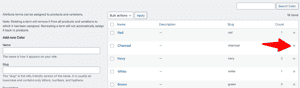
To reorder the swatches go to: Products > Attributes, and underneath the attribute you wish to modify, click Configure Terms.
These handles can be clicked and held, and then dragged up and down to re-order the attribute. Once moved, ensure that you have fully cleared all cache, including Autoptimize, if you have that plugin enabled.
Tooltips color
You can change the color of the tooltips by adding some custom CSS to: Appearance > Customize > Additional CSS.
.tippy-box {
    background-color: red;
}

.tippy-box[data-placement^="top"] > .tippy-arrow:before {
  border-top-color: red;
}