When you’ve done just about everything else to increase sales and optimize your online store, it’s time to go back to the basics.
That’s right. I’m talking about making your WooCommerce product pages stand out by changing up their design.
If you’re like most store owners, you probably agree that visual appeal adds to the customer’s shopping experience. A well-designed product page makes it easy for customers to learn about your product, select the right variation, and quickly add products to the cart.
Since the default WooCommerce product design options are pretty limited, we recommend using the Shoptimizer theme with the CommerceKit plugin to change the way your product pages look on the front-end.
In this article, we’ll go over some useful tips on how to make your WooCommerce product pages stand out to maximize sales.
Top eCommerce sites to take inspiration from
Before you jump into customizing your WooCommerce product pages, let’s take a step back to look at some of the top eCommerce sites for ideas and inspiration.
Philips Hue
Philips Hue showcases their WiFi smart bulbs on an attractive product page that’s not only easy to navigate but also displays product details in a professional and easy-to-read way.
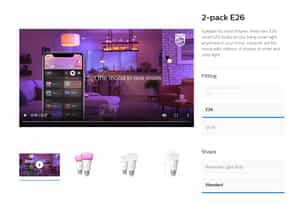
They have also added a product video on the product page to make it easier for customers to see what the product looks like in real life. This makes the product much more appealing and encourages more customers to add it to their shopping carts.
boohoo
boohoo is a UK-based fashion store that has well-crafted product pages.
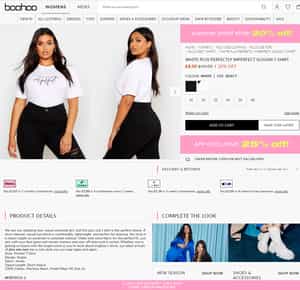
It displays product details in a clean layout and has repositioned the short description to better suit the product page’s layout. By repositioning the short description, they’ve put variation options center stage. This helps customers identify product variation options easily while ensuring product details are still accessible on the product page.
West Elm
One of the most noticeable additions to West Elm’s product page is the “Add to Favorites” button right beside the add to cart button.
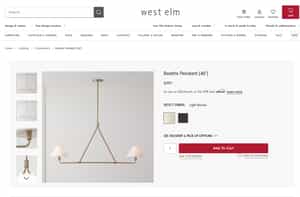
This not only lets customers save products to be purchased at a later date but also helps store owners identify customer purchase intent. This lets them offer sales and discounts to encourage prospective buyers to purchase products from their wishlists.
Pottery Barn
Home furnishing eCommerce company, Pottery Barn, displays various product options in attractive, easy-to-understand attribute swatches.
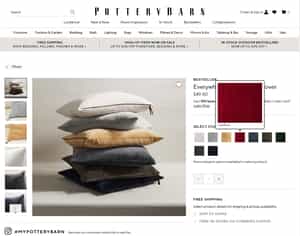
Displaying attribute swatches to highlight each product option helps customers differentiate between the available options and makes it easier for customers to pick the right one.
Useful tips to make your WooCommerce product pages stand out
The Shoptimizer theme and CommerceKit plugin offer a great way to customize your product pages however you want, without having to touch a single line of code. This makes it easy for just about anyone to customize their product pages, even if they don’t have any experience with coding or web development.
The CommerceKit plugin comes free as a part of the Shoptimizer theme. So, for the price of a WooCommerce theme, you get access to various WooCommerce product design features at no extra charge.
Here are some of the ways you can use Shoptimizer with CommerceKit to make your products stand out:
Note: For this tutorial, we’ll assume you have the Shoptimizer theme and the CommerceKit plugin installed and activated on your WooCommerce site.
#1. Add videos to your WooCommerce product pages
Adding videos to your WooCommerce product pages is a great way to showcase products better and instill trust in your customers. In fact, 73% of consumers are more likely to purchase a product after watching a product video that explains it. The best part is that it’s very easy to set up.
To begin, navigate to the products page.
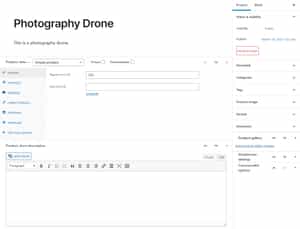
Click on the Edit Product button to continue. Next, click on the Add product gallery images link under the Product Gallery meta box.
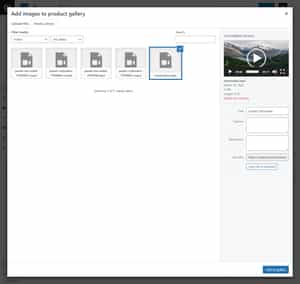
Upload product videos to your WooCommerce site and then click on the Add to gallery button. You can also click on the little play button on top of your video thumbnail to edit video settings.

The plugin also lets you add a video URL from popular video platforms such as YouTube or Vimeo.
Once you’re ready, click on the Update button to continue.
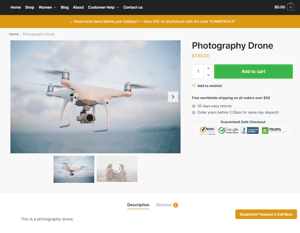
Adding a product video makes your product offering much more appealing to customers. It gives them a better idea of what they can expect to get.
For a better understanding of how videos make your WooCommerce product page stand out, check out our guide on how to add product video in WooCommerce.
#2. Set up an attributes gallery
You can use the Shoptimizer theme and CommerceKit plugin to display an attribute gallery for products on your online store.
So, when a customer selects a product option, the relevant product images will be displayed to them. For instance, if a customer selects the Red color variation, they’ll see the t-shirt product in red. This helps deliver a better online shopping experience.
Same as before, navigate to your product’s edit page to get started.

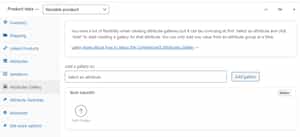
Now, click on the Attributes Gallery tab under the Product data meta box.
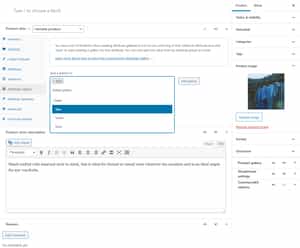
Select the variation option you want to add a gallery for using the dropdown menu and click on the Add Gallery button.
Next, click on the “Add Images” icon to start uploading images to your product attributes. Similarly, you can add multiple attribute galleries to display all available product options.
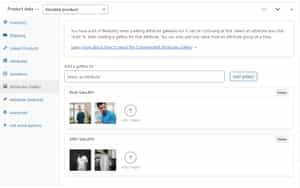
Make sure to click on the Update button once you’re done.
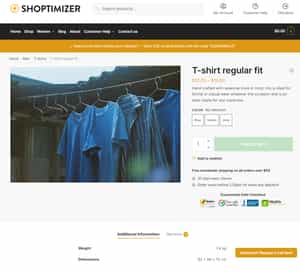
Customers will see the default product image on the front-end until they select a product option.

Setting up an attribute gallery is a great way to display each product option better and gives your customers a chance to view each product option closely. As a result, it can help customers make informed purchase decisions quickly.
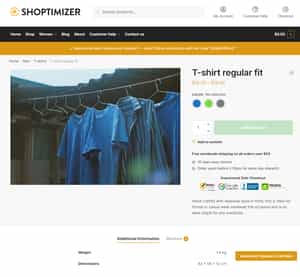
#3. Showcase variations better using variation and attribute swatches
If you sell variable products, you might consider showcasing extra options using variation and attribute swatches. This helps make your product pages stand out and makes it easier for customers to differentiate between the available options and pick the correct variation.
Navigate to the product’s edit page and click on the Attribute Swatches tab under the Product data meta box. Make sure the Enable attribute swatches checkbox is selected.
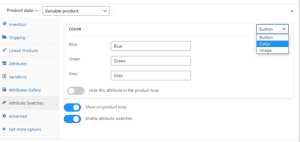
Here, you can select the attribute swatch you want to use to display various product options. For instance, you can display different colors of the product using color swatches.
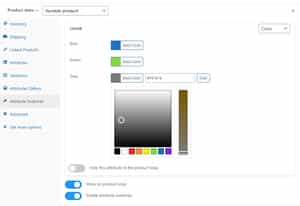
Once you’re ready, make sure to click on the Update button to save changes on the front-end.

Customers can now select various options and easily differentiate between them using the color swatches instead of clicking on generic-looking buttons or dropdown menus. As a result, your product variations options stand out and look more appealing to customers.
If you’re looking for more information about this, you can check out our tutorial on how to set up WooCommerce attribute swatches.
#4. Reposition the product’s short description
The Shoptimizer theme with the CommerceKit plugin lets you reposition your product’s short description quickly.
All you have to do is navigate to the Edit product page and click on the settings icon on the very top right of your screen.

Now click on the Shoptimizer settings meta box and select your product’s short description location using the Product short description position dropdown menu. Once you’re ready, click on the Update button to continue.
This is an easy way to showcase your product’s short description anywhere you want on your single product pages. For instance, you can display the short description below the guarantee and features text. This helps create unique-looking product pages while also ensuring an enhanced shopping experience on your online store.
#5. Enable sticky add-to-cart button
Adding a sticky add-to-cart button is a great way to encourage more sales and offer a unique shopping experience on your online store. This makes it easier for customers to add products to their cart regardless of where they are on the page.
You can enable a sticky add-to-cart button on your WooCommerce site’s product pages using the Shoptimizer theme with the CommerceKit plugin. Once you have both the theme and the plugin installed and activated on your WooCommerce site, navigate to Appearance → Customize from the WordPress admin panel.

Next, navigate to Layout → WooCommerce and scroll down to the Single Product section.
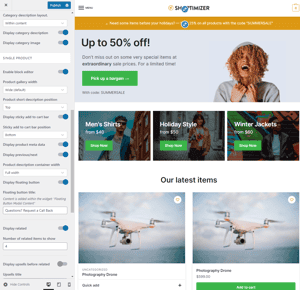
Select the Display sticky add to cart bar checkbox and click on the Publish button to continue.
Customers can now add the product to their carts from anywhere on the single product page.
#6. Let customers “wishlist” products on your online store
A great way to encourage more customers to keep coming back to your WooCommerce site is by letting them “favorite” or wishlist products on your online store. This lets customers mark products they’re interested in and might purchase at a later date. It also increases your chances of ultimately making a sale.
To enable the wishlist feature in WooCommerce, you will need to use the Shoptimizer theme with the CommerceKit plugin.
Head over to Pages → Add New and paste the following shortcode to create a “Wishlist” page for your online store:
[commercegurus_wishlist]

Now, click on the CommerceKit tab from the WordPress admin panel and then select the Wishlist feature.
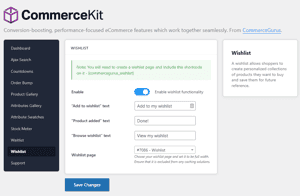
Select the Enable checkbox to activate wishlist functionality on your WooCommerce site and select the page you just added the wishlist shortcode to using the Wishlist page dropdown menu. You can also set custom texts for the wishlist buttons.
Make sure to click on the Save changes button to continue when you’re done setting it up.
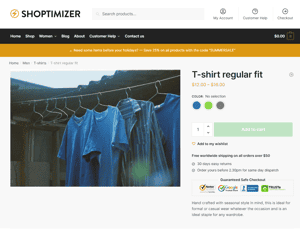
Customers can now add products to their wishlist by clicking the heart icon with the Add to my wishlist text.
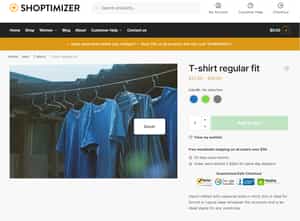
Once the product is added to their wishlist, customers will be notified with a “Done!” notification. They can then click on the View my wishlist button to navigate to the wishlist page you just created.
Conclusion
Creating attractive-looking product pages that stand out while being optimized for conversions can be challenging. This is why we recommend using the Shoptimizer theme with the CommerceKit plugin for WooCommerce as an “all-in-one” solution for creating and designing attractive-looking product pages.
The best part is that you only pay the price for a robust WordPress theme and get access to advanced WooCommerce features at no extra cost. This is because the CommerceKit plugin comes free as a part of the Shoptimizer theme. It’s a complete solution for making your product pages stand out and enhancing the shopping experience on your online store.
Ready to make your WooCommerce pages stand out? Get Shoptimizer and CommerceKit today!


 Problems with eCommerce design: the lack of product information
 Building the best WooCommerce theme – focus on speed and conversions
 14 eCommerce Store Features Inspired by Top Footwear Brands
 Rockerbox Review