Here’s a question for you: what do Amazon, eBay, and Etsy all have in common? They’re high-earning multivendor stores.
Multivendor stores are all the rage these days and it’s easy to see why. They provide tons of benefits to both businesses and consumers and are an excellent way for store owners to earn a commission. According to Statista, 37% of online shoppers would prefer to shop at an online marketplace for a repeat purchase.
The good news is that building a multivendor store in WordPress is actually pretty easy. And, in this article, we’ll cover everything from what a multivendor store is to what you need to build one. We’ll also walk you through a step-by-step tutorial explaining how you can build a multivendor store with Dokan and Shoptimizer.
What Is a Multivendor Store?
For those unfamiliar, a multivendor store is an online marketplace where multiple merchants sell products and services.
The multivendor store is typically managed by the website owner who’s responsible for setting up the store and handling transactions. Store owners can moderate content on the store and earn a commission on each sale. The individual merchants (i.e. vendors) manage their own inventory.
There are plenty of reasons why you might consider building a multivendor store. As a marketplace owner, it’s an easy and viable way to generate recurring income through commissions. In other words, every time a merchant makes a sale, you earn some money.
For sellers, multivendor stores are attractive options for setting up shop because they offer better visibility than if the merchant was to set up an independent online store. Think of it this way: if you wanted to sell handcrafted purses and tote bags, would you set up your own online store or sell through Etsy?
It’s also worth mentioning that consumers also love shopping at online marketplaces because they get quick and easy access to high-quality products at competitive rates. In addition to this, multivendor stores tend to have verified payment methods and a good track record of successful transactions which makes consumers more likely to buy from a marketplace than an individual seller – especially if they’re just starting out.
Some examples of popular multivendor stores and marketplaces include Amazon, eBay, Etsy, Taobao, and AliExpress.
What You’ll Need to Build a Multivendor Store
Before we take a look at what you’ll need to build a multivendor store in WordPress, it’s important to take a step back and consider how multivendor stores actually work behind the scenes.
Generally speaking, sellers register as vendors on the multivendor store. Some multivendor stores let sellers register for free while others charge for registration. Once they’ve registered, they can set up their products and services and let customers (or, in some cases, businesses) buy from them.
The store’s admin typically sets up a commission fee on each transaction which is automatically deducted whenever a seller makes a sale. The customer’s payment is often transferred to the admin account first where the commission is deducted and then the rest of the payment is deposited in the seller’s account.
Features to Look for in a Multivendor Store Plugin
As a store owner, you need a multivendor store plugin that offers the following features at the bare minimum:
- Lets sellers register as vendors. You can choose to charge for registration or let sellers register for free. It’s a good idea to approve vendor registrations manually.
- Lets store owners (the admin) set up and earn a commission from each sale through their preferred payment gateway.
- Supports different types of products e.g. physical products, digital goods, and services.
What You’ll Need to Build a Multivendor Store
The first thing you need to build a multivendor store is a solid web hosting provider for your website. Ideally, you want to go for a managed hosting platform that’s designed with eCommerce businesses in mind. For this reason, we recommend Cloudways. As an added benefit, Cloudways offers managed cloud hosting which means you can scale your hosting resources as your multivendor store grows.
Once you’ve decided on a hosting provider, you need to purchase a domain name and install the WordPress CMS to it. And, once WordPress is all set up, the final step is to install WooCommerce to your website.
Now that you have the basic infrastructure down, it’s time to choose a WordPress multivendor plugin that will power your online marketplace. For this, we recommend using Dokan. In addition to this, you’ll also need an eCommerce-optimized theme. Our best advice is to go with Shoptimizer.
Dokan Overview
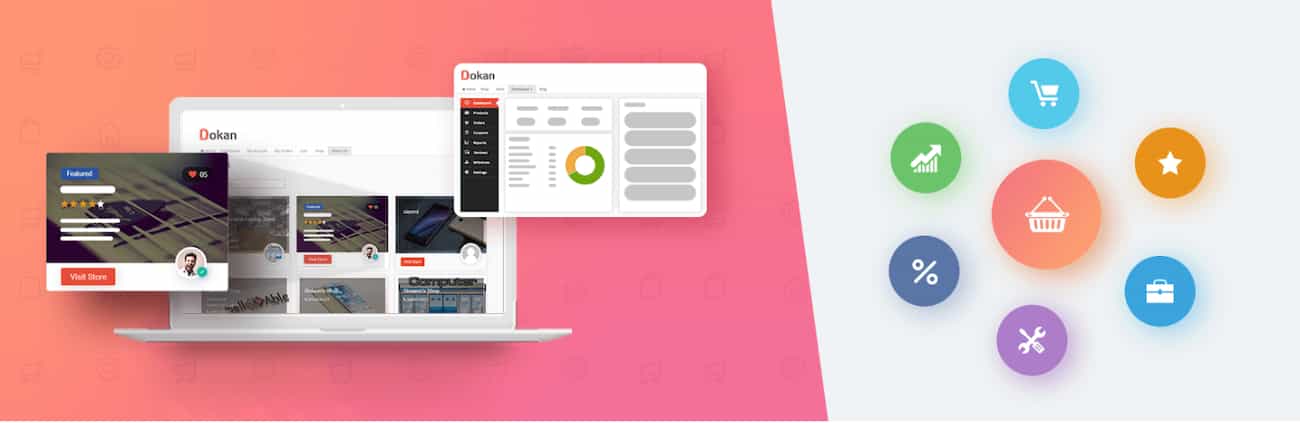
Dokan is a WordPress multivendor plugin that lets store owners set up a complete online marketplace similar to Amazon and eBay. It’s powered by WooCommerce which means you can let merchants sell digital, physical, and variable products.
You can let an unlimited number of vendors register and sell products and vendors can sell an unlimited number of products through their stores. In addition to this, as the admin, you can earn through vendor commissions or product-based commissions. Dokan also gives admins the option to create subscription packs and charge for product uploads, product limits, and time.
Key features:
- Offers an intuitive user interface.
- Vendors get a personalized dashboard on the multivendor store’s front-end.
- Only admins can access the multivendor store’s back-end.
- Gives admins full control over product publishing, vendor registration, and subscription renewals.
Dokan is available free for download in the WordPress Plugin Directory. The plugin also offers a premium version, Dokan Pro, that packs advanced features like social login, reports, seller verification, and subscriptions. However, for this tutorial, we’ll be looking at the free version of the Dokan plugin.
Shoptimizer Overview

Shoptimizer is a Dokan-compatible WooCommerce theme that’s optimized for speed and conversions. It lets you offer customers a distraction-free checkout experience making it easier for them to complete their orders. In addition to this, it lets you add additional product information to the product page making it easier for customers to make informed buying decisions.
Key features:
- Lets you add timer sales countdowns on individual products.
- Comes with built-in social proof elements including a slide up sales notification.
- Designed with WooCommerce SEO in mind.
- Utilizes the powerful Elementor page builder which is compatible with Dokan.
We recommend using the Shoptimizer theme for building your Dokan-powered multivendor store because it’s built with speed and conversions in mind which means you can rest assured you’ll be delivering the best possible user experience to vendors and customers.
In addition to this, the Shoptimizer theme comes with Dokan styling out of the box which means you don’t have to purchase Dokan Pro to get access to a responsive eCommerce theme with Dokan-specific widgets. Shoptimizer also lets you add trust badges at crucial stages of the buyer’s journey.
How to Build a Multivendor Store With Dokan and Shoptimizer
Here, we’ll explain how you can build your multivendor store with Dokan using the Shoptimizer theme. For this tutorial, we’ll assume you already have WooCommerce and the Shoptimizer theme installed and activated on your WordPress site.
Step #1: Set Up Dokan on Your WordPress Site
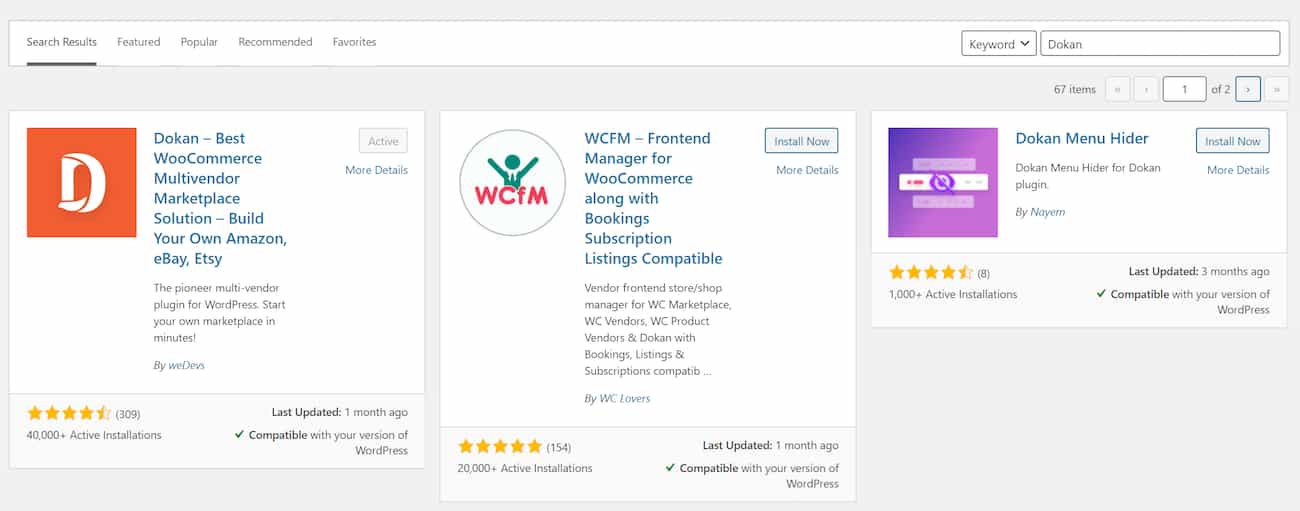
The first step is to install and activate the Dokan plugin. Head over to Plugins > Add New from the WordPress admin panel and search for Dokan.
Install and activate the Dokan plugin to your WordPress site. Once that’s done, you can start configuring the plugin’s settings. We recommend running the setup wizard which should only take a few minutes.
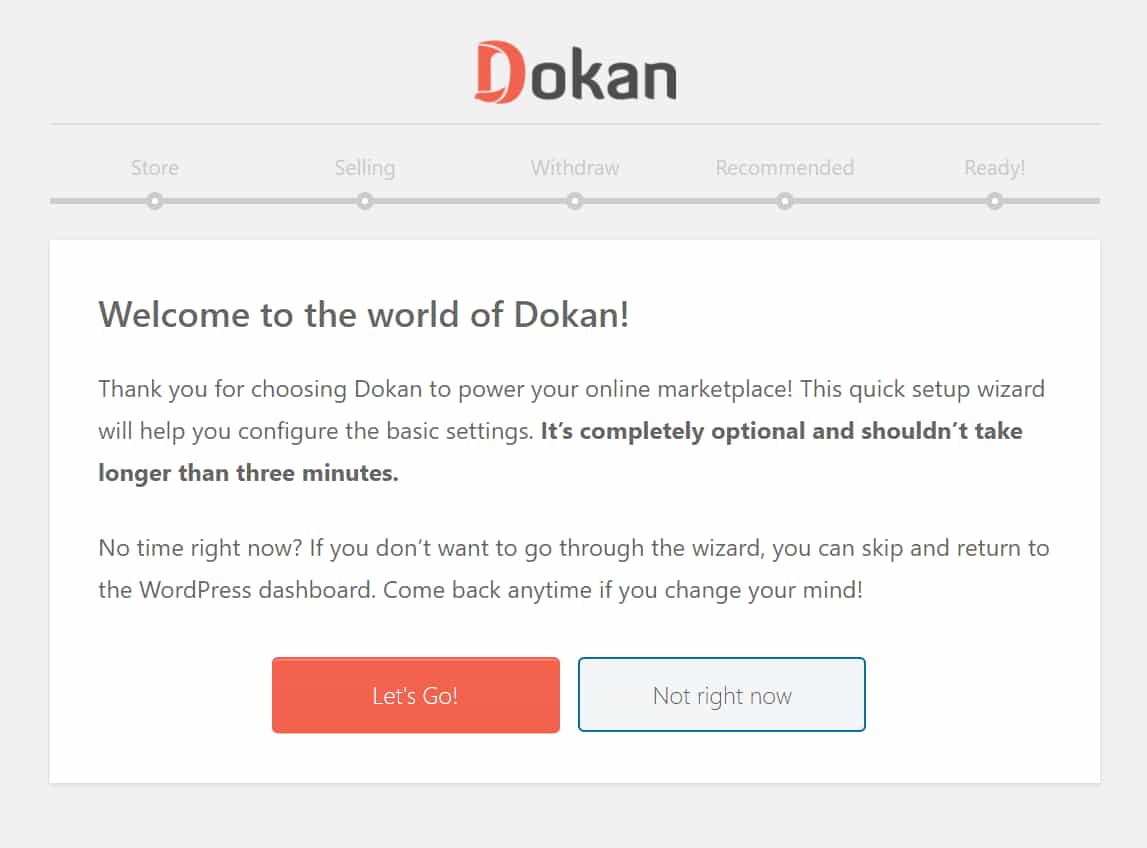
The setup wizard walks you through settings for setting up the store, selling options, payment options, shipping, and withdrawal options.
Store
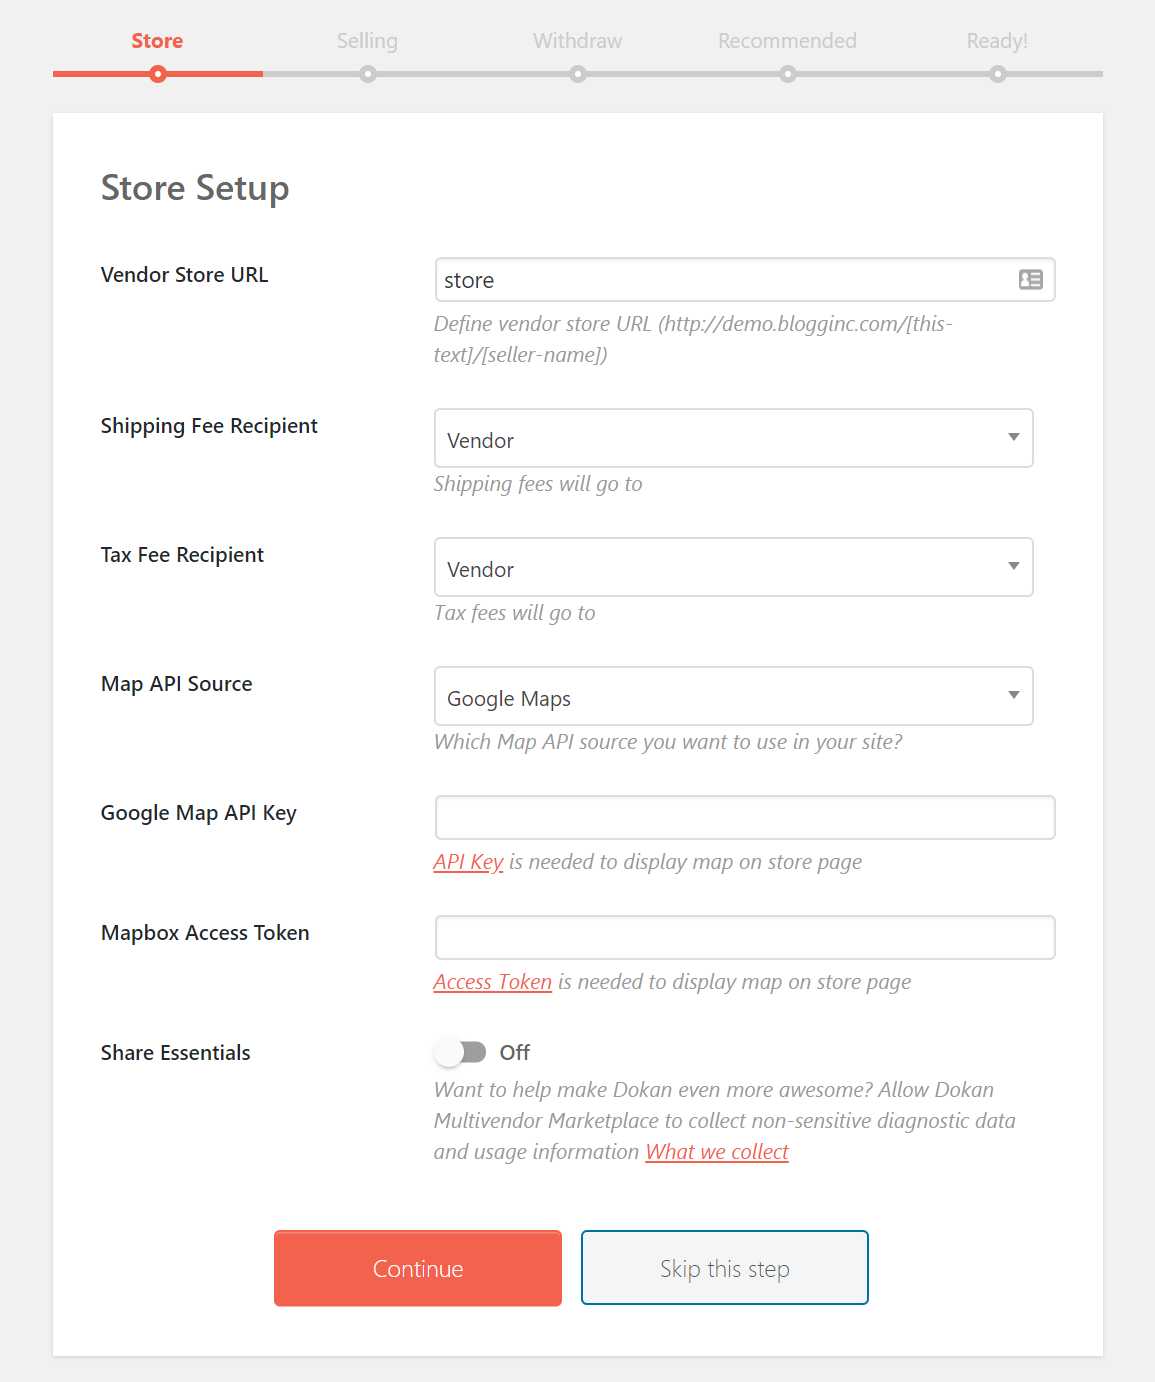
The Store Setup screen lets you configure the general settings for your multivendor store. From here, you can set the vendor store URL and decide who shipping fees and tax fees should go to. In addition to this, you can set up maps to be displayed on the front-end.
Selling
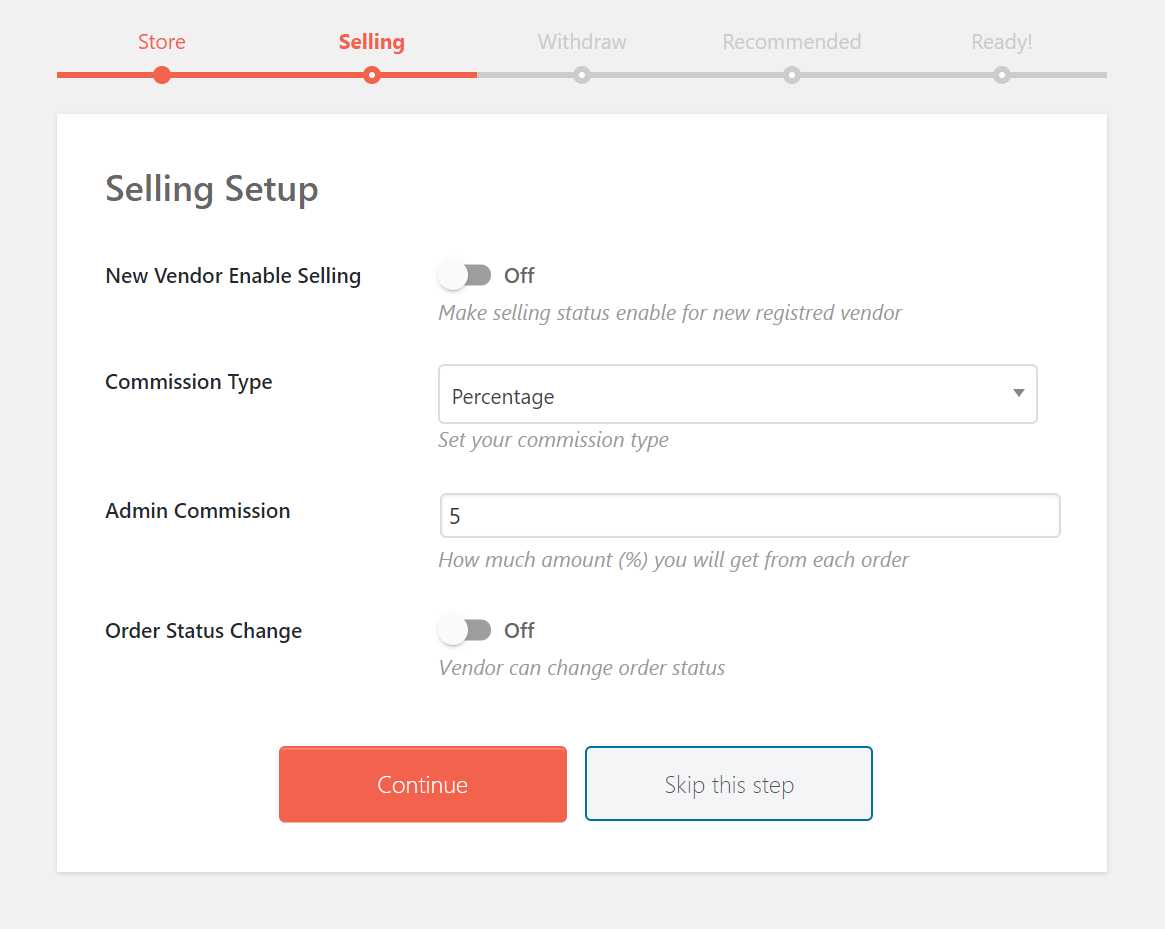
You can configure selling options from the Selling Setup screen. For example, you can choose to allow newly registered vendors to start selling right off the bat, set your preferred commission type (flat or percentage-based), and the commission amount.
Withdraw
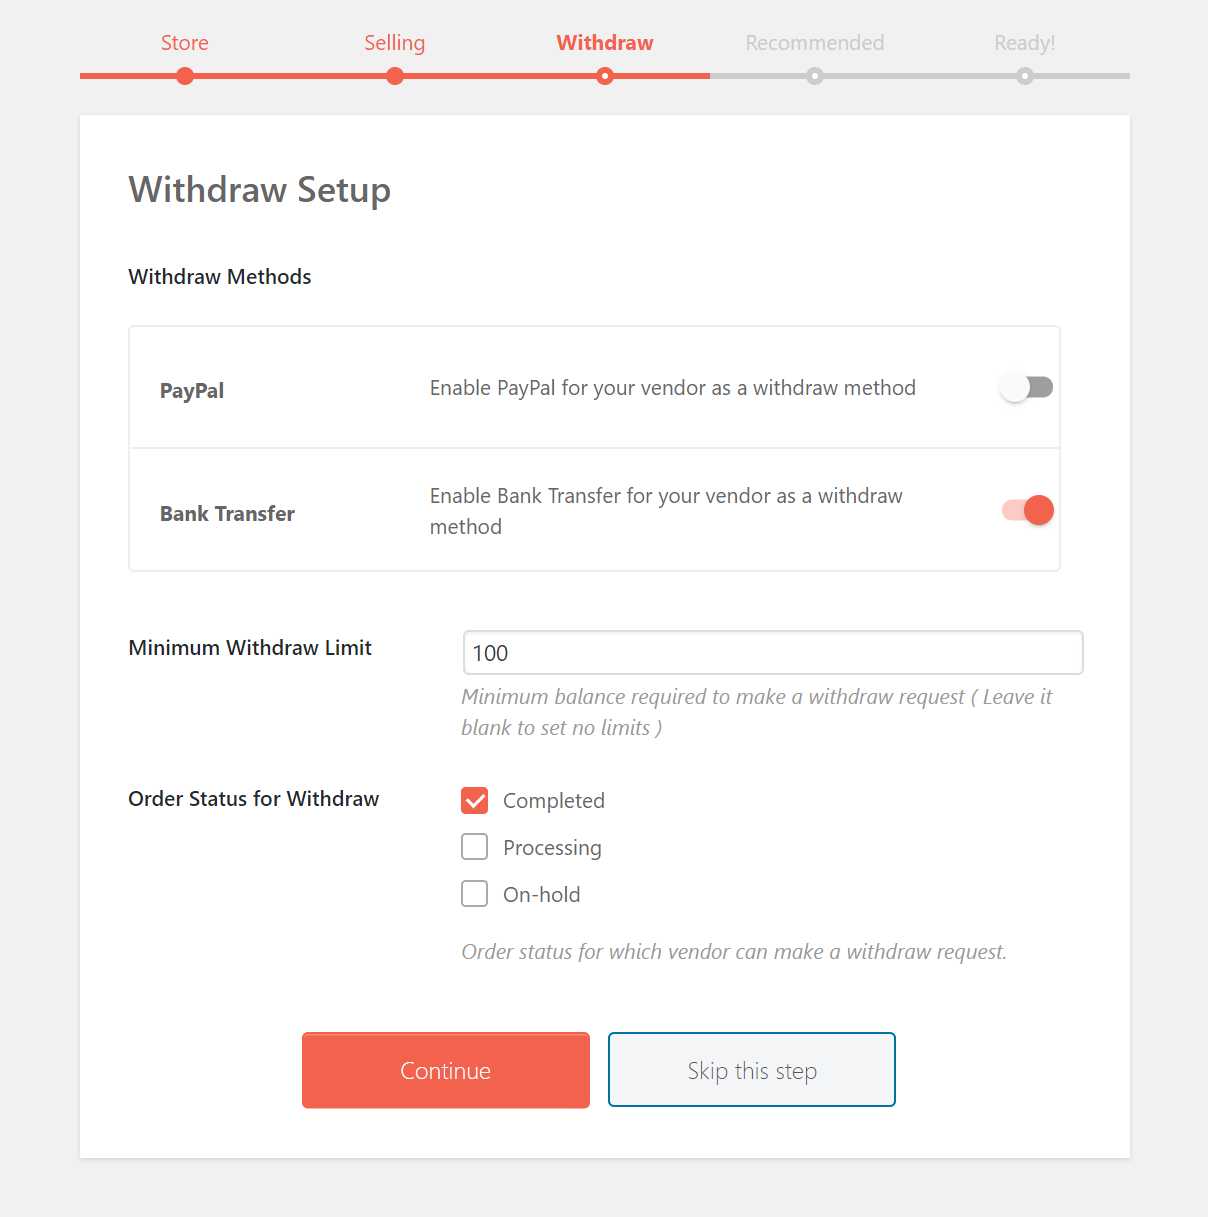
The Withdraw Setup lets you choose payment withdrawal methods (e.g. PayPal or bank transfer), the minimum withdrawal limit, and order status. The options available to you will be based on your WooCommerce settings.

The Dokan plugin also recommends that you install the WooCommerce Conversion Tracking plugin to track conversions. This is optional.
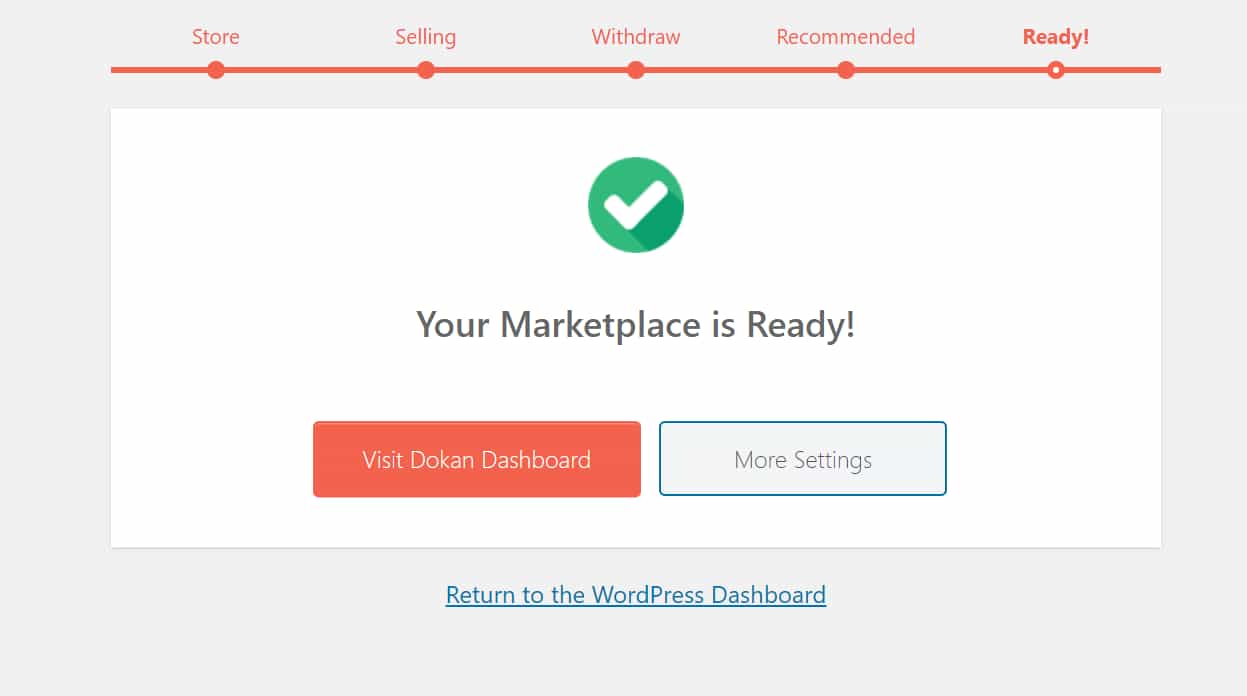
That’s it! Click the Visit Dokan Dashboard button to proceed.
Step #2: Set Up Vendor Registration
Once you’ve completed the setup wizard, you can start setting up vendor registration. For this, you need to first ensure that you’ve configured the correct settings.
To do this, head over to Settings > General and tick the checkbox next to the Anyone can register option.
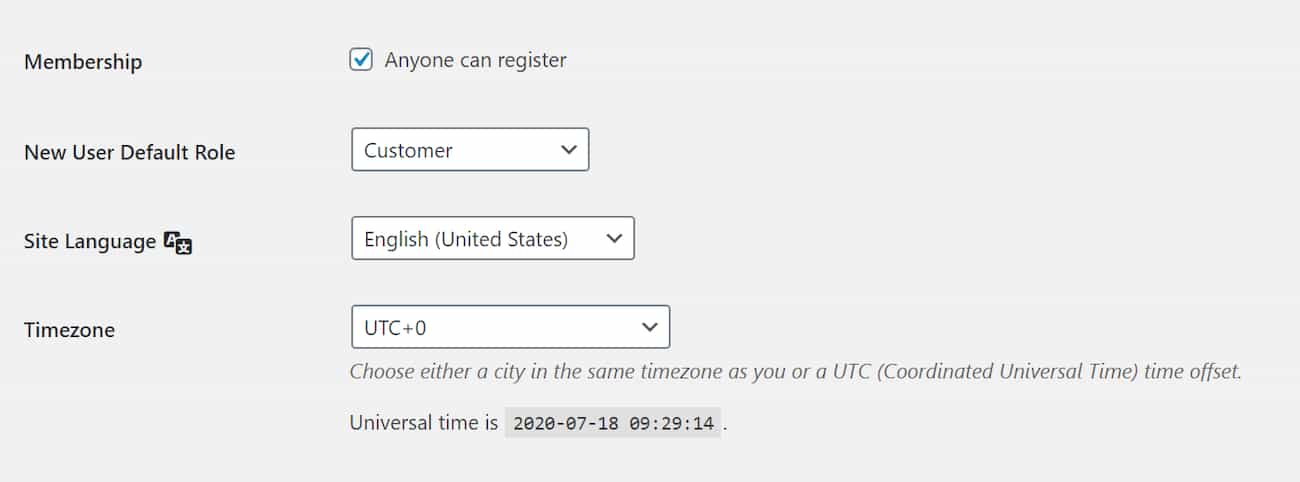
Click the Save Changes button to continue.
Next, you’ll want to make sure vendors can add products to their stores once they’ve registered. Head over to Dokan > Settings from the WordPress admin panel and click on the Selling Options tab.
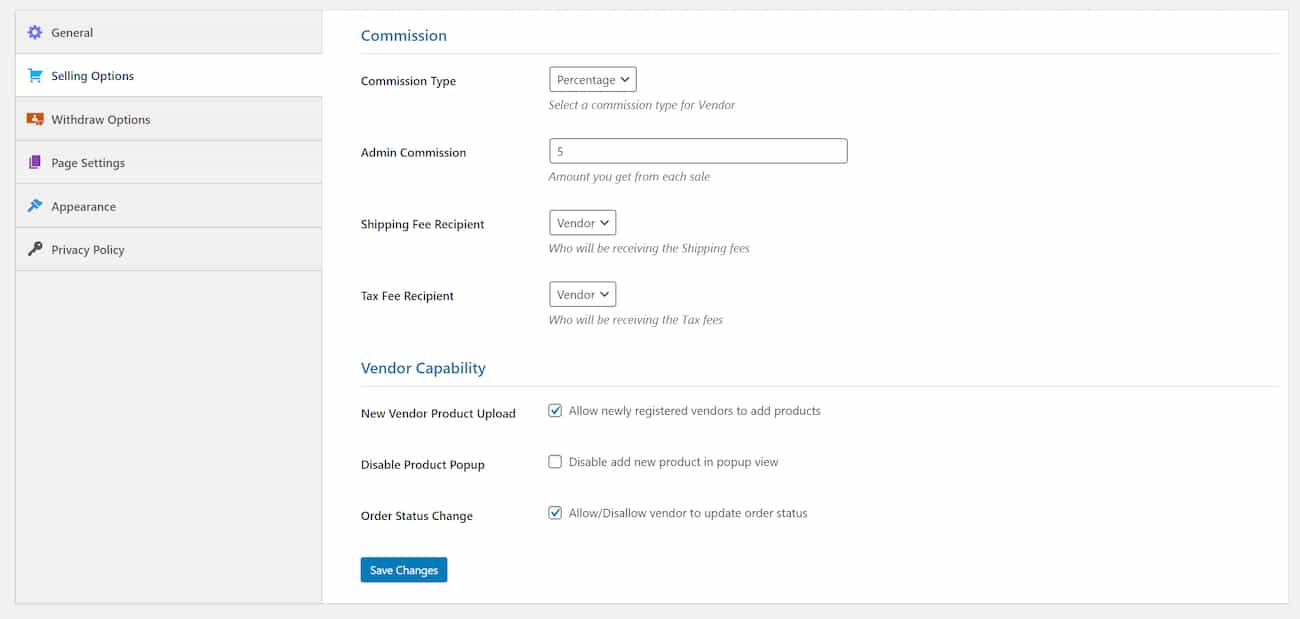
Under the Vendor Capability section, tick the checkbox next to the New Vendor Product Upload option. You should also allow vendors to update their order status by ticking the checkbox next to the Order Status Change option.
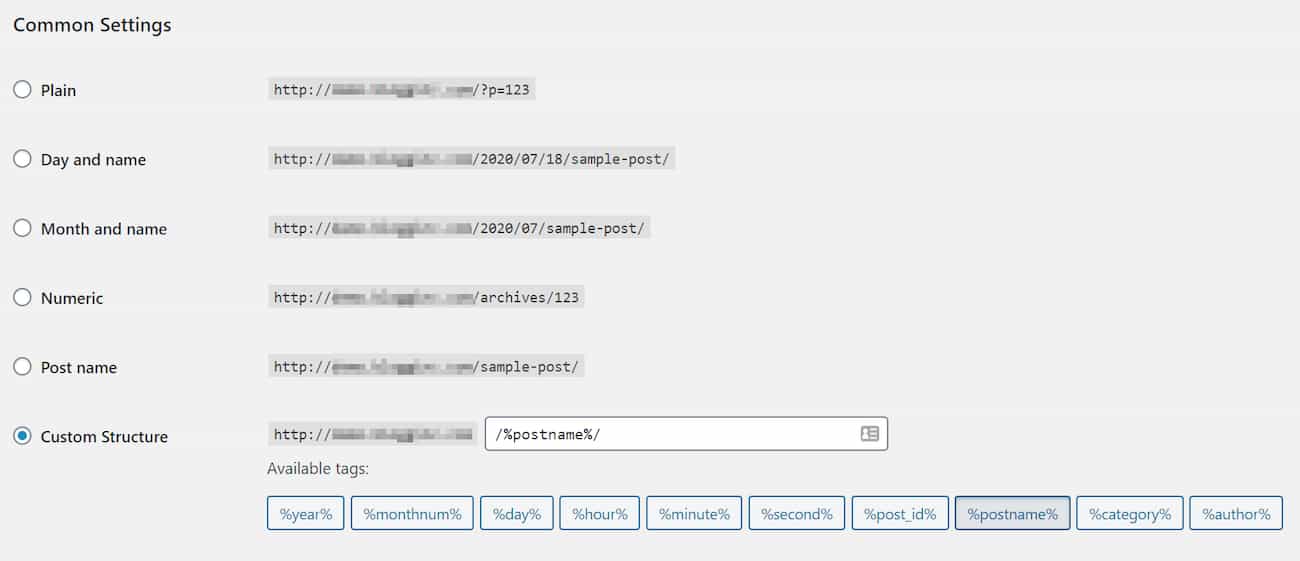
Finally, make sure that the correct permalinks are set up for vendors and the products they’ll add to their store. Go to Settings > Permalinks from the WordPress admin panel and make sure that the URL structure ends with a trailing slash i.e. /%postname%/. This will ensure that the vendor dashboard works properly.
Register as a Vendor
Now, to make sure everything is working as intended, we recommend registering as a vendor on the multivendor store and adding a new product to your store.
To do this, simply visit the registration page from your store’s front-end and fill out the registration form as a vendor.
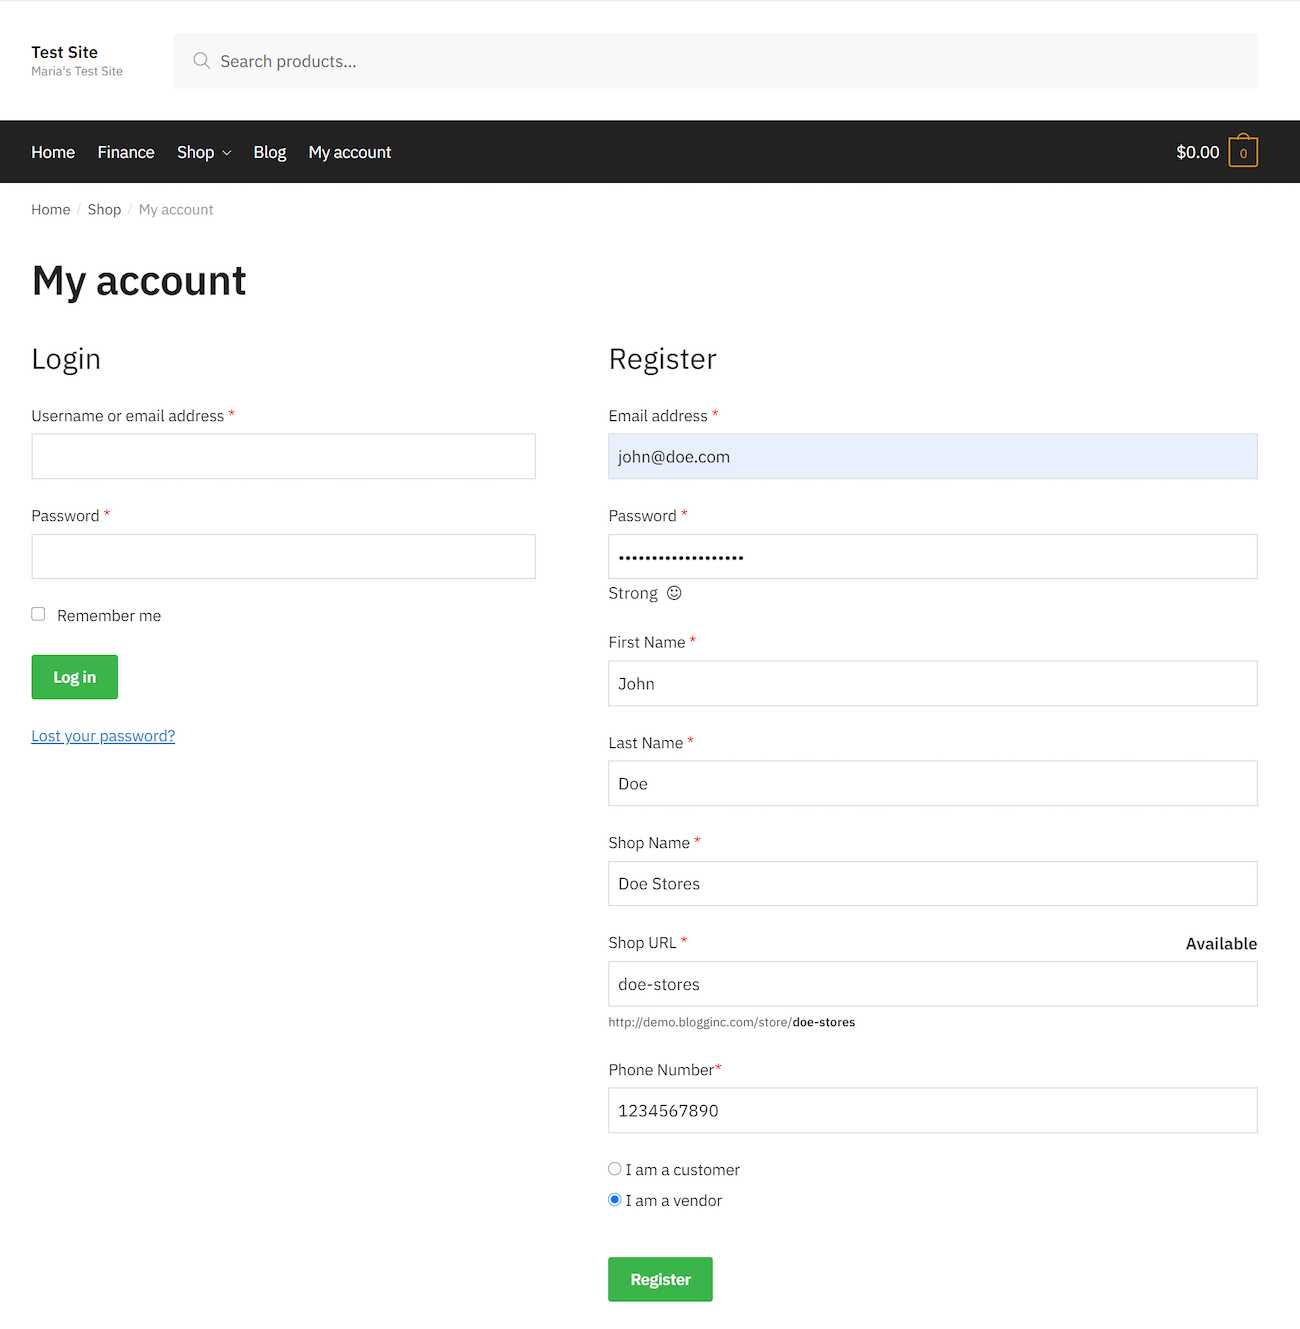
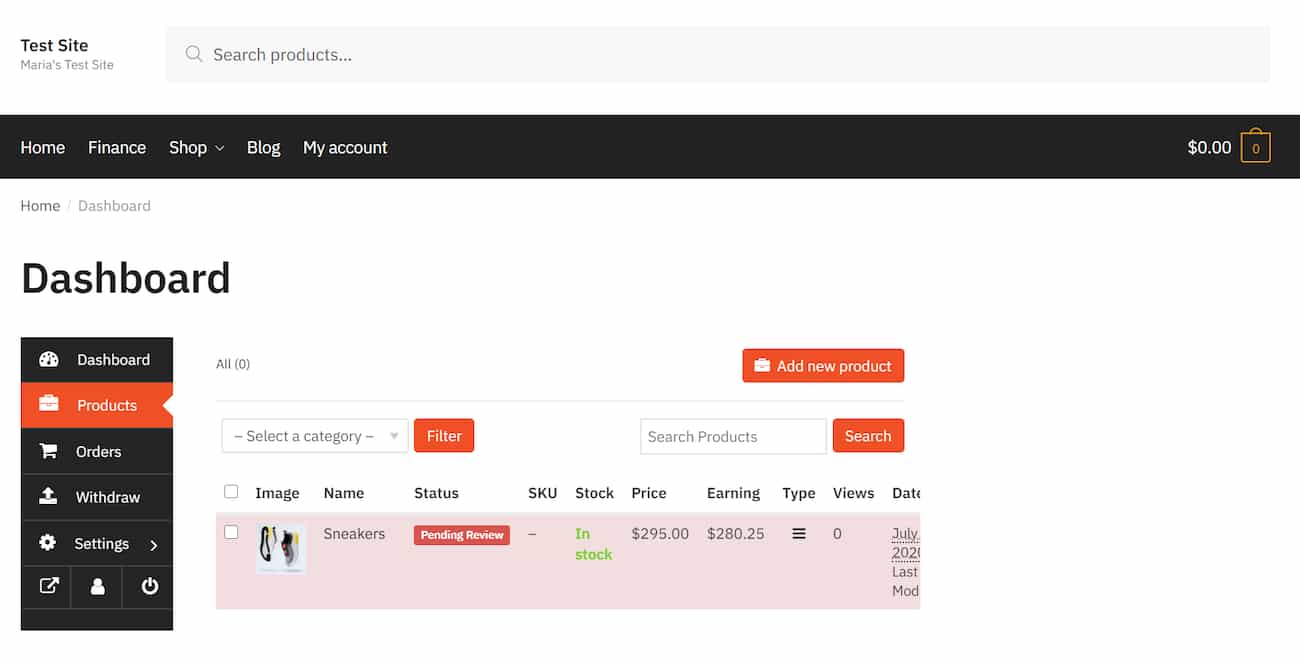
You’ll automatically be redirected to your store’s front-end dashboard. It should look something like this:

To add a new product to your store, go to the Products tab from the vendor dashboard, and click the Add new product button.

Enter the product details (like product image, product name, price, category, tags, and description) and click the Create & add new button to continue.

The products list in your store should have the new product added to it along with the Pending Review status. This is because the multivendor store requires admins to approve a product before it’s published on the front-end for customers to browse and purchase. Admins can choose to allow vendors to publish products directly i.e. without admin approval.
To do this, you’ll have to go to All Users from the WordPress admin panel, edit the vendor, scroll down to the Payment Options section, and tick the checkbox next to the Publishing option.
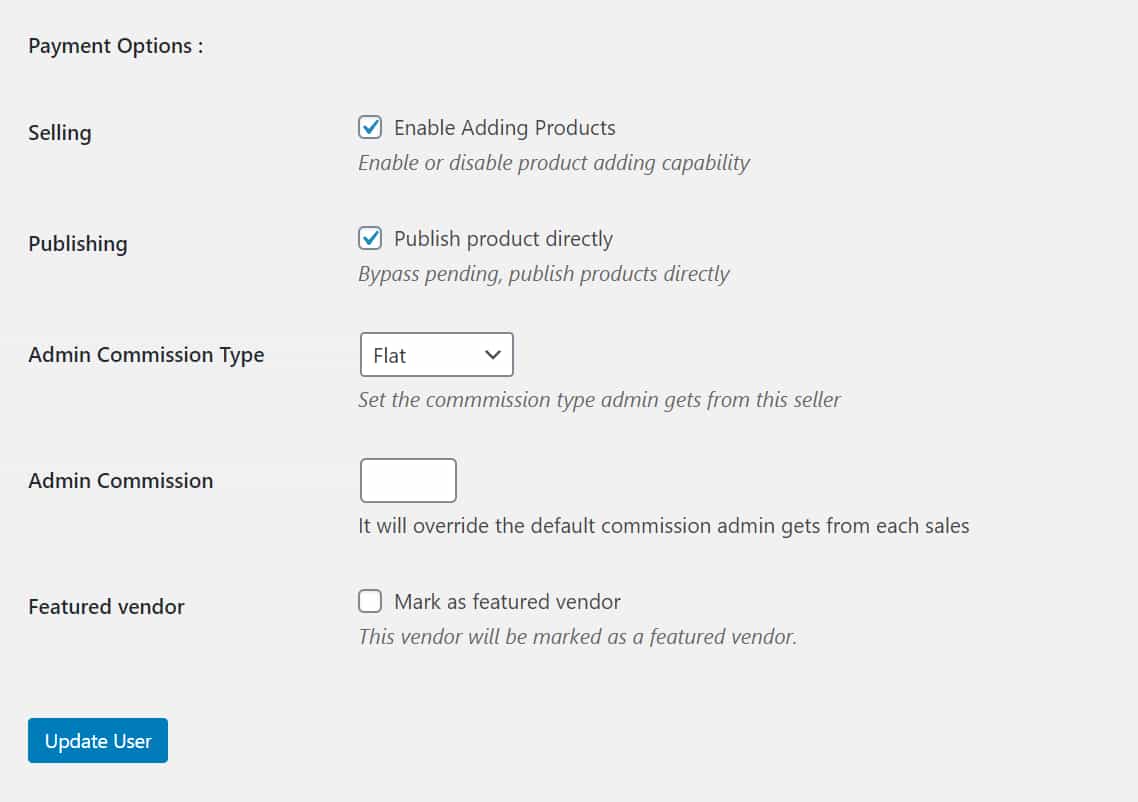
Click the Update User button to save changes and continue.
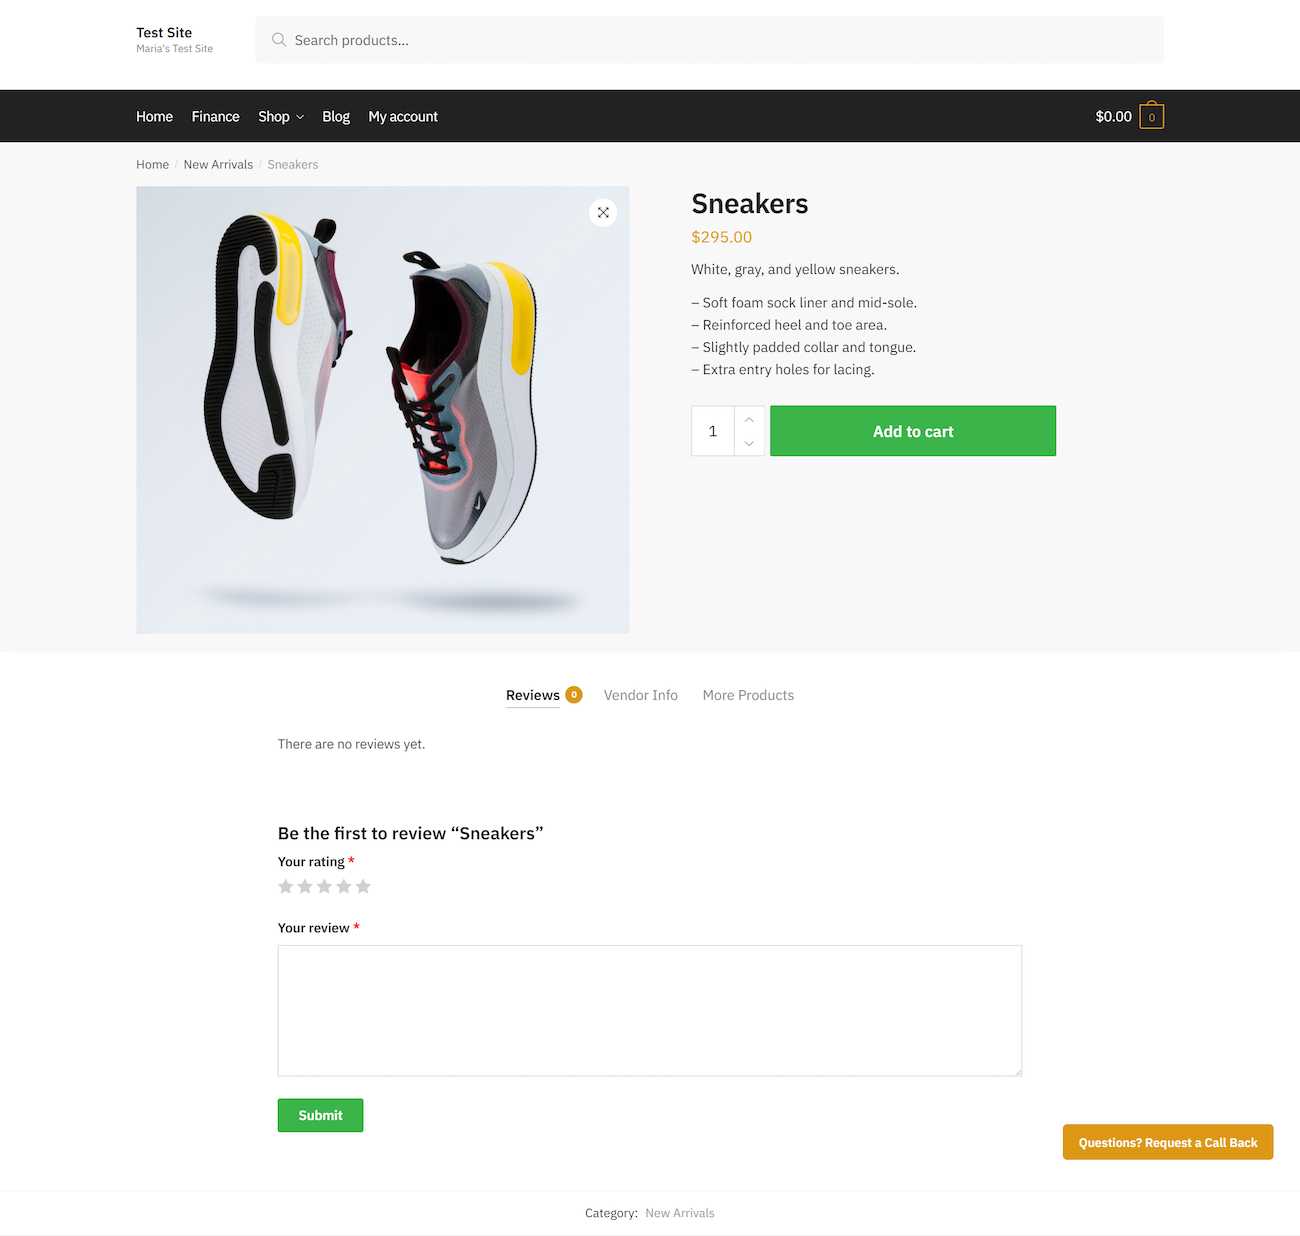
The product page will look something like this once the product is approved by the admin:
Step #3: Customize the Dokan Sidebar
With the Shoptimizer theme, you have the option to customize your multivendor store’s sidebar. This helps you deliver a better shopping experience to customers and can potentially help you boost conversions and sales.
There are a number of different ways to customize the Dokan sidebar. For example, you can:
- Showcase your best selling products
- Display top rated products
- Show store opening and closing times
- Show a product category menu and contact form
To do this, simply head over to Appearance > Widgets from the WordPress admin panel and drag and drop the Dokan widgets into the Dokan Store Sidebar area.
Once you’re done, the vendor’s page on your multivendor store might look something like this:

Build a Multivendor Store Today
A WordPress multivendor store is a great way to earn through commissions. With the right tools, you can set everything up, let merchants register and add products, and start earning via commissions.
The Dokan multivendor plugin and Shoptimizer WooCommerce theme make it easy for store owners to build and set up multivendor stores in a few simple steps. All you have to do is install the Dokan multivendor plugin, configure its settings, and set up vendor registration.
Ready to build a conversion-optimized multivendor store? Get Shoptimizer today!


 Checkout flows compared – WooCommerce vs Shopify
 WooCommerce Examples – 38+ Top Designs to learn from (2021 update)
 4 Great Customer Service Ideas
 The Best WooCommerce Hosting Plans – Part Two