If you’re selling products with varying features and attributes, displaying product filters is essential. They help customers drill down to find what they’re looking for quicker, which is particularly important on catalogs with a lot of items.
Not being able to filter results restricts the ability of users to browse your store the way they need and will affect conversions.
I’m going to explain how to include product filters to WooCommerce. This will first cover WooCommerce’s default filter widgets but I’ll also show you how to add more sophisticated filter controls, including color swatches, and filters which dynamically update the results set without a page refresh.
Plus, I’ll describe how to include horizontal filters on your catalog which negate the need for a separate sidebar. This can be ideal for certain kinds of stores which prefer having products front and center. As we’ve seen from Baymard’s research on the topic, a horizontal filter can outperform the traditional sidebar layout. This is a relatively new UX pattern but it’s a great choice if you only need to display a small number of filters.
Let’s get started!
Default filters in WooCommerce
Baymard’s research on filtering identified five key filters which customers look for when buying from eCommerce sites. They are in order of priority:
- Price filter
- User ratings average
- Color
- Size
- Brand
These are obviously dependent on the nature of the items you are selling but are a good base starting point when thinking about filters. Four out of this five are part of the core WooCommerce widgets. (Brands are not a core WooCommerce taxonomy type but can be added via an official plugin, or an unofficial one).
You can access the default WooCommerce filters within Appearance > Widgets. With WooCommerce active, you’ll see them on the left hand side. They can be dragged into whatever widget area your theme uses to display the sidebar. In our own Shoptimizer WooCommerce theme, it’s simply called ‘Sidebar’.
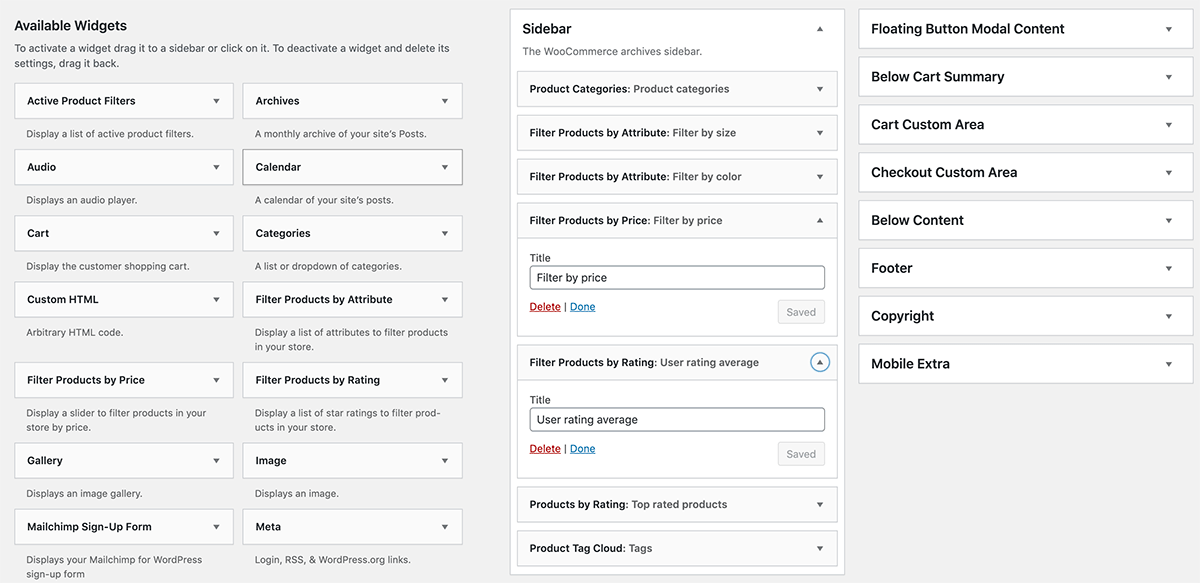
Many of these widgets don’t really have any options. They’re pre-configured to filter based upon your store’s content. These include the first two in our list:
- Filter products by price
- Filter products by rating – i.e. the user rating average, as suggested by Baymard
The widget which can be configured the most is the Filter Products by Attribute one. If you’ve set up attributes in WooCommerce such as sizes, materials, or colors, you’ll be able to select these within the widget configuration area.
Note that the default look of these are fairly simple. It’ll just display the text label, with no fancy swatches or anything like that. And on the front-end, selecting one will fresh the page.
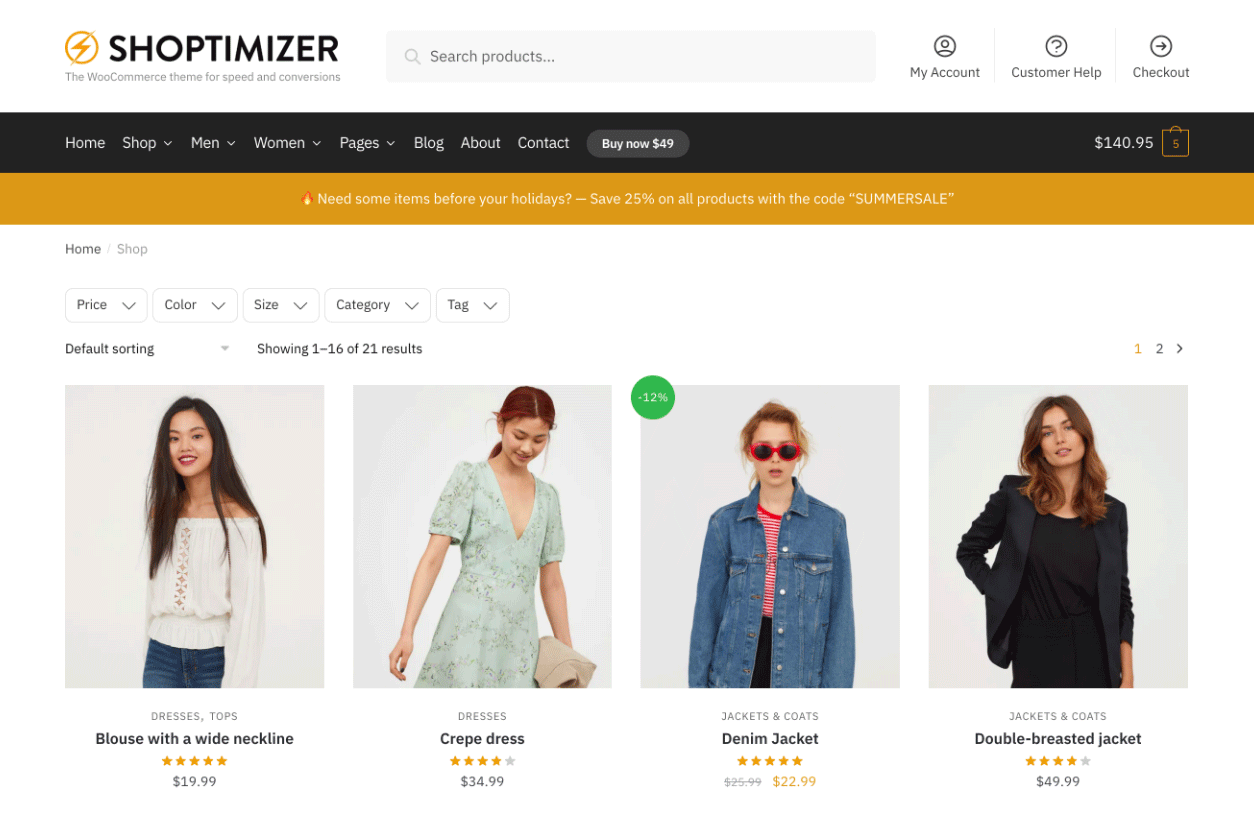
You can see how the final result looks in Shoptimizer in the screenshot below or the live version on our theme demo site.
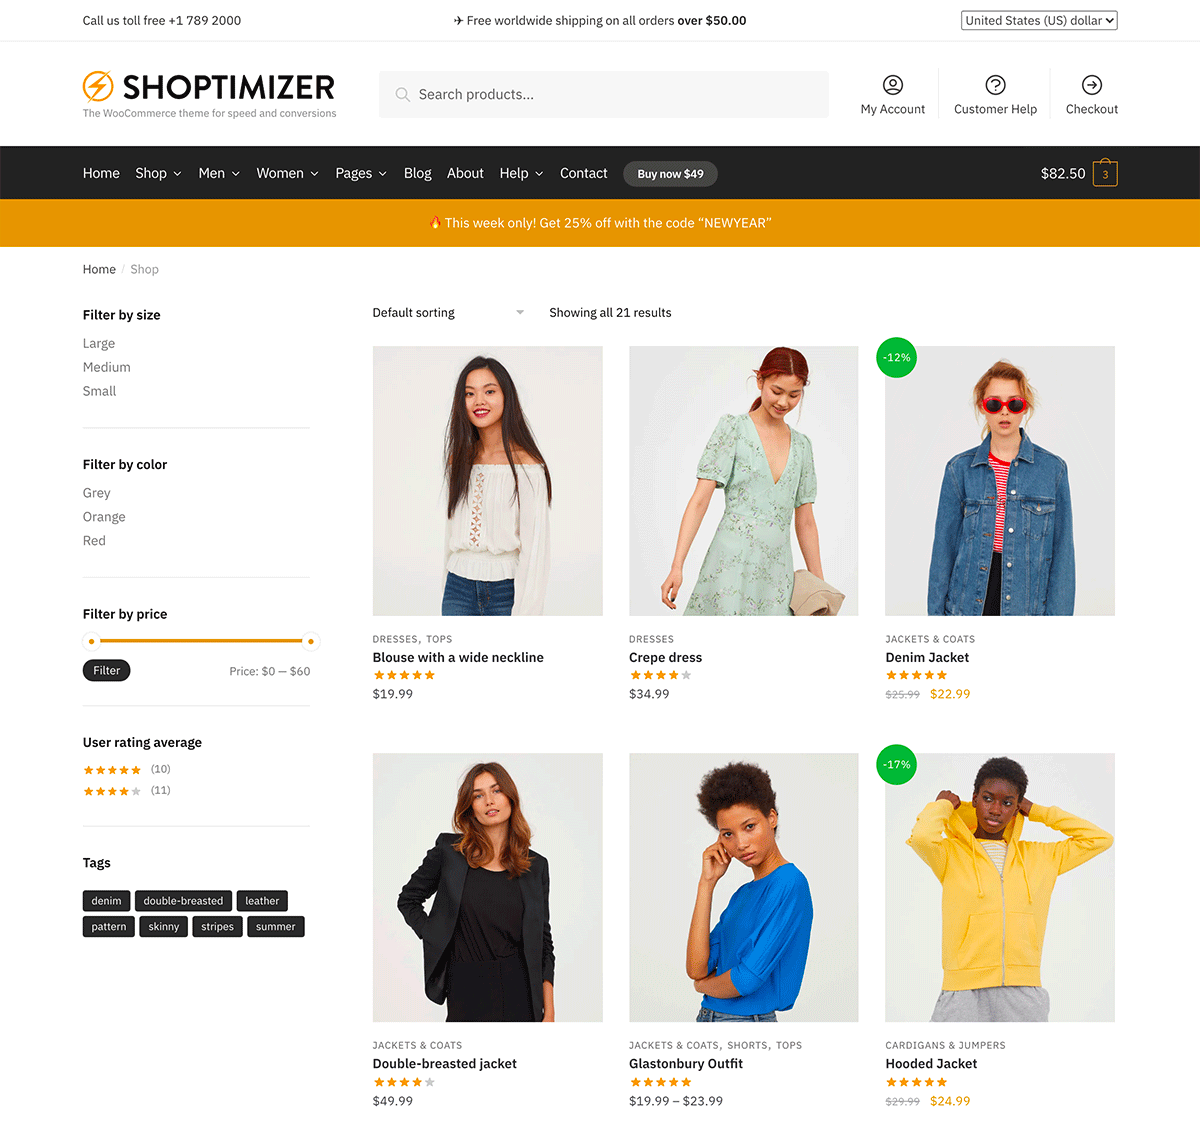
So far, so good. And for many stores, this will do the job perfectly. You don’t need to rely on any plugins, your filters are coming from core WooCommerce.
In the next example, let’s use a dedicated product filters plugin and see what the result is.
Themify – WooCommerce Products Filter

I came across this WooCommerce filters plugin suggestion in one of the WooCommerce Facebook groups I occasionally dip into. Apart from some initial setup issues, it’s pretty good. Unusually it offers a proper horizontal layout option in its settings so I’ll be showing you how to set that up also.
You can search for Themify WooCommerce Products Filter in the usual plugins area of WordPress, or via the direct link.
Step 1. Install the plugin and name your filter
Install and activate the plugin to begin.
Once this initial stage is completed you’ll see a new Product Filters area in the dashboard. You can create a new filter name in this section. I’ve called mine “Shoptimizer Filters” but feel free to name it anything you like.
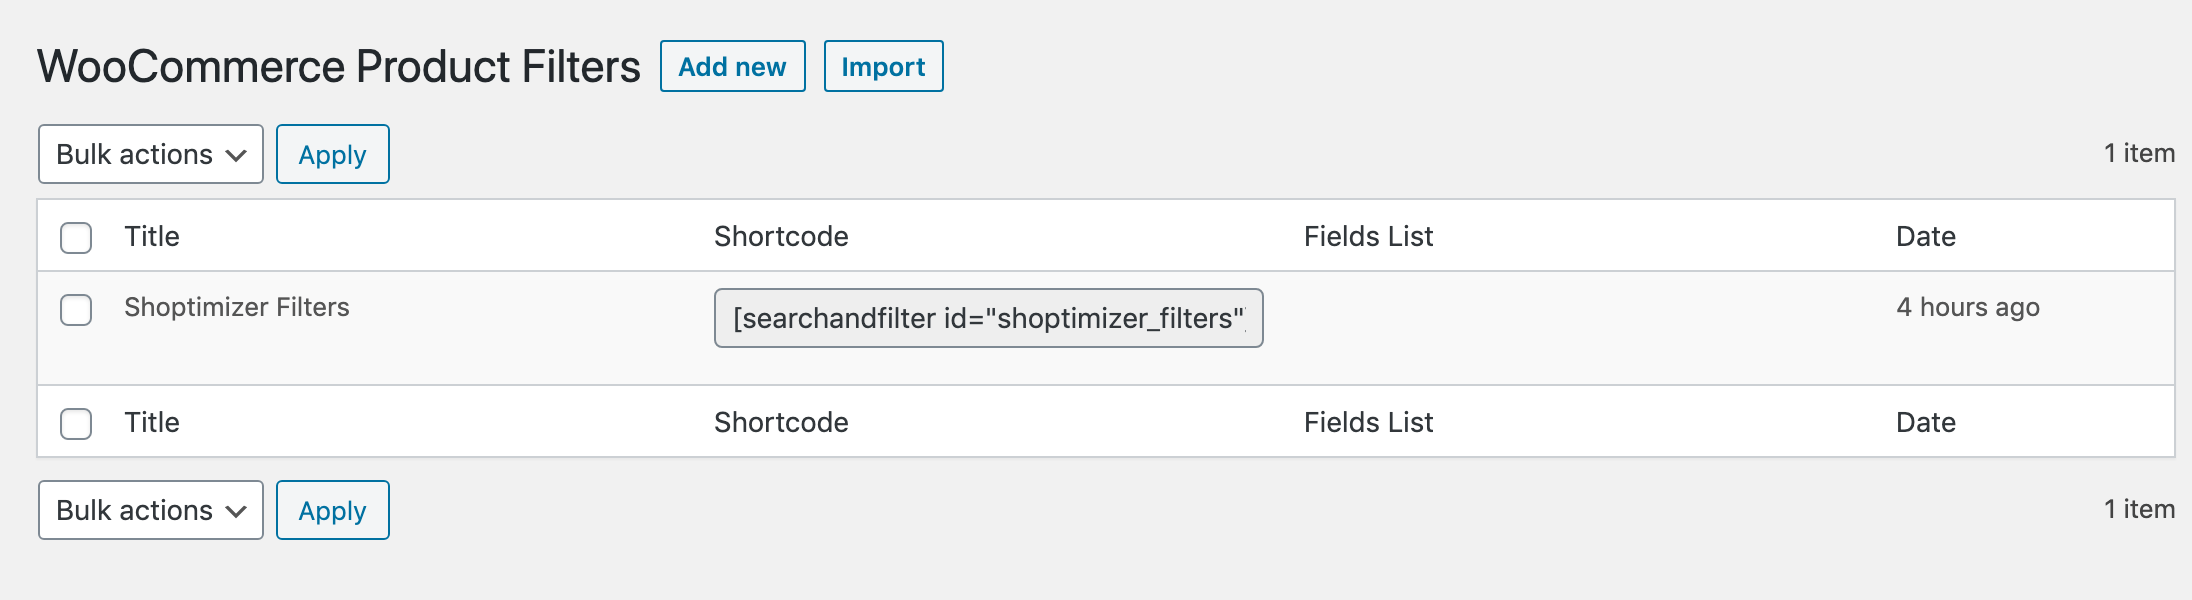
Note that on this dashboard it creates a custom shortcode which we’ll need to reference later in order to display these filters.
Step 2. Configure the layout options
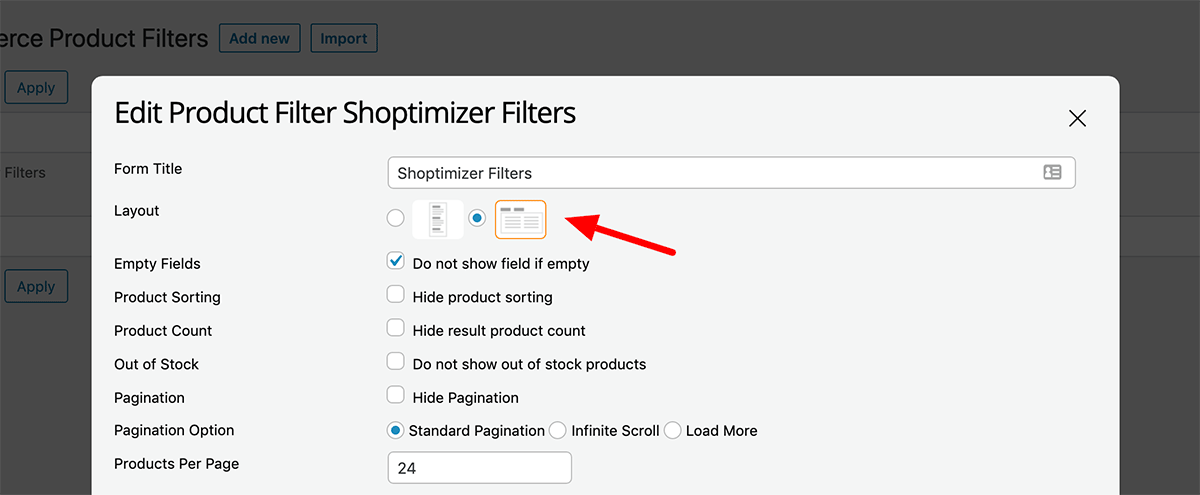
When you edit the filter you’ve just created, you’ll see a modal window with all of the options followed by a section to set up your filters. Let’s look at the options first.
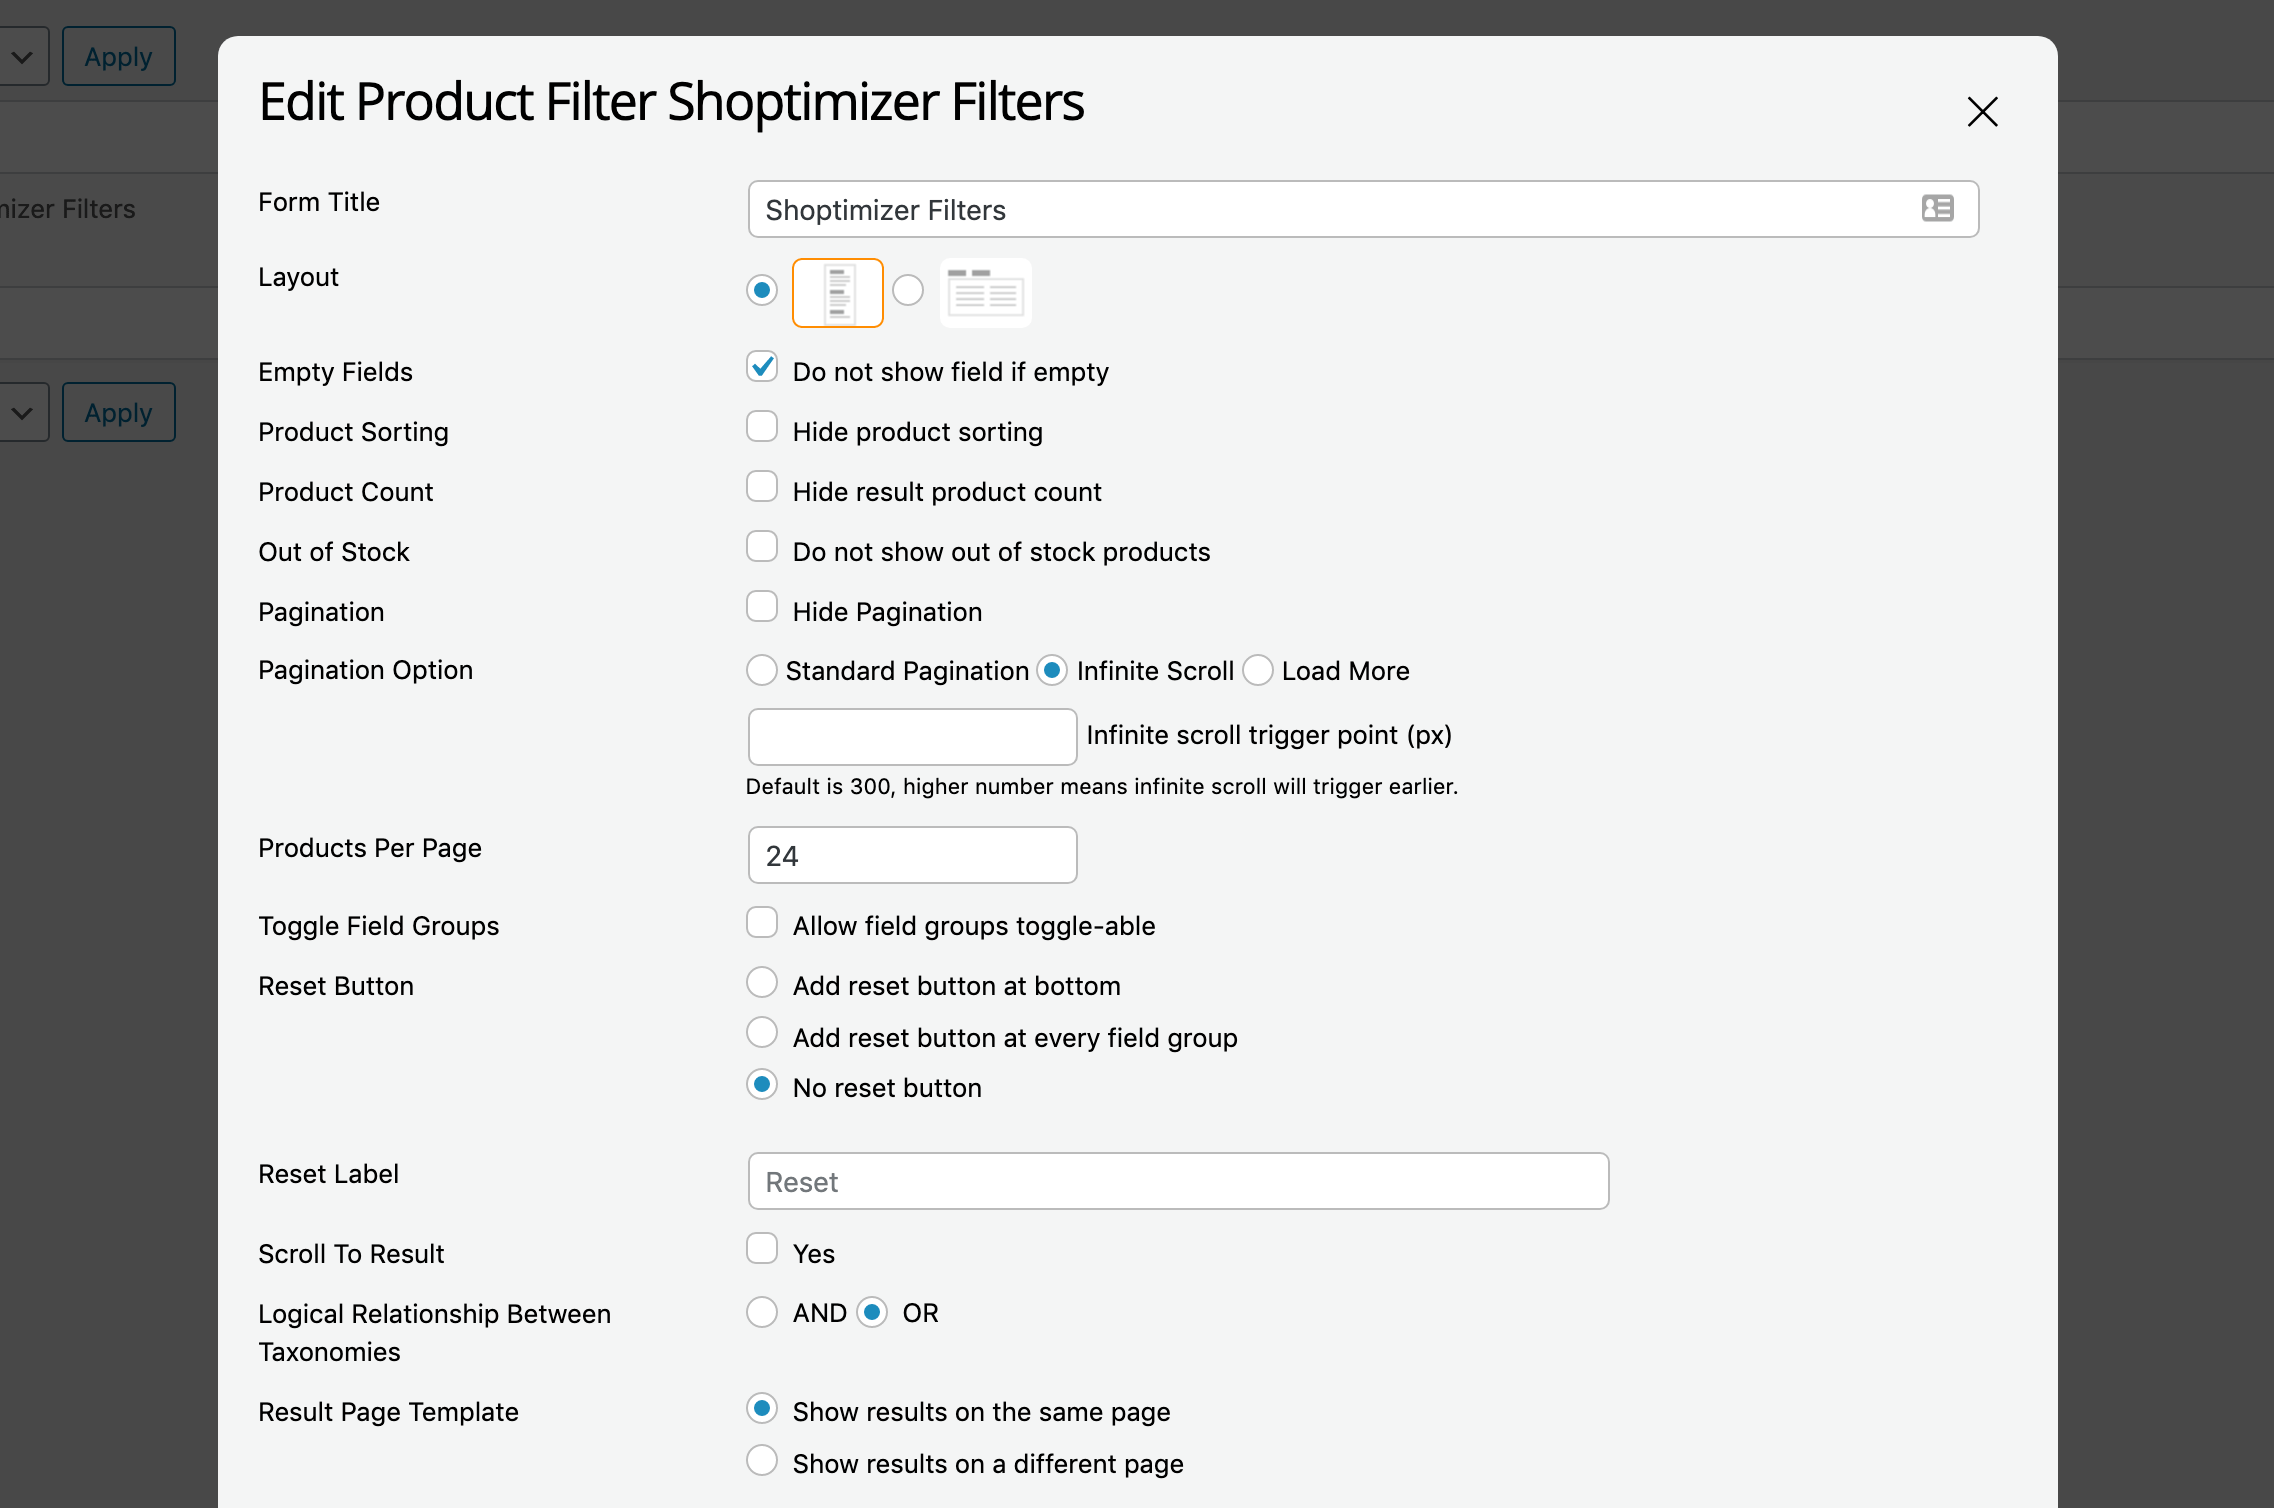
The first setting is whether to have a vertical or horizontal layout.
I’m going to set up a vertical widget area first.
The one setting you need to watch out for is the Products Per Page input field. This cannot be empty!
This should match your configuration in your WooCommerce settings, i.e. Appearance > Customize > WooCommerce > Product Catalog. If you are displaying 3 items per row, and 8 rows per page, then this should be set to 24.
I have ‘Standard Pagination’ selected, but the plugin also supports infinite scroll and displaying a Load More button which is pretty neat.
Step 3: Create your filters
The bit at the bottom of the same modal window is where you create your filters. I thought this was quite intuitive compared to some other implementations I came across.
You can drag and drop the filters you want to display from the button blocks into the rows below. As well as any custom attributes you have created (such as color and size), it includes filters for:
- Product SKUs (pretty handy for certain catalogs)
- In Stock Items
- Product Categories
- Sale items
- Price (with more configurability than the default Woo one)
- Product Tags
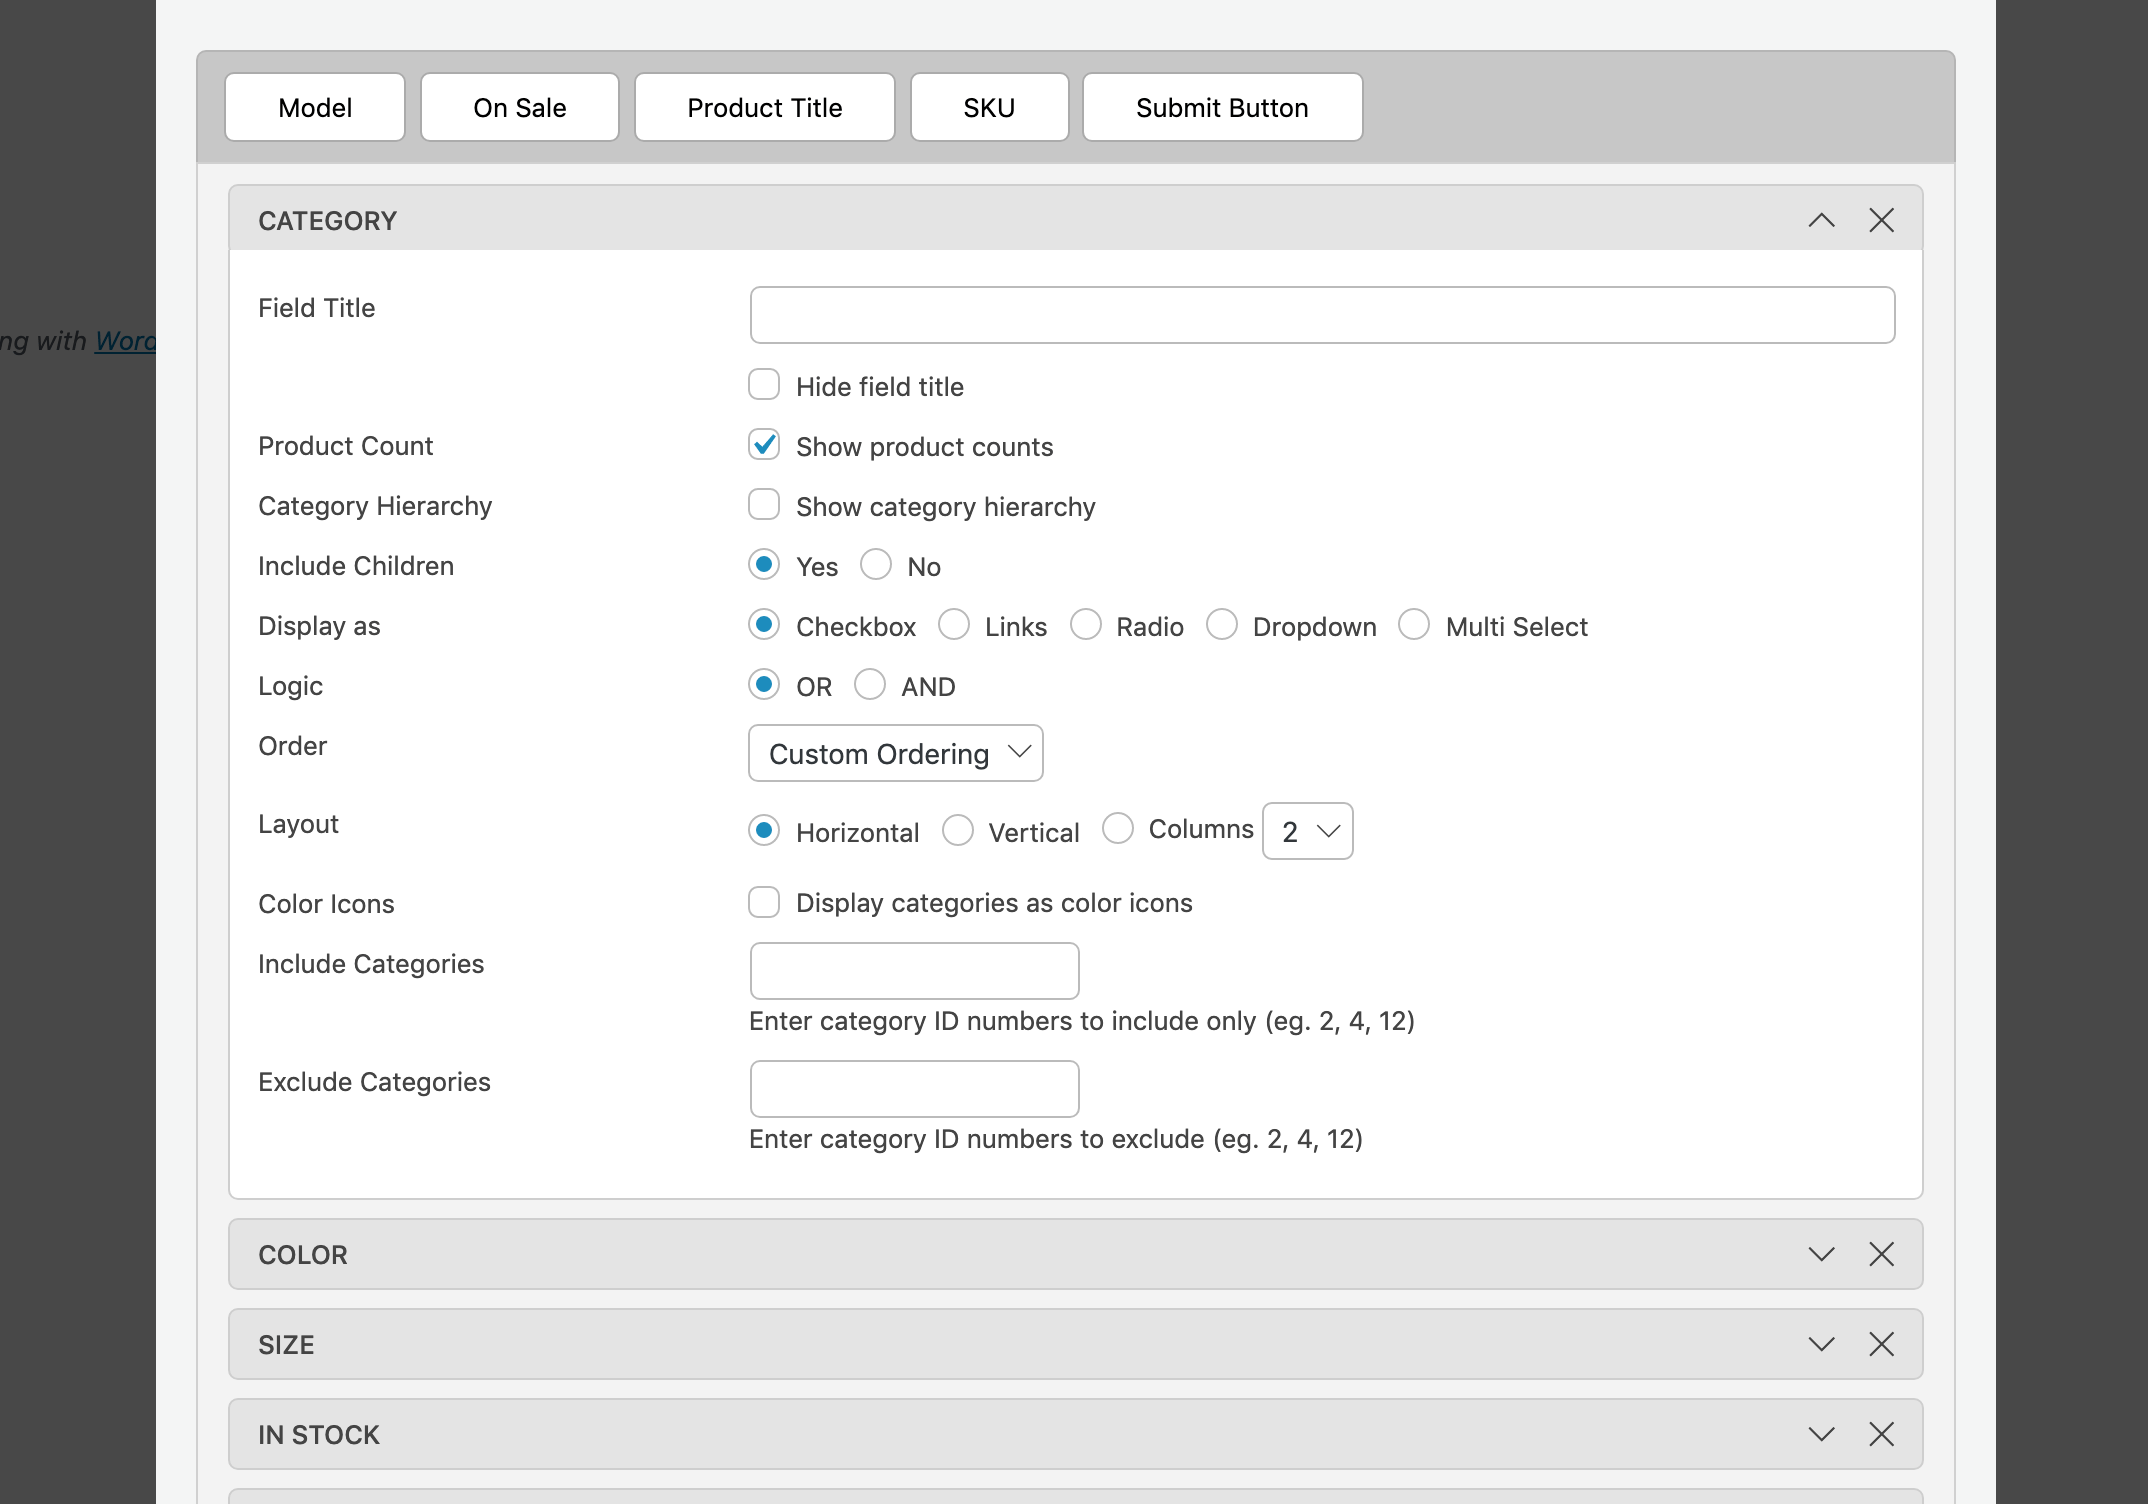
Once you’ve dragged a filter down, you can expand it to review a host of additional configuration options. These include displaying a particular filter as:
- Checkboxes
- Links
- Radio buttons
- A dropdown
- Or, a multi select
So you have lots of choices in how you want to display your filters. You can also exclude certain categories by ID which is a useful feature for store owners.
If you’ve chosen a color attribute you’ll also get a separate series of options where you can assign a swatch color to each option. You can even upload a background image which is great if you have say different pattern choices for your products.
Step 4: Display the filters in the sidebar
Firstly, we’ll display our new filters in our sidebar, much like we did before with the default WooCommerce widgets.
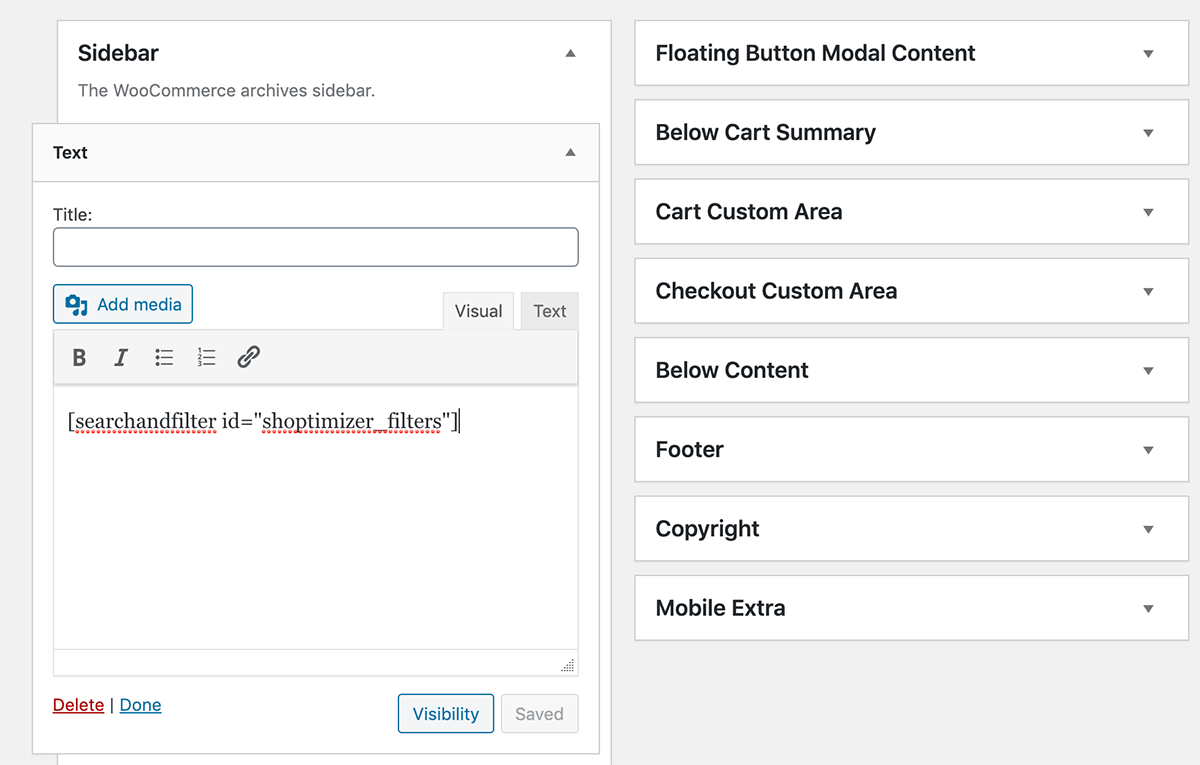
We can use the shortcode created in Step 1 and drop it into a simple text widget within our Sidebar widget area. After that, if we refresh our Shop page we should see our new sidebar filters.
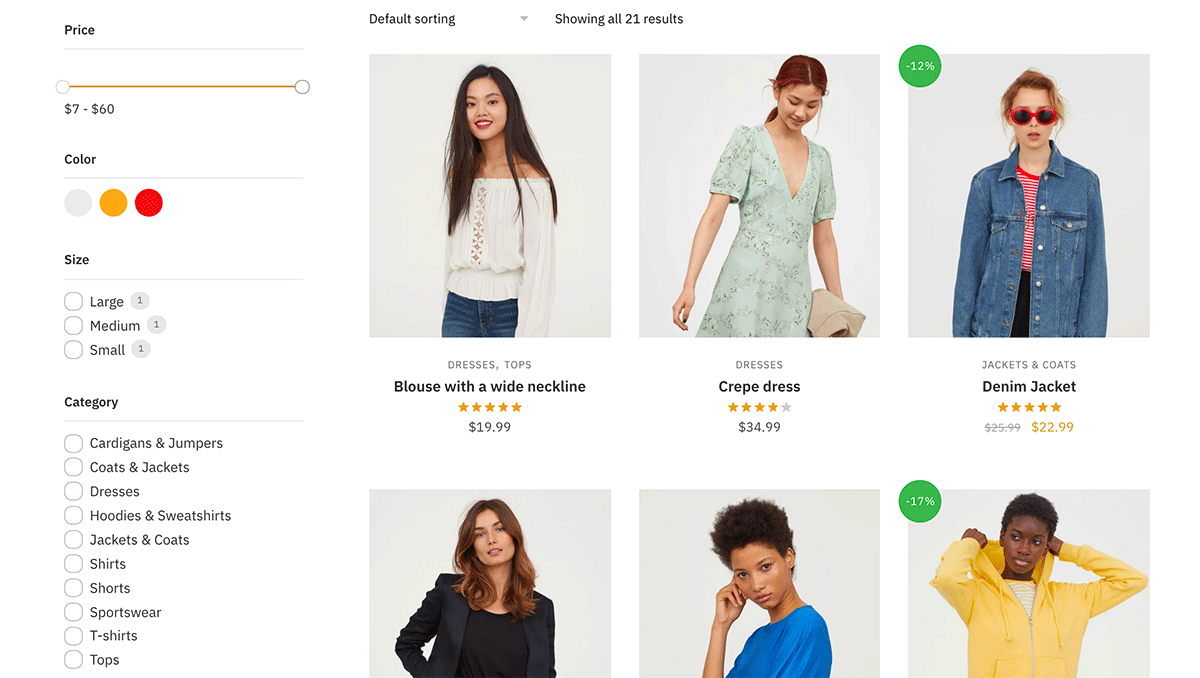
The nice thing about this, compared to the WooCommerce default widget filters is the results set automatically updates when a filter has been selected.
One small tweak I made was change the price filter bar color from purple to orange which better matched my store. I used a line of CSS to achieve this.
|
1 2 3 |
.wpf_slider.ui-slider .ui-widget-header { background-color: #dc9814; } |
Step 5: Display horizontal filters
Let’s change the style of these filters to horizontal ones. So first go back into the plugin options and change the layout to horizontal.
Next, you can delete the sidebar widget previously added as we don’t need that anymore.
We’re actually going to also remove the sidebar completely as we’d like the filters to stretch the full width of the content container. In Shoptimizer you can do this within: Appearance > Customize > Layout > Sidebars – and set ‘WooCommerce Sidebar’ to ‘None’.
If you’re using a different theme you’d need to contact the theme author for instructions on how to remove the Shop sidebar.
To make things look a bit more balanced, we can also increase the number of items appearing per row to 4. You can do this within: Appearance > Customize > WooCommerce > Product Catalog.
So after doing that we’ll have a shop page with no sidebar, but also with no filters, despite choosing the horizontal layout.

Why is this? Well we haven’t added the shortcode yet. And unlike the sidebar widget area, there isn’t an obvious place to put this. So we’ll have to use one of the standard WooCommerce hooks and add it that way.
Within a child theme’s functions.php file, or via the Code Snippets plugin, we’ll need to include the following simple bit of code.
|
1 2 3 4 5 |
add_action( 'woocommerce_before_shop_loop', 'shoptimizer_custom_filters', 5 ); function shoptimizer_custom_filters() { echo do_shortcode('[searchandfilter id="shoptimizer_filters"]'); } |
We’ve created a custom function called shoptimizer_custom_filters (you can change the naming if you like) and are hooking it into the woocommerce_before_shop_loop location which will display it before the products.
You’ll notice I’m using the same shortcode as I used earlier for the widget.
Now, when we refresh the Shop page we should see the horizontal filters appear.
Success! We have our horizontal widgets, and without a sidebar, our products are much more prominent. I hope this guide to the Themify WooCommerce Products Filter plugin was a useful one.
Before we go let’s take a quick look at some alternative filter plugin options.
Other WooCommerce Filter Plugins
FacetWP
Professional version only. Starts at $99.
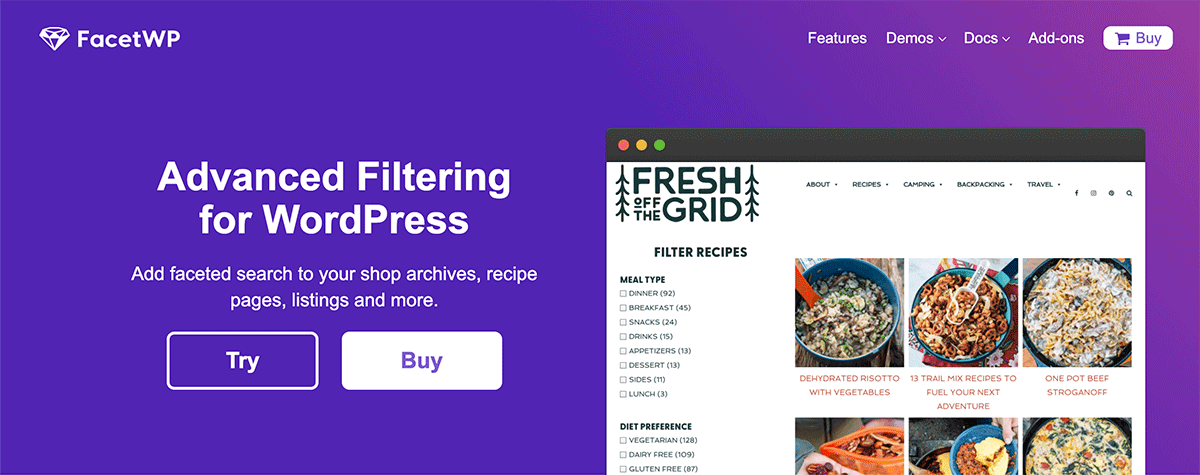 I’d class this as the “gold standard” of filtering solutions for WooCommerce. FacetWP is a premium only plugin, with no free version available. It’s probably the most advanced filtering system for WordPress and WooCommerce, and it’s lightning quick to load results as it uses a separate index table for speed.
It’s a very developer friendly tool and includes a huge array of display options and in-built hooks to allow you to perform customizations. There is also excellent compatibility with plugins such as Advanced Custom Fields which is an important consideration for many stores.
Their showcase page highlights the breath and scope of the sites using the plugin. There are plenty of eCommerce examples in the list so you can test how the filters operate in the demo stores before taking the plunge and purchasing.
I’ve personally utilized it for a side project of mine, Just Buy Irish and was very pleased with how easy it is to implement and the feature set it provides. If your store is dealing in serious revenue, and you want the best filtering solution out there, FacetWP would be the first option I’d consider.
WOOF – Products Filter for WooCommerce
Free version. Professional version $29.
I think this “WOOF Product Filter” plugin is currently the most popular filtering solution with over 100,000 installs. It’s got an excellent average rating and is full of functionality, covering almost every kind of display filter you’d need. It includes Products searching by AJAX, Dynamic products recount, and searching by SKU.
There’s even a step-by-step products filter option which I don’t think I’ve seen in any other plugin. So, if you’re looking for a filters plugin which does everything, this one would be a good choice for a test run.
Advanced Ajax Product Filters
Free version. Professional version $29.

This filter plugin from BeRocket is one of the most popular solutions out there. Like the WOOF plugin it’s also highly rated by users in the .org plugin repository. The free version includes a tonne of functionality including checkboxes, selects, sliders, colors, and images for the filter display options.
I found the plugin interface quite cumbersome to set up in comparison to the Themify Product Filters plugin. But once you follow the plugin documentation and get your head around the UX it works pretty well.
Conclusion
Product filters are a very important feature for eCommerce stores with medium-to-large catalogs. The tutorial in this post covers how to add filters, both to the sidebar, and horizontally above the Shop page.
I also covered some alternative plugin options, such as FacetWP, WOOF – Products Filter for WooCommerce, and Advanced AJAX Product Filters. Out of these, the one I highly recommend (if you have the budget) is FacetWP.
Now, I’d like to hear from you. Do you have a filters plugin for WooCommerce which you would like to recommend? Maybe there’s a great one out there which I missed. Have you used any of the filter plugins mentioned and what are your opinions on them? Either way, let me know in the comments below!


 The Importance of Product Filters in eCommerce
 WooCommerce Variation Swatches
Hello, Simon!
To change the color of the Themify plugin’s price filter bar I used the .css code that you entered through the Additional CSS option on the theme’s customize tab.
When I update the site, the color of the bar remains unchanged.
Should I include the code elsewhere? Could you tell me?
I did the same and the colour of the bar within the filter remained unchanged. Maybe Simon or John at CommerceGurus can help with this css.
Cheers!
Hi Simon,
The filters works really well, but we made some CSS ourself to make some adjustments on the standard filter options within Wordpress.
The one think I missed at your theme, is something like a number on the filter button, where people / users could see that there is one active filter.
Now you see the button ”filter”, but you have to press it, to see that there are active filters.
Just an suggestion.
We highly recommend Shoptimizer! Thank you once again for such a great opportunity to offer fast webiste!
We are looking for a plugin which could offer a few size ranges to choose. For example:
We offer rubber orings: https://powerrubber.com/kat/oringi-gumowe/ (please check only Polish language version).
Here, the each product has: Inside Diameter (ID), Cross Section (CS), Material, Colour, Hardness.
For the first and the second: ID and CS, I would like to offer range to choose for our Customers.
Example: The Customer was looking for orings:
ID from 10mm to 12mm
CS from 2mm to 3mm
In our offer we have
ID: 10; 10,5; 10,62; 11; 11,5; 12;
CS: 2; 2,5; 2,62; 3
Please let us know if you have the solution. We can also pay for this service.
Kind regards,
Robert
Hi, really great tutorials and tips. Going through some tips i landed on this page and i am wondering, which of the above plugins are actually fast and lightweight? Shoptimizer is great and really fast so i want to keep it this way.
Thank you
The Themify – WooCommerce Products Filter exhibits a notable issue, which is acknowledged by the developer and is operating as intended. Specifically, the filter system displays attributes even when they have no associated products. To elucidate further, if one is navigating within a category, such as “men’s shoes,” and there are no items available in the color yellow, the filter will still include the “yellow” color option. This behavior can have a detrimental impact on user experience, potentially leading to a decline in conversion rates, which is a concern for an efficient filtering plugin.
Hi, Really great theme!
Are the product filters pages SEO friendly? (Can I configure the Meta Title, Meta Description, friendly url, H1 and filter page contents)
Regards
Hi, it will just reload the shop or category page (whichever catalog page you are on) in WooCommerce via ajax with the appropriate results displayed. So the metadata will just come from the catalog page you filtered from. It’s not a brand new page.