We’ve had a couple of questions about the WooCommerce thank you page or confirmation screen, with people looking to edit the output. By default, its display is rather simple and doesn’t it offer any in-built options to change what is presented.
I think many stores are missing a trick here. There’s a number of features which could be very valuable to display on this screen. From sharing your purchases, signing up to a newsletter to displaying product guides, we’ll go through some ideas and then show you how to add them to your own WooCommerce store. Let’s make it work harder for you and get additional leads, signups and survey results. A strong thank you page can do more than simply display the order details.
What can you display on an improved thank you page?
Let’s look at six content elements you can use to transform your regular WooCommerce thank you page, a crucial stage of the buying process, and make it work harder for you. Bear in mind, you shouldn’t also overload the customer with content at this stage, I’d recommend including no more than two of these features.
1. Ask a buyer to share their new purchase on social media
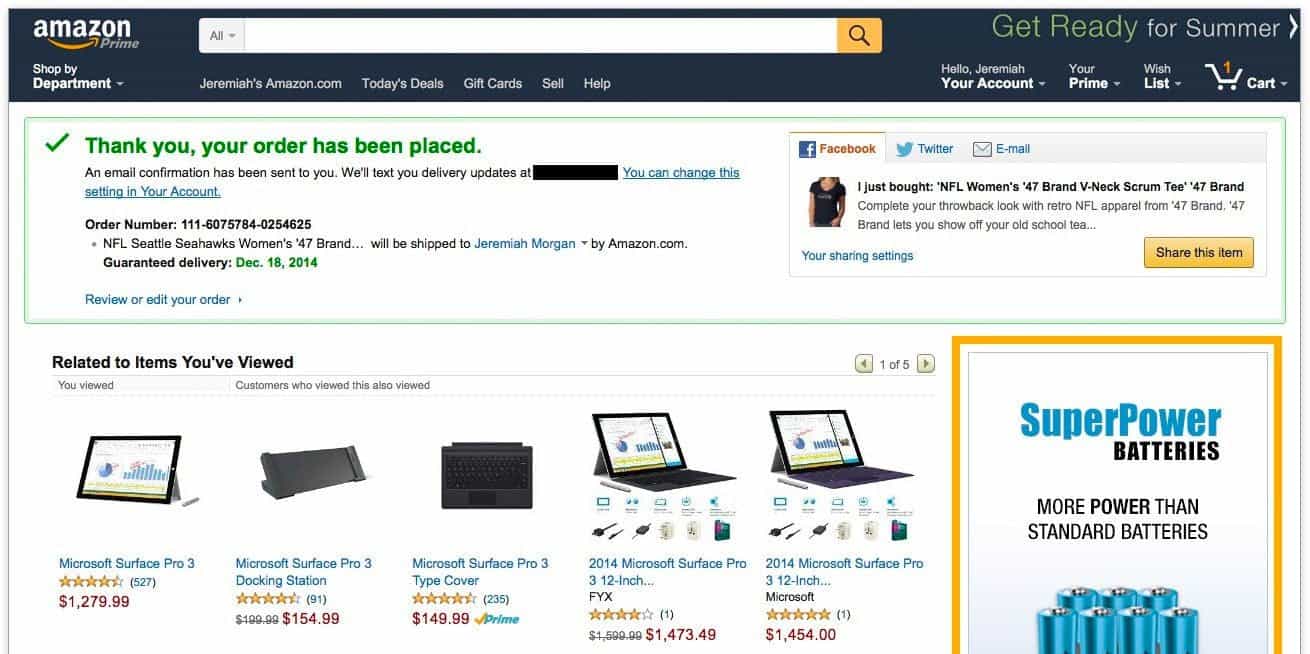
People tend to be excited after just buying a product, there’s a mini adrenaline rush. It’s a good time to test the waters and see if they’ll share the news with friends on social media. This is essentially free traffic, unlike paying for Facebook or Twitter ads – people will be doing the promotion for you straight to your site. I’d be curious about how many people do share their purchases at this point but two of the biggest eCommerce players implement such a feature; Amazon and TicketMaster. You can be sure that they’ve done the research on this and that they deem it a conversion booster.
2. Recommend signing up to a newsletter for future special offers
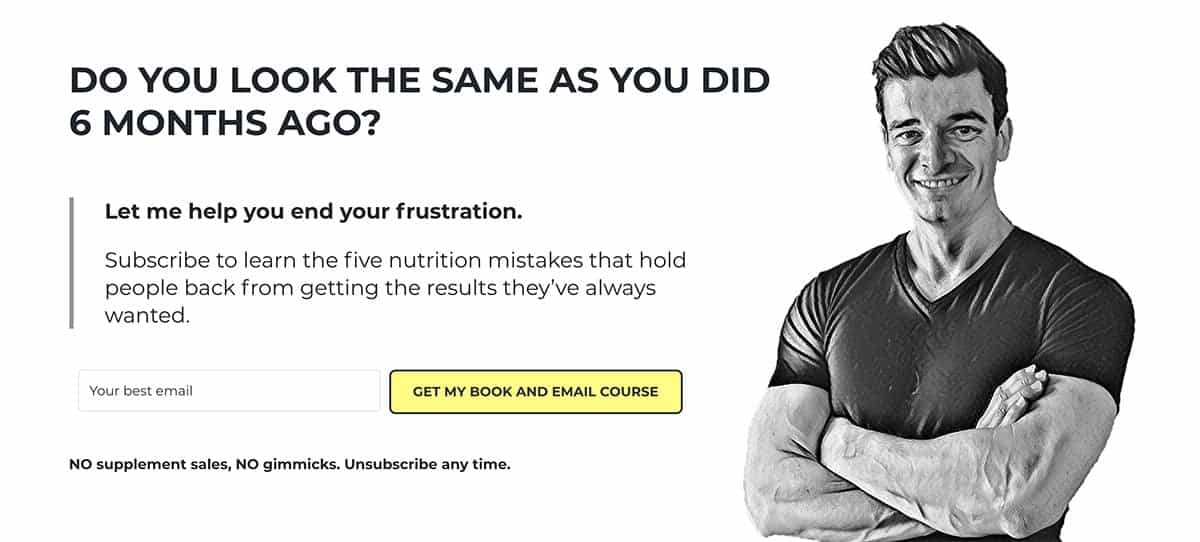
Email is still a fantastic way to reach buyers, and remains far more effective than through social media. Organic reach on Facebook is around 6% compared to an open rate of email in the 20%-30% range. Plus, an email offer remains within the subscriber’s inbox so a buyer can think about it and come back and click at a later time. A dynamic Facebook feed will show a post once and likely not again. The WooCommerce thank you page is a great location to include a newsletter sign up form to entice your new customers to return and buy again.
3. Display a discount code for a future purchase
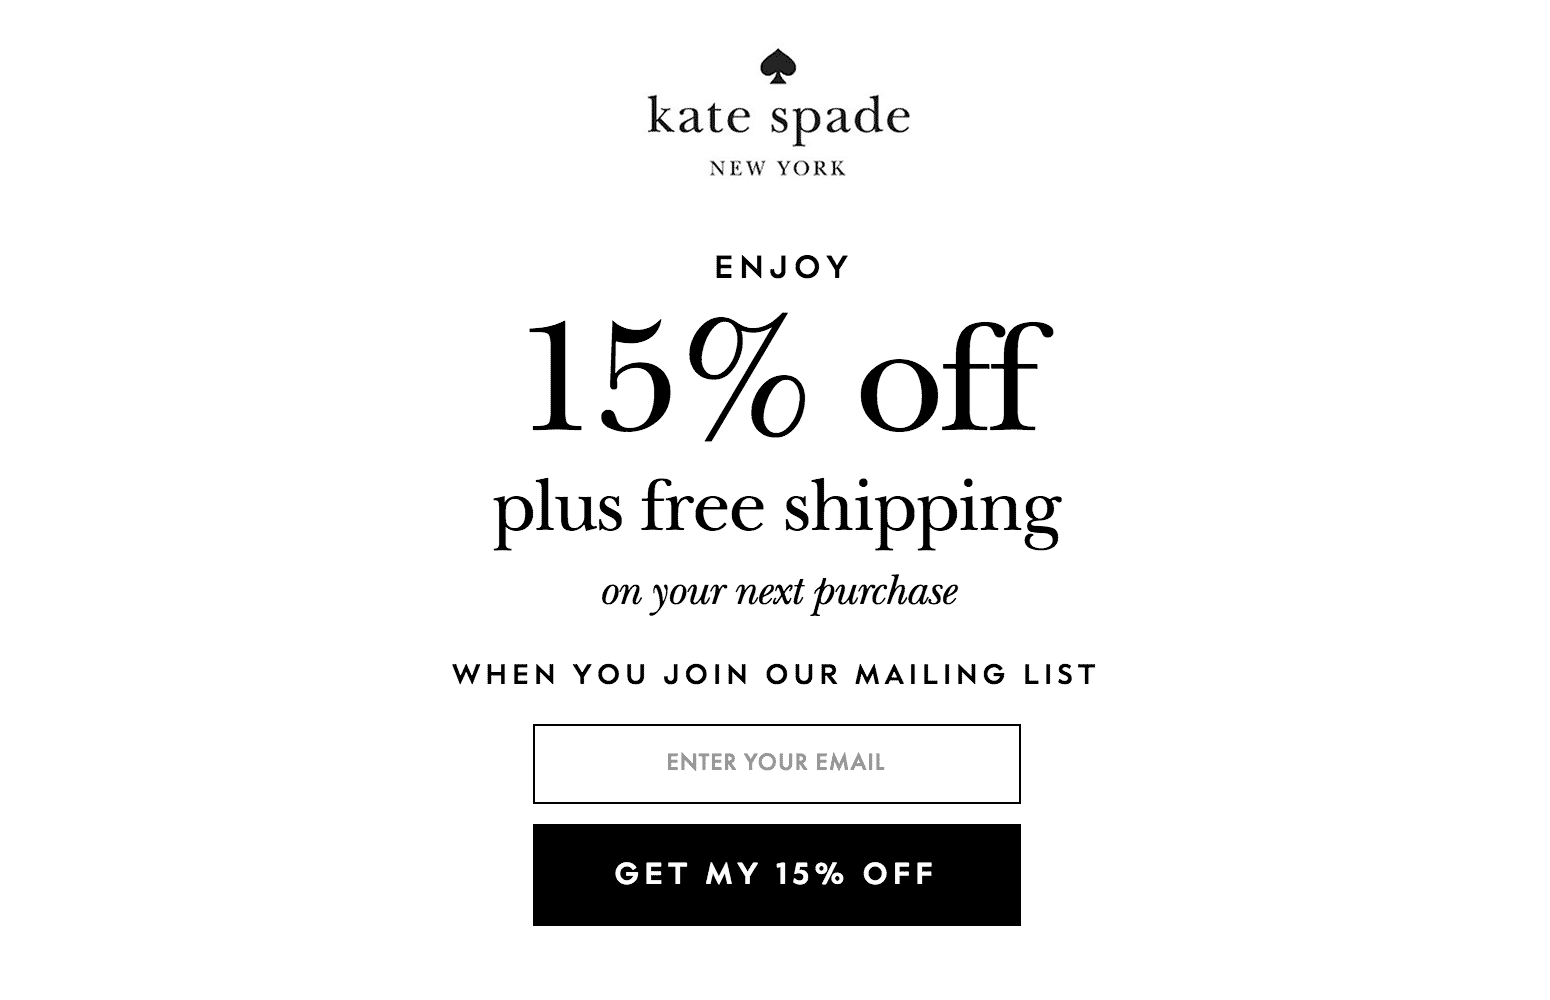
A simple one this, and you could incorporate it into the newsletter option above, by offering them a code if they sign up. A simple display of a code may even entice a buyer to go back and buy another item right away they needed a little more persuading over.
4. Ask buyers to fill out a short survey (or even just one question)
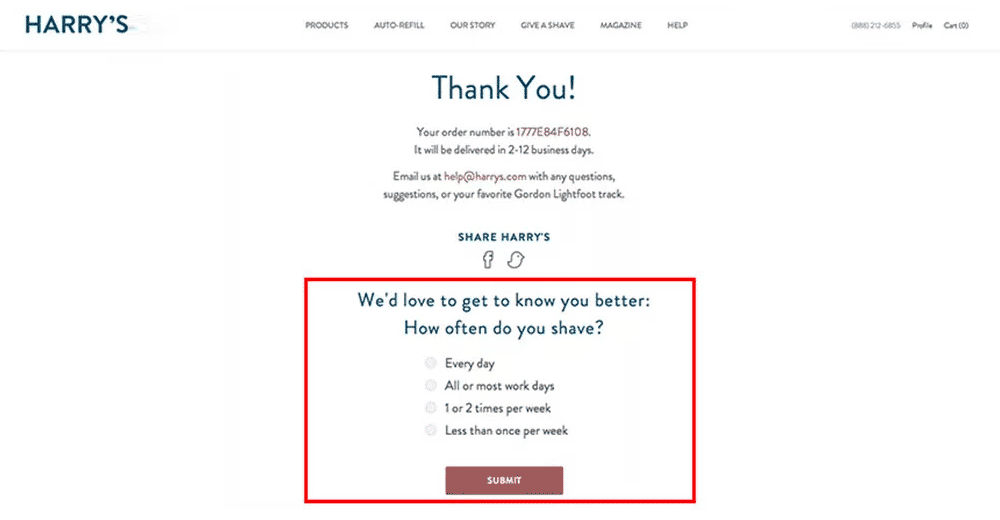
A survey asking customers what they think about your site and what improvements they’d like to see could be of great benefit. The problem usually, is that you don’t want this to disturb the usual purchase flow. The last thing you’d need would be an obtrusive notice distracting a user while in the process of buying. Adding such an option at the final WooCommerce thank you page step solves this and can help you receive valuable data from actual buyers.
5. Display product guides and instructions
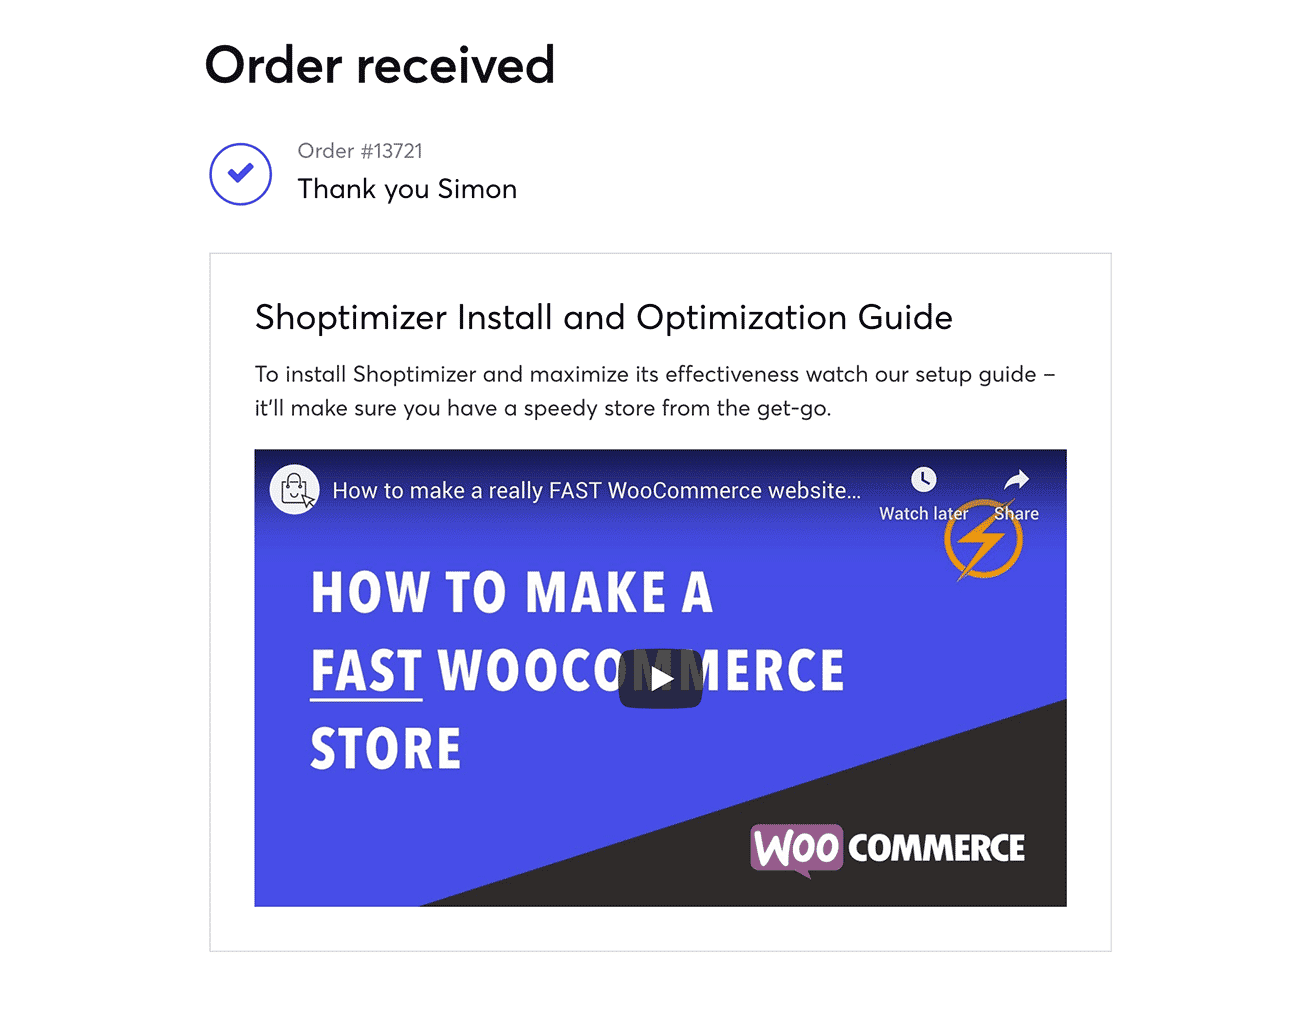
If you have a specialist site why not provide guides such as videos or instructions to buyers right away. We do that right here on CommerceGurus, including links to Shoptimizer’s install guide and a video on setting the theme up from the very beginning.
This can work for a host of stores however, if you sell coffee why not include a video on the best brewing process and the recommended equipment to use. Extra marks if you feature yourself in the video thanking customers for buying from your store first. Adding product guides, be they PDFs or videos is a great way to communicate with customer’s that you understand their needs and are there to assist immediately after ordering.
6. Include customer testimonials to reassure buyers
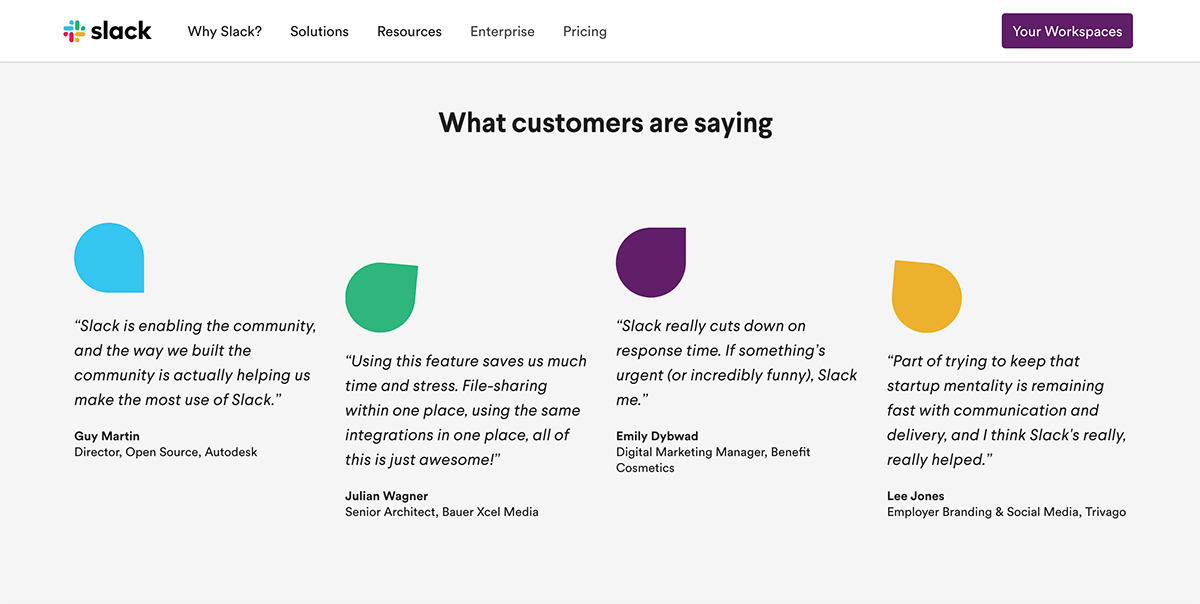
Strangely, right after buying can be a time when some customers are at their most vulnerable. What if I made a mistake with this purchase and won’t like it? Adding customer testimonials from delighted existing buyers can be a great way to assuage these doubts and provide reassurance to anyone feeling nervous.
Let’s show you how to transform your WooCommerce thank you page
We’ll be using our own Shoptimizer WooCommerce theme throughout the process, including the screenshots. There seems to be two schools of thought on how to edit this step; use a function and redirect to a custom thank you page, or use a plugin. I think both for speed and functionality, the plugin suggested below is the best solution for this particular task. Let’s begin!
Step 1 – Install the NextMove Lite Plugin
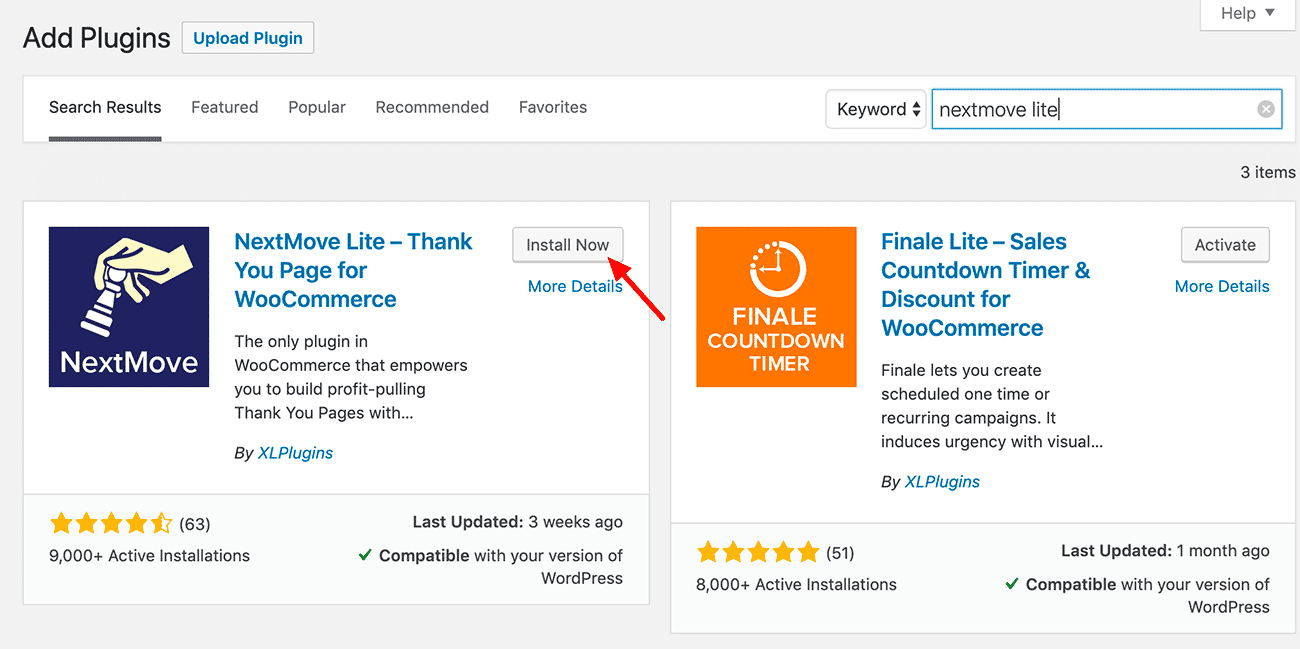
To install this, simply go to the Plugins section of your WordPress install and search for NextMove Lite. Click the blue install button next to it and once it has been added, click again to activate it.
Step 2 – The Overview Screen
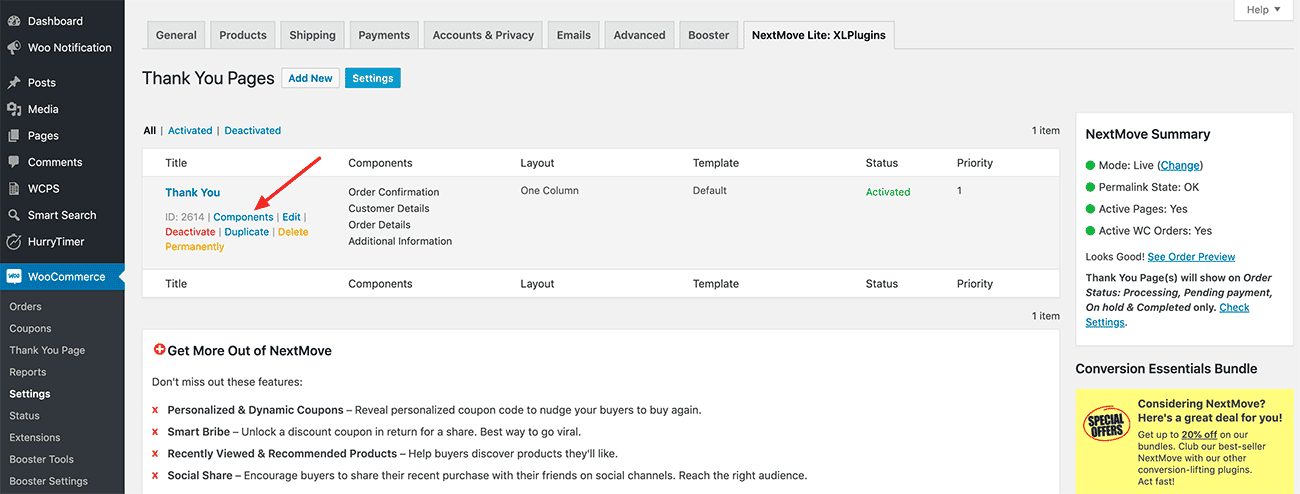
After installing and activating the plugin you’ll be directed to the NextMove Lite overview page. You can also access this via: WooCommerce > Settings and click on the NextMove Lite: XLPlugins tab.
You’ll see that it has already set up a custom landing page for you with the most common components people usually require. These are:
- Order Confirmation details
- Customer Details
- Order Details
- Additional Information (displayed by certain payment gateways e.g. bank transfers)
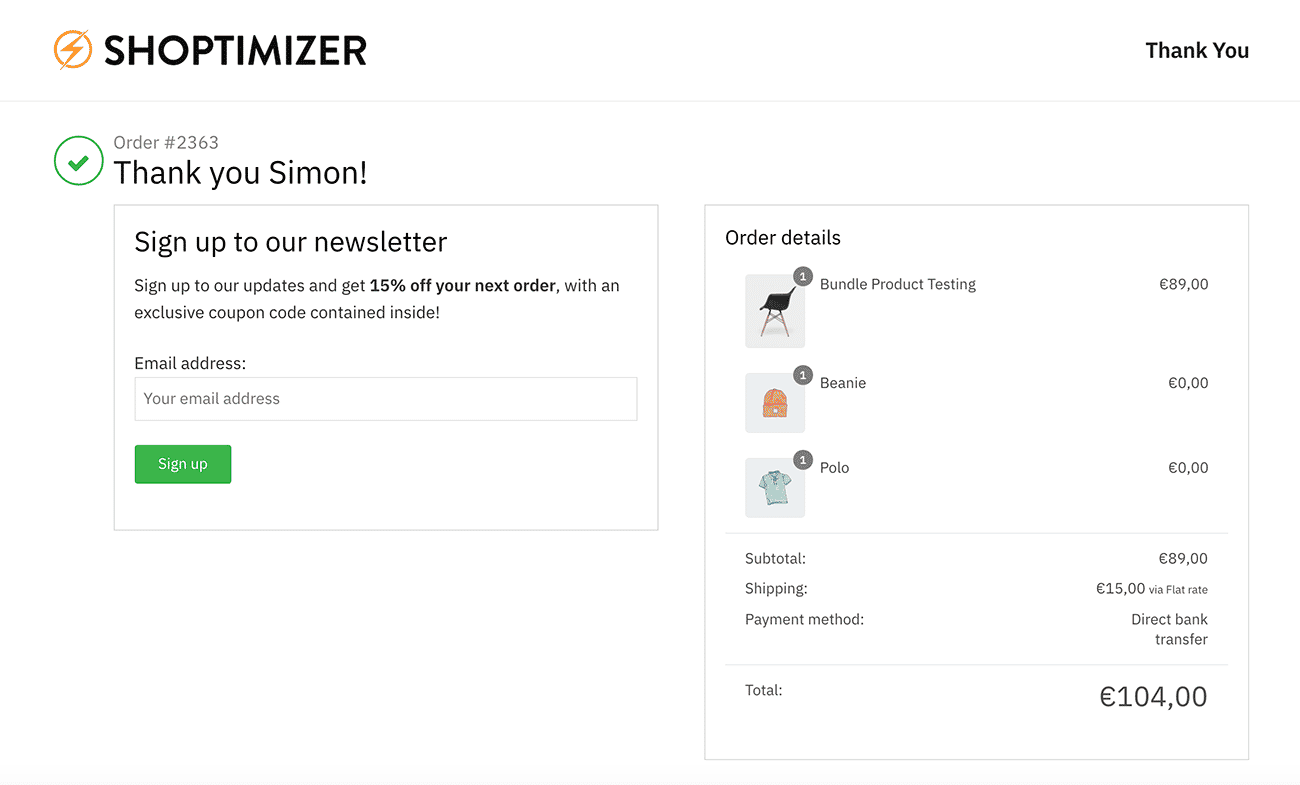
The first three are already present in the default WooCommerce thank you screen but now are presented in a more attractive fashion. You’ll see the Layout is also displayed as one column, you can change this to be two columns shortly if you wish.
You can create multiple Thank You pages (we’ll look at this in more detail later) by clicking on the Duplicate link.
It is activated already, if you want to deactivate this while tweaking the content click on the red Deactivate link. On the right side you can see how it looks at the moment by clicking on the See Order Preview link.
Hover over the ‘Thank You’ title and click on the Components link which appears.
Step 3 – The Customize Area
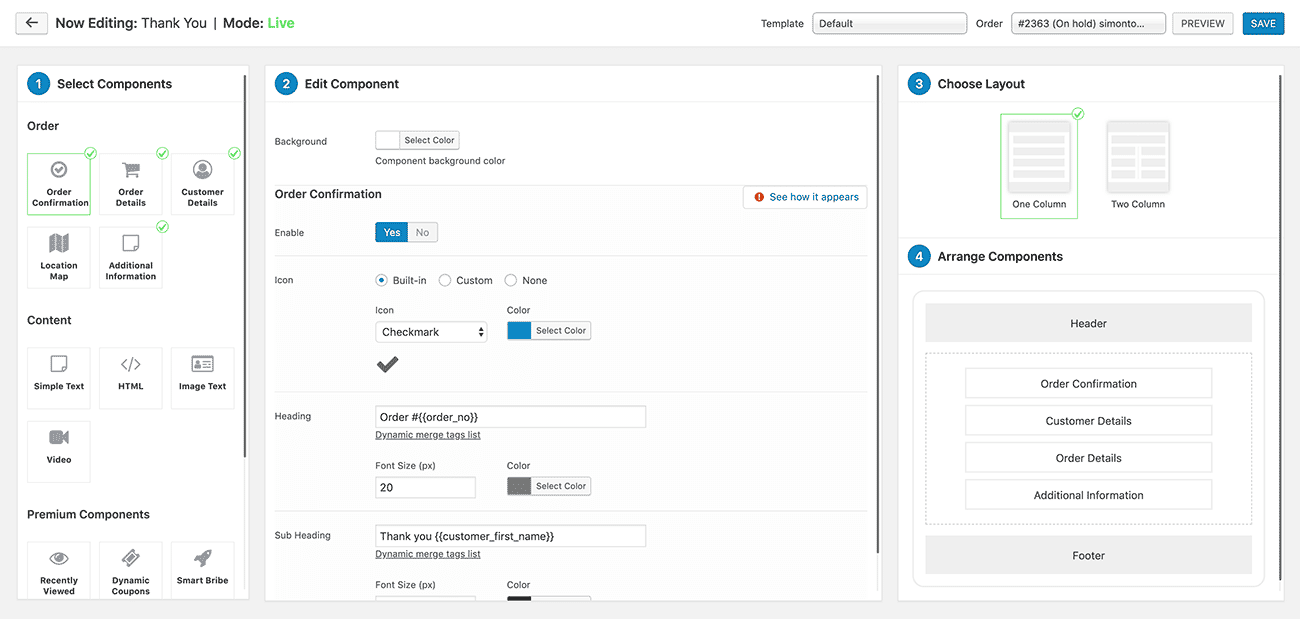
Initially, this looks a little overwhelming but spend a few minutes with it and it makes sense. On the far left, anything with a green tick will appear on the page. Click on a box, e.g. ‘Order Confirmation’ and you can then edit it within the wide middle section.
Now, you can only add one of each component to your thank you page. But, I’ve noticed that the Simple Text block also supports shortcodes, so that makes two you can use off the bat. Also, you could simply add more than one shortcode within a component if you need more than two.
Within the Layout and Arrange Components section you can switch the layout to two columns and decide which elements appear in which column. It’s a simple matter of dragging and dropping as you can see in the animation above.
Step 4 – Add a Newsletter Signup form block
We’re going to add a simple newsletter form block to encourage people to sign up after buying. We can include a discount code within the newsletter content to courage repeat business. We’ll use the MailChimp for WP plugin to achieve this. The plugin page has the setup instructions included, but to cut to the chase, when you have a signup form ready you’ll be able to display it by using a shortcode. It looks like this:
[mc4wp_form id="145"]So, let’s add a new HTML block – you’ll see this option on the left side of the screen.
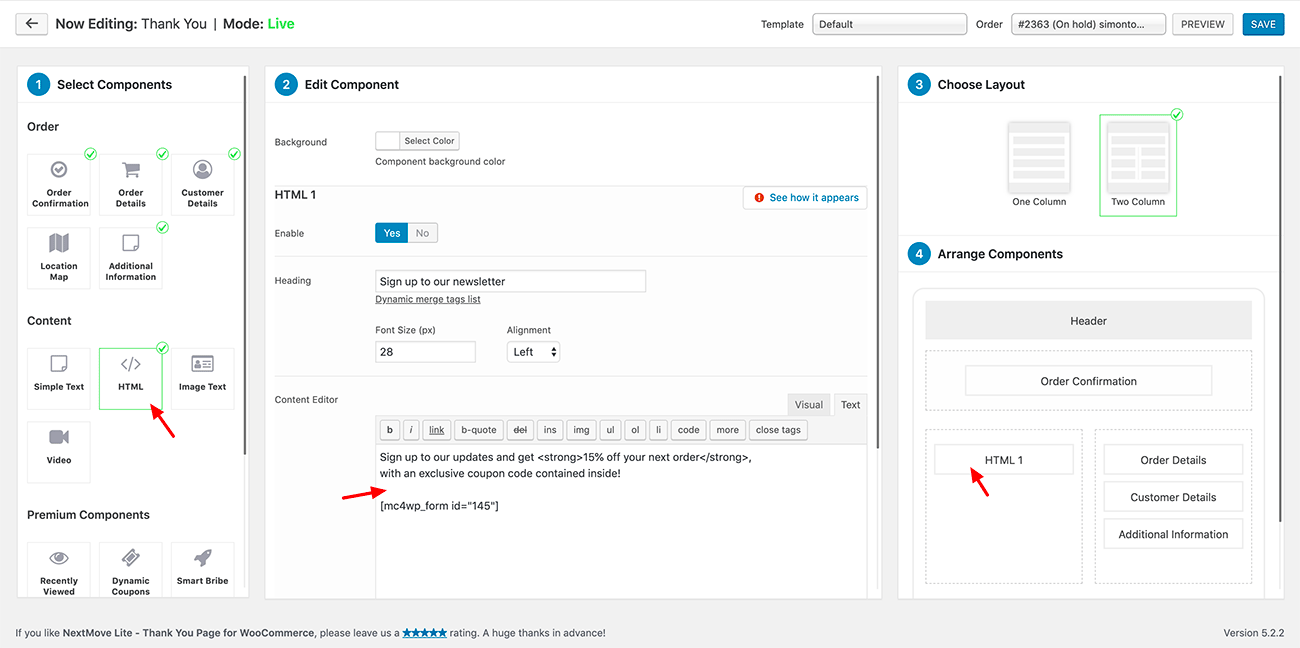
I tweaked the content within the editor to my liking and included the shortcode to the MailChimp form. Remember, you can add any shortcode to this space – it doesn’t need to use that particular plugin. So, if you want to include a survey shortcode for example you can.
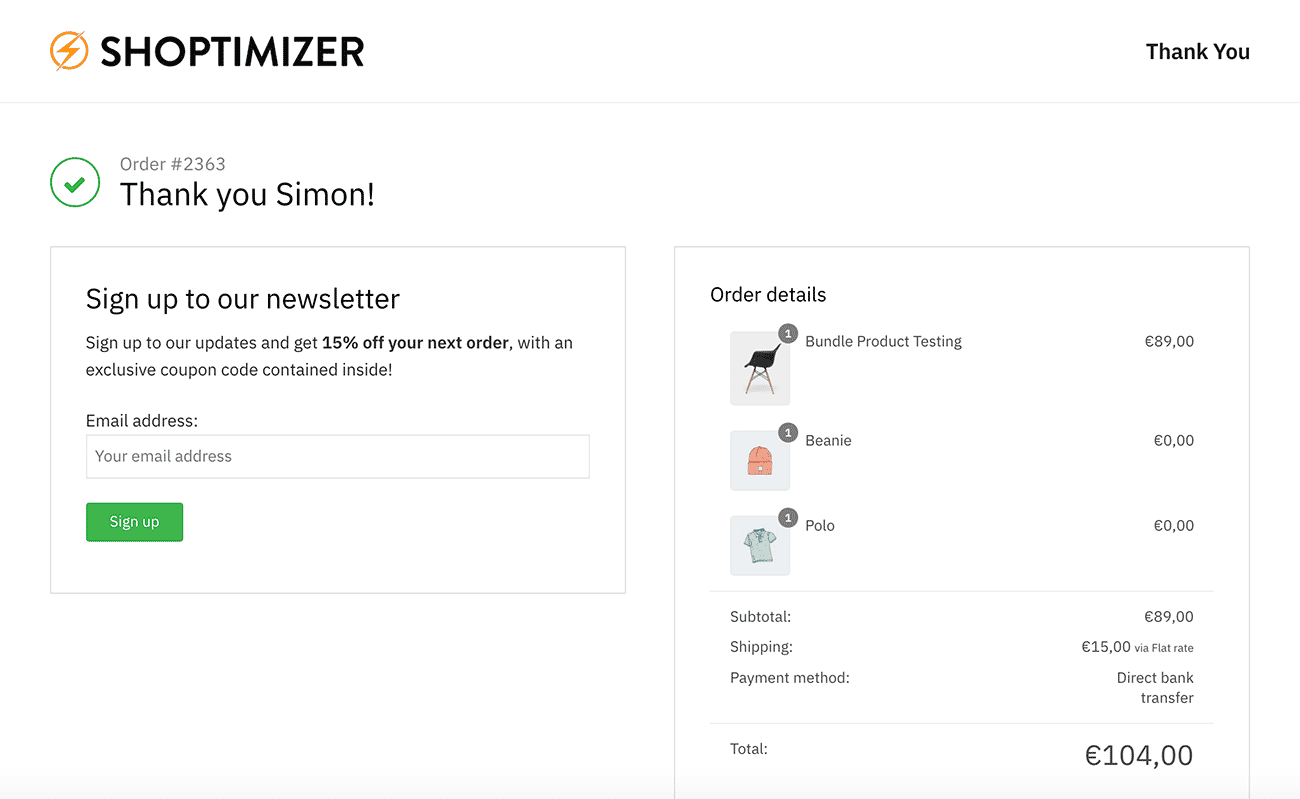
On the right hand side I rearranged the display a little so that the order confirmation was on the top and the signup form immediately visible to the left. The order and customer details are positioned on the right.
So, click Save on the top right and then the Preview button next to it to see what it looks like. Pretty decent start.
The padding does look a little cramped though, so let’s tidy this up with some custom CSS. You can add this within a child theme, or quicker still, via Appearance > Customize > Additional CSS.
body .xlwcty_wrap .xlwcty_Box {
	padding: 35px;
}

.xlwcty_clearfix,
.xlwcty_col2_wrap {
	padding-top: 20px;
}

body .xlwcty_wrap.xlwcty_circle_show .xlwcty_in_wrap {
	padding-left: 0px;
}

.xlwcty_order_info {
	padding-left: 70px;
}

body .xlwcty_wrap .xlwcty_circle {
	left: 0px;
}
Now, the result looks a lot neater with less bunching of elements and more white space which makes everything easier to read.
Step 5 – Include a Product Guide Video
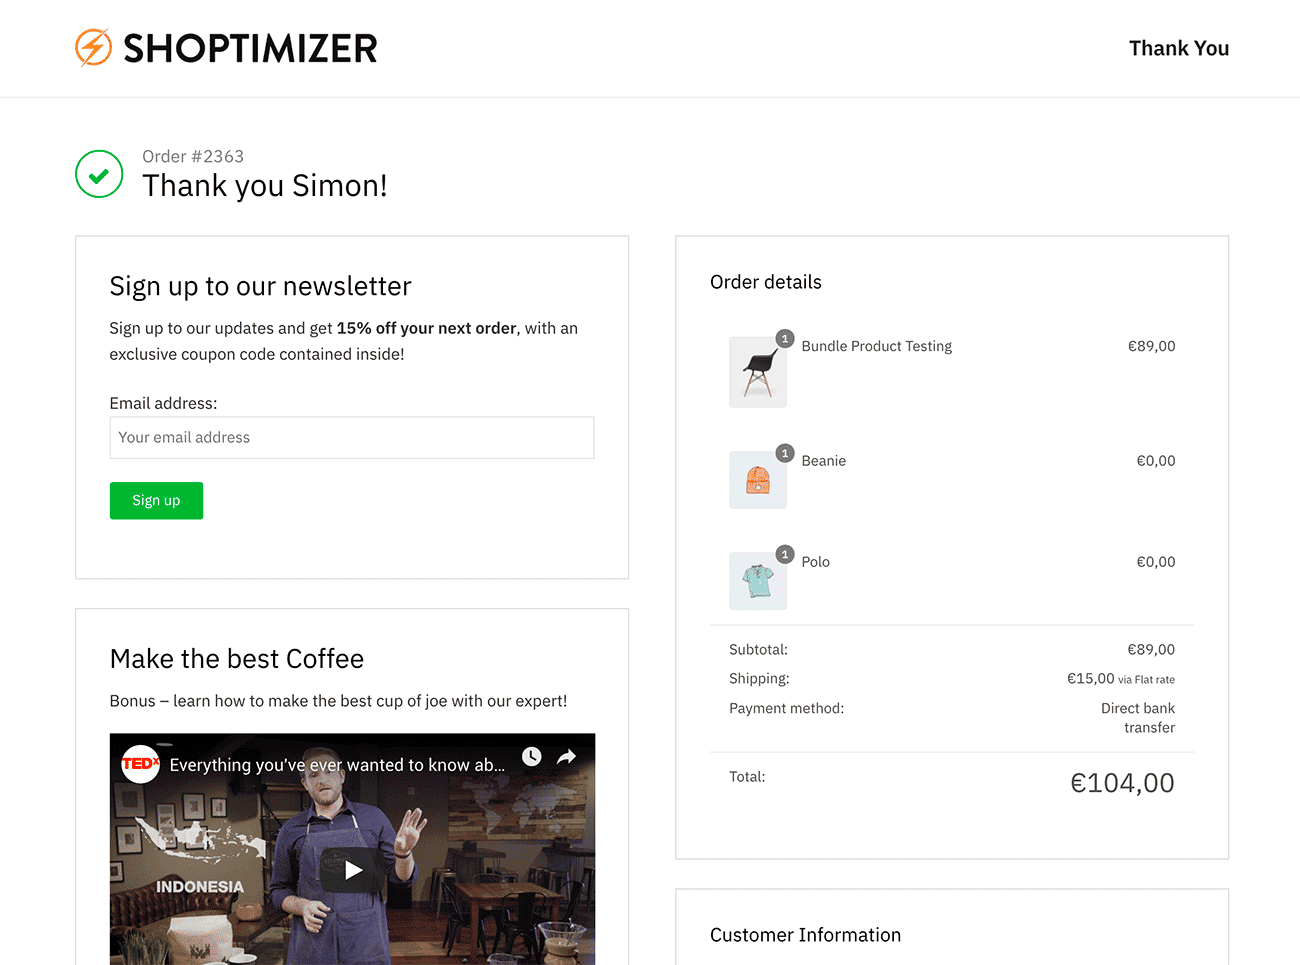
Beneath this I’d like to add an embedded Youtube video with a video on how to make great coffee (let’s say we sell tea and coffee). The process is the same, just add the Video element and enable it. You can add a link to the Youtube url and some text. Within the layout section on the right, we can position it beneath the newsletter sign up. The result will look like this.
But.. what if we sell coffee amongst other things? We wouldn’t want to show a video on making coffee if somebody is actually buying tea. Well glad you asked. You can set up our thank you page to only display when somebody buys from a certain category. In fact you can create multiple thank you pages with AND/OR conditions based on categories and individual products.
If you go back to the Screenshot in Step 2 – you’ll see an Edit link. Clicking that takes you to the Thank You page edit screen, where further down you can set these conditions.
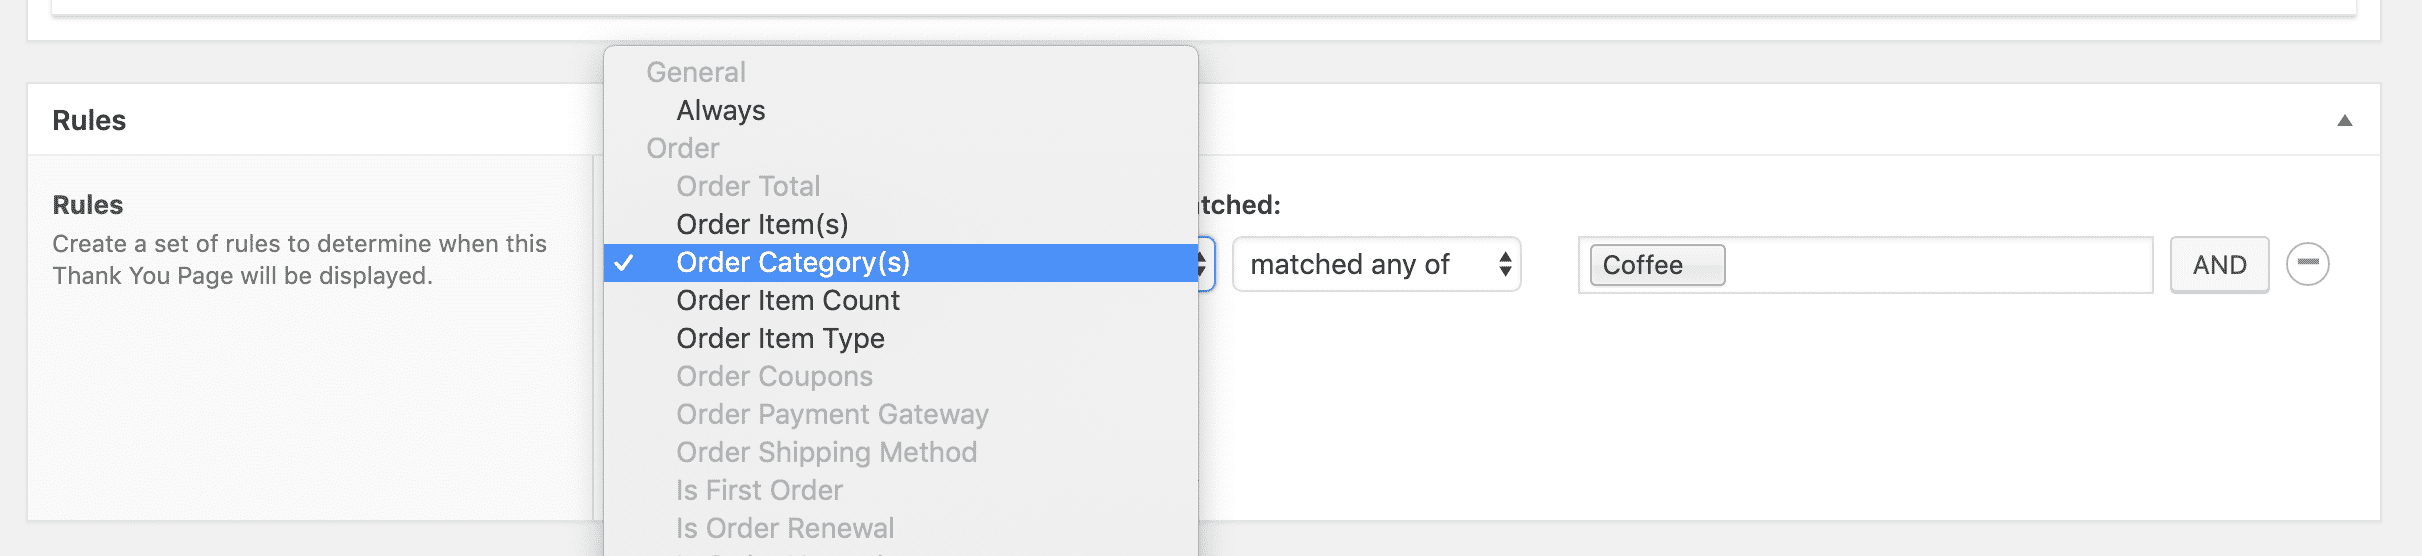
The Pro version offers a much wider set of conditions including if it’s a first order or if they’re using a coupon. You can create completely custom thank you pages based upon almost any set of variables; it’s very powerful.
Next steps
If you want to include some of the other features mentioned above such as social sharing the easiest way is to simply upgrade to the Pro version of the plugin. You can get it for only $29 a year which is a pretty decent deal for a feature which could bring in many multiples of this over the course of 12 months. You’ll need to decide if that’s worth the value for your own store, I’d feel it is.
There is also a dynamic coupons option in Pro but you could just as easily simply create a simple static HTML block with a text coupon to do the same thing. It depends how complex your individual requirements are.
Any questions about editing your WooCommerce Thank You page?
If you have any questions or comments feel free to add them below the line. Plus, if you have any other techniques for changing your WooCommerce thank you page I’d love to hear them. Also – what features have you included and what sort of engagement rates have you experienced since adding them? Just leave a message below!

 WooCommerce Subscriptions Tutorial: Create Your First Subscription Product
 Kinsta Review – How well does it work for WooCommerce Hosting?
 Curation in eCommerce
 Weekly Gurulinks
Such a great article. I’m now worried about thank-you page security. Can you also recommend a solution to create a custom thank-you page URL which can expire after a given time?
WooCommerce’s thank you page is based upon the cart session, so that will naturally expire after a couple of hours. It’s not a URL people can access unless they’ve put an order through.
I need to add the parameter for Google analytics, please see below:-
/order-received/thank-you/ . – if no coupon used
/order-received/thank-you/?utm_coupon=name-of-coupon – if coupon used
Of course, the other 2 parameters will be there. Any idea how can I add a parameter if coupon code is applied on the checkout page.
Re news letter sign up, there is a ticked box option by default for signing up to a newsletter when making the order in the final cart page (below address details). So seems pointless to put this option in the Thankyou page, unless you had some tricky coding to detect they had unticked that box?