CommerceKit is our new companion plugin for Shoptimizer. It includes features designed for conversions, built in a minimal, performance focused way. Each module uses vanilla JS (no jQuery), and loads only on pages where they are needed.
It can replace a number of 3rd-party plugins, ensuring that you have less overhead, and a faster site. If you have an existing Shoptimizer site and replace a plugin feature with a CommerceKit module, ensure that you disable the plugin first.
Note that each module has been built for performance and with a feature-set perfect for the vast majority of users. But, If you have very specific requirements, a separate dedicated plugin (some of which are mentioned below) may still be the better option.
- Ajax Search
- Countdown Timers
- Free Shipping Notification
- Order Bump
- Product Badges
- Product Gallery
- Product Attributes Gallery
- Attribute Swatches
- Size Guides
- Sticky Add to Cart
- Stock Meter
- Waitlist
- Wishlist
To get started
First go to the Plugins area, and if you have any of the following plugins active, disable them. This step is typically only for existing customers.
- HurryTimer
- WooCommerce Smart Search
- YITH Wishlist
- YITH Waitlist
Ensure that CommerceKit is active and up to date Appearance > Install Plugins and then click on the CommerceKit link in your WordPress dashboard. From here, you’ll be able to configure and activate each module and get up and running.
Ajax Search
Plugin it replaces: Smart WooCommerce Search
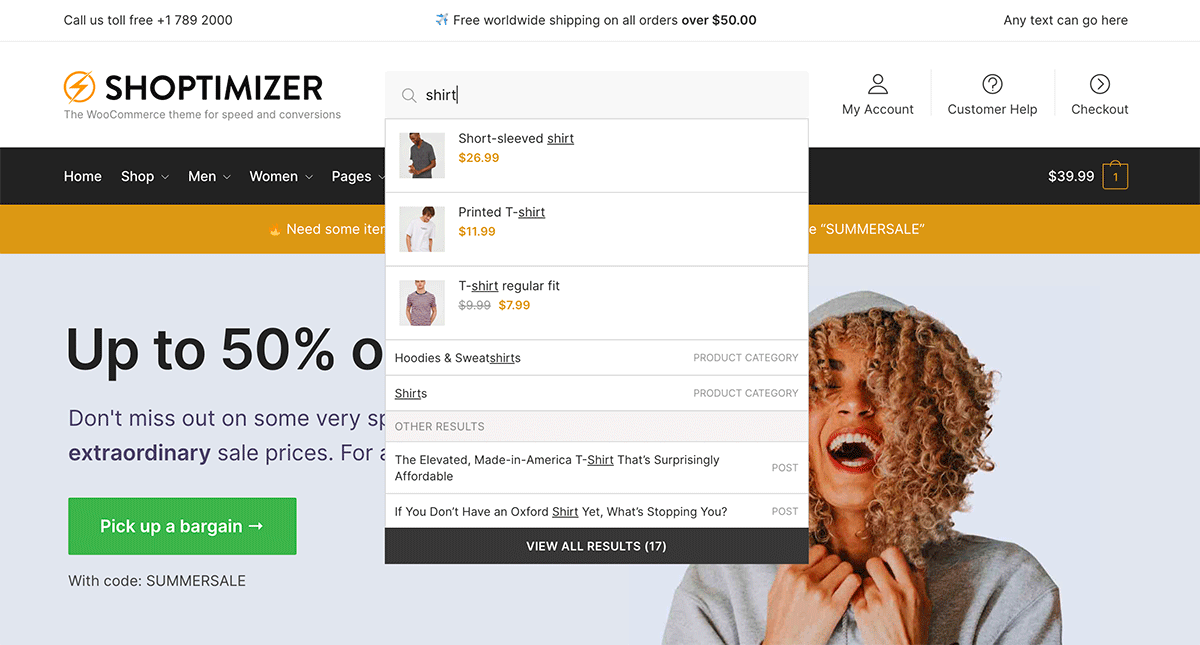
Our Ajax Search module allows customers to quickly search through your catalog and display results immediately. You can choose to display results from all content (recommended) or just products. Plus decide if you wish to display out of stock items.
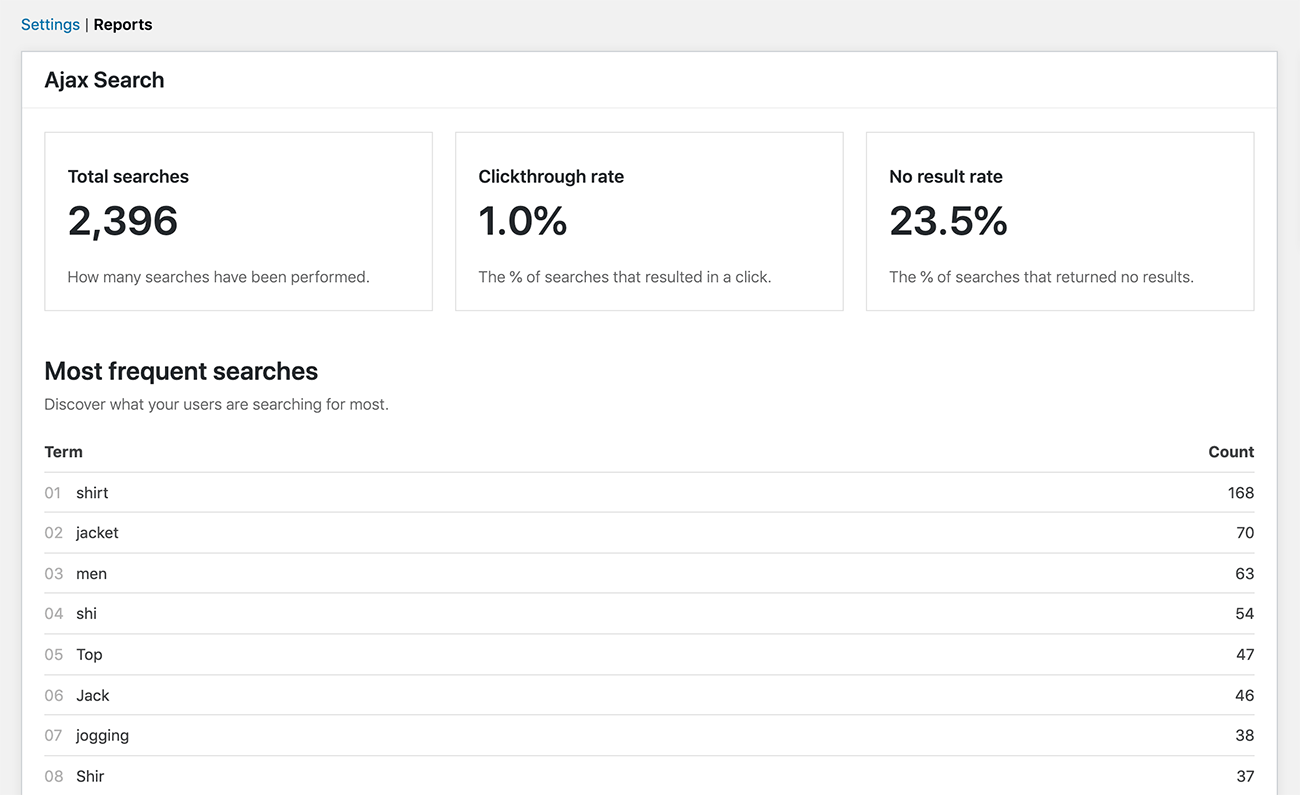
We also have a very useful Reports tab. In this, you can see the most popular searches performed on your site, the clickthrough rate, and the percentage of searches which return no results.
Countdown Timers
Plugin it replaces: HurryTimer
You can create two different countdown timers in CommerceKit, on product pages and the checkout. Firstly, on product pages:
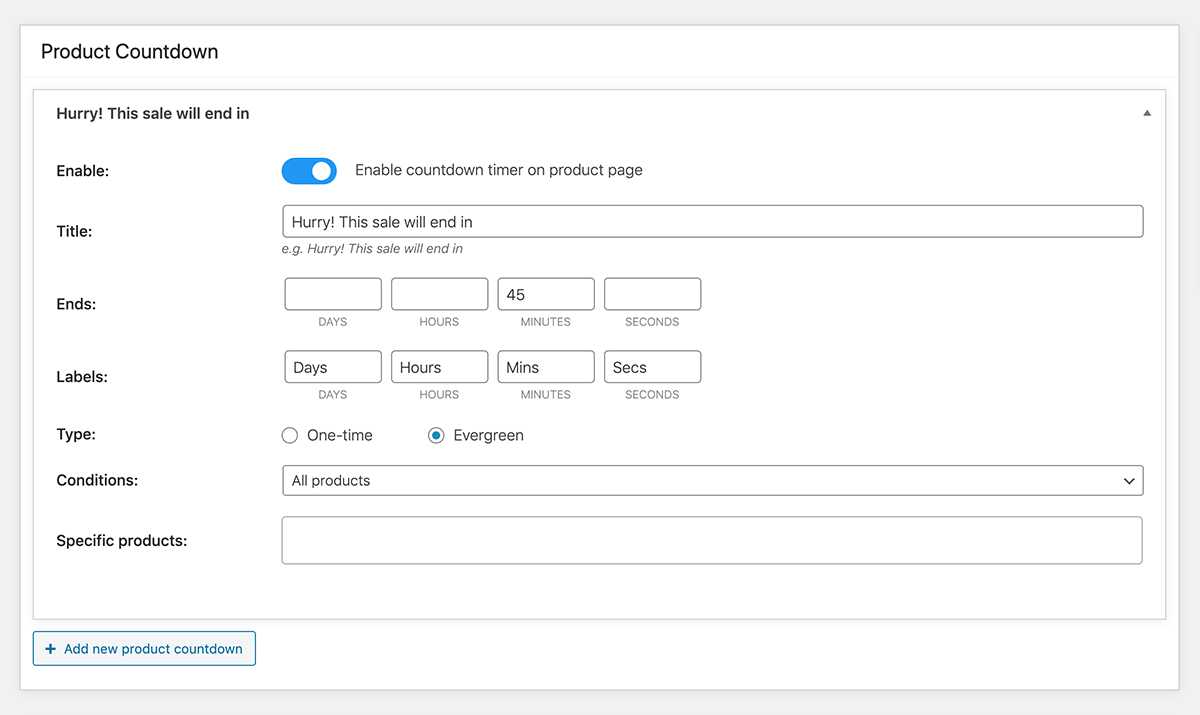
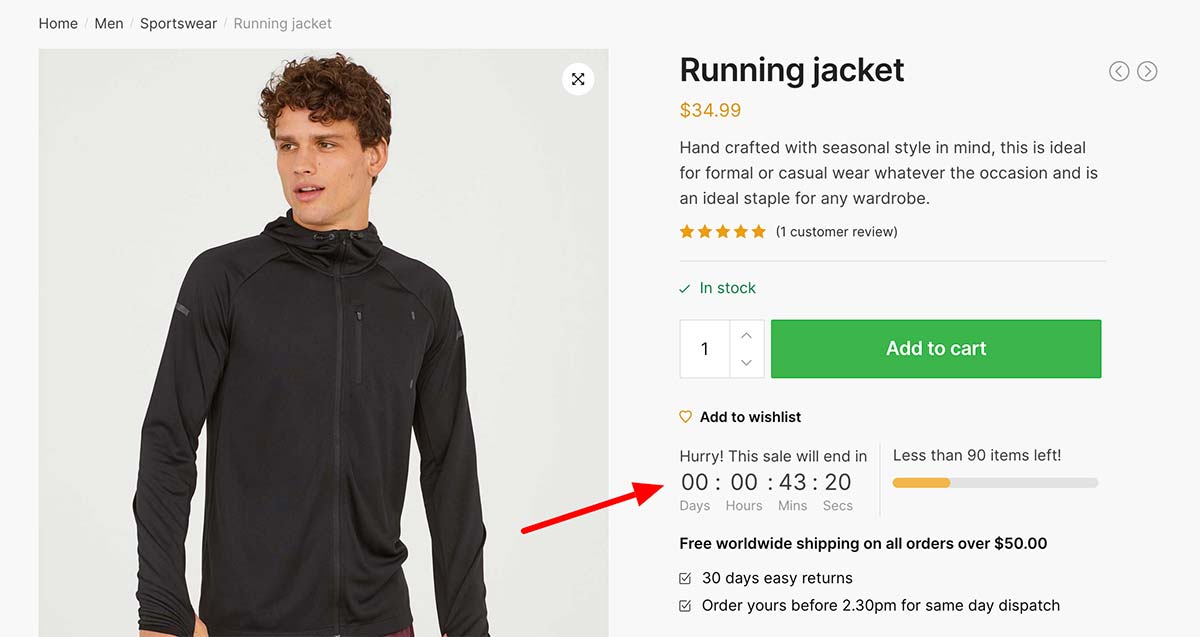
To create a product countdown similar to the theme demo, use Hurry! This sale will end in as the title. Set ends to be 45 minutes and the type to be Evergreen. There is a conditions area where you can specify it to appear only on certain products or categories.
You can also create multiple product countdowns for different products and categories if you wish.
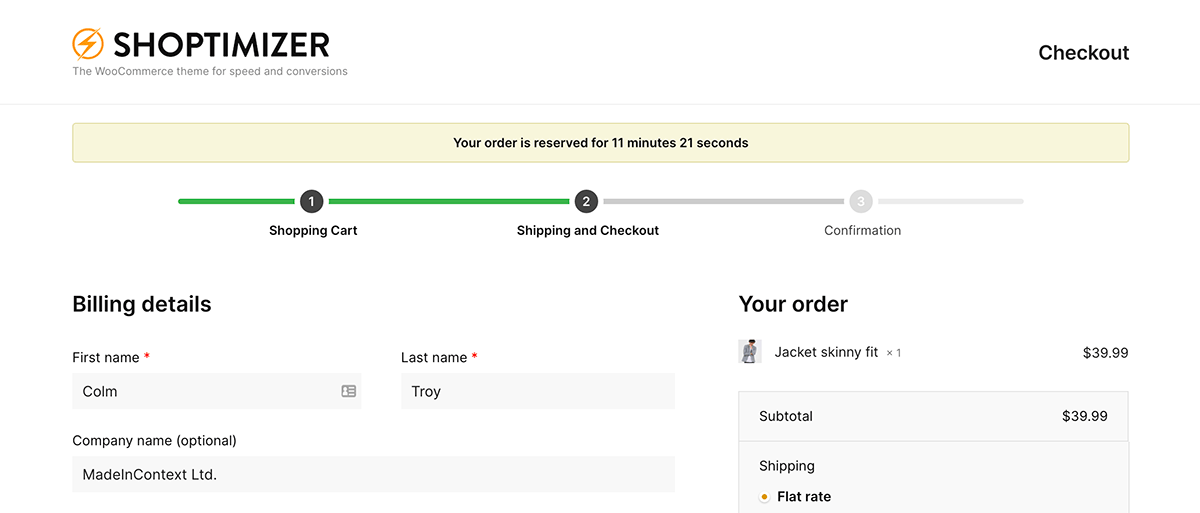
You can also add a countdown on the checkout page to encourage customers to complete the form and not leave the page.
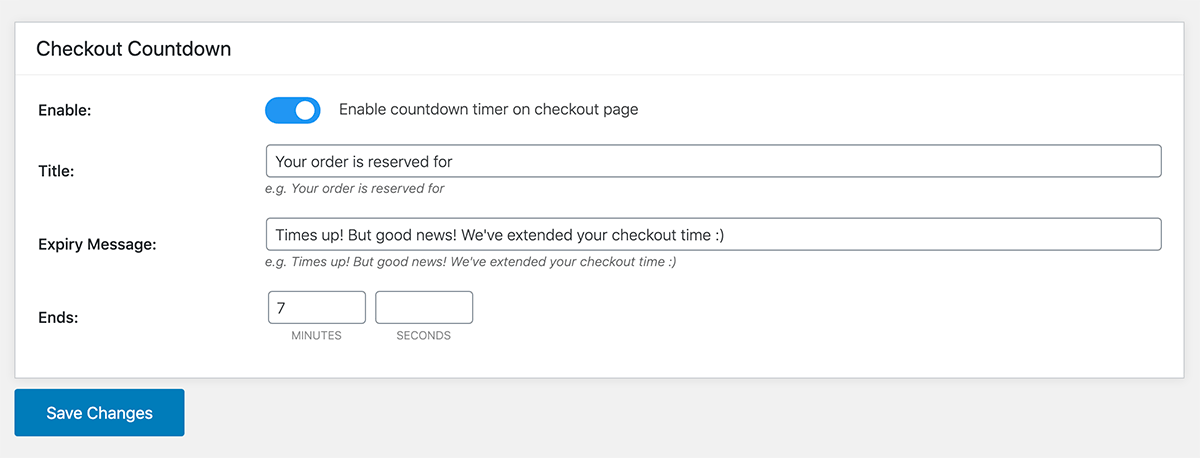
Include a title such as Your order is reserved for, an expiry message and an end time – say 12 minutes. The countdown will appear on the checkout similar to the screenshot below.
Free Shipping Notification
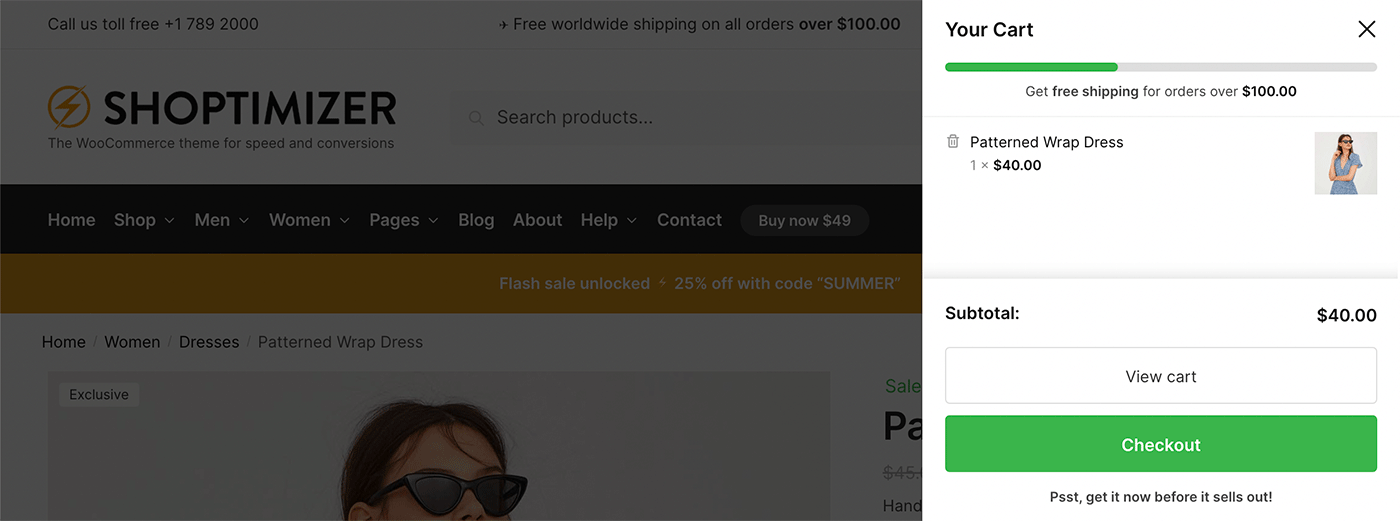
CommerceKit’s Free Shipping Notification allows you to display a notice within the sidebar mini cart, and on the cart page to notify the buyer when they are getting close to a free shipping threshold.
Obviously this feature is only suitable for stores which offer free shipping. If you do not offer it, there’s no need to activate this particular module.
To get started you’ll need to delve into WooCommerce Shipping options within: WooCommerce > Settings > Shipping.
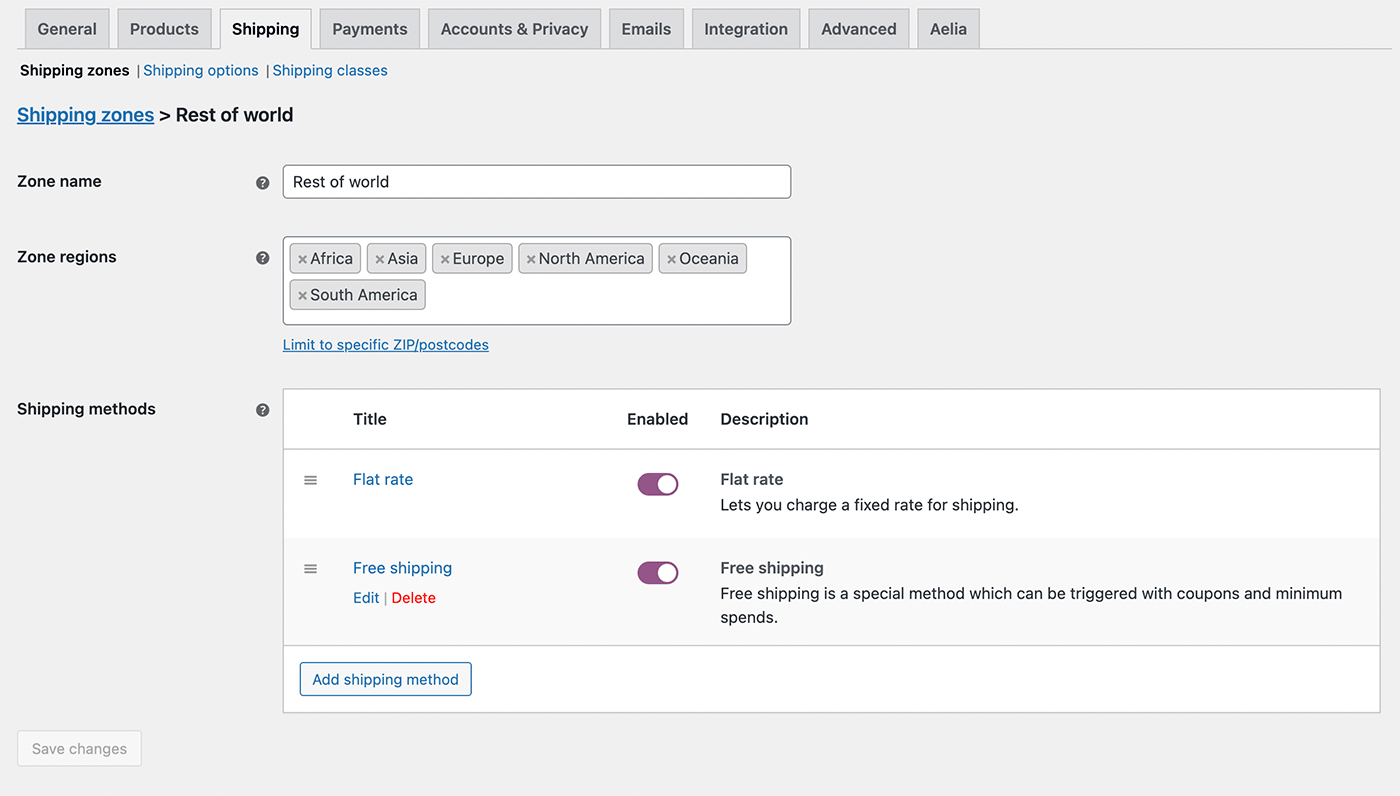
From there, you can setup different Shipping Zones and within these create various Shipping methods. In the example above I have a Flat rate method enabled which charges $5 for shipping. I have added an additional Free shipping method which becomes active when the cart total is greater than $100.
You can learn more about this by consulting WooCommerce’s Shipping Documentation.
Once you have a Free shipping method enabled, you can now switch on the Free Shipping Notification module within CommerceKit.
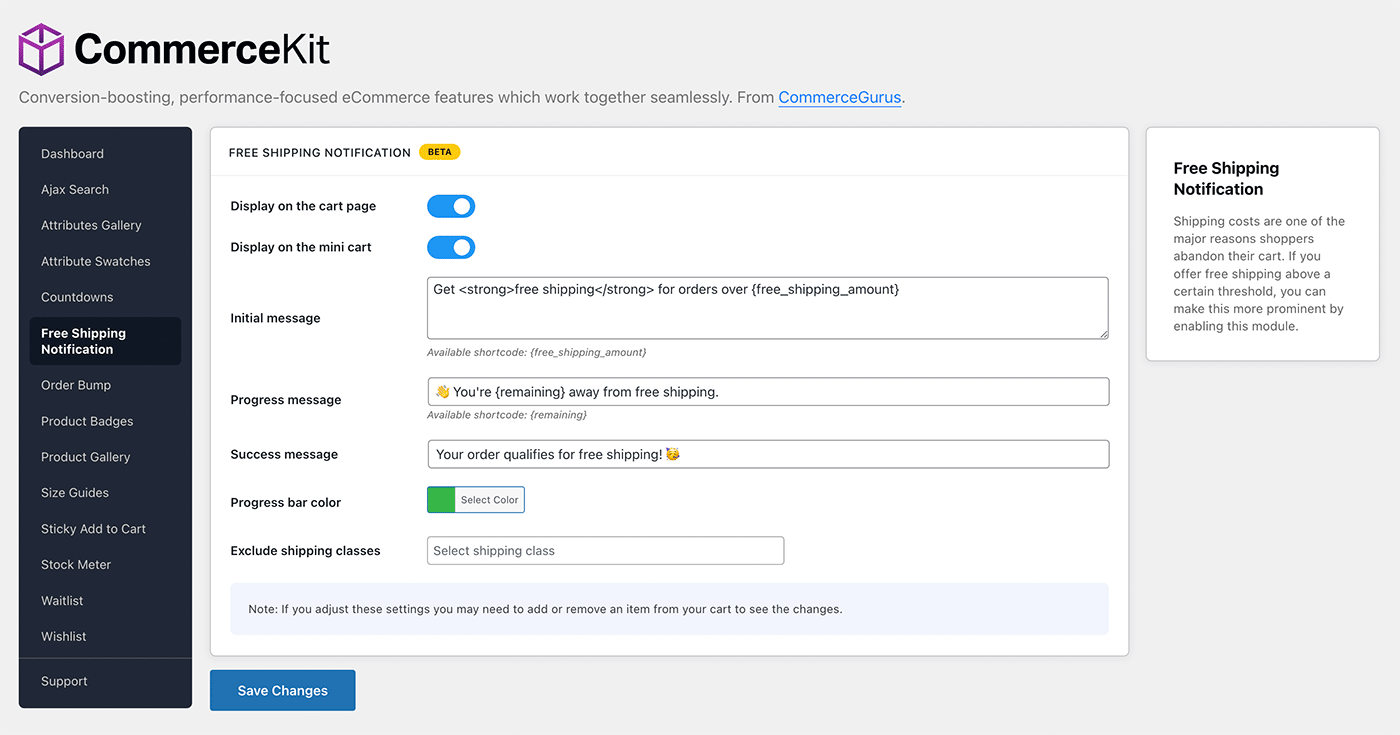
Within these settings you can display it on the regular cart page, and in the mini cart. You can adjust the text displayed at different stages, as well as alter the progress bar color if you wish.
We have also added an Exclude shipping classes option. In WooCommerce you can create a custom shipping class and apply it on, for example, bulky items. If this bulky item (e.g. a piano) is present in your cart, then free shipping no longer applies.
Once active you should see the free shipping progress bar appear in your mini cart.
Order Bump
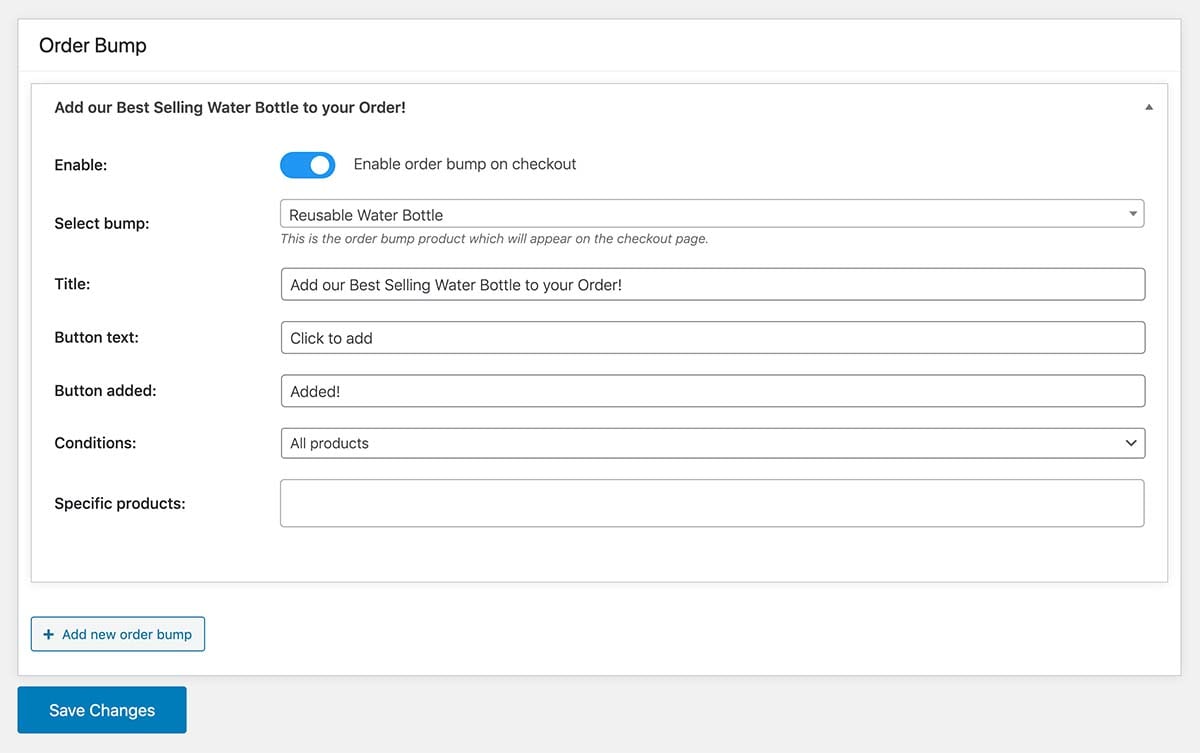
A brand new feature to Shoptimizer is an Order Bump. This allows you to feature a product next to the Place order button on the checkout page. Think of it as an upsell right before purchase. It’s ideal for an add-on item which doesn’t cost too much – a spontaneous addition to the order.
Only one Order Bump will display in this space.
To set it up, go to the Order Bump area of CommerceKit and enter the details.
Now when you go to the Checkout screen you’ll see the product selected next to the Place order button like so.
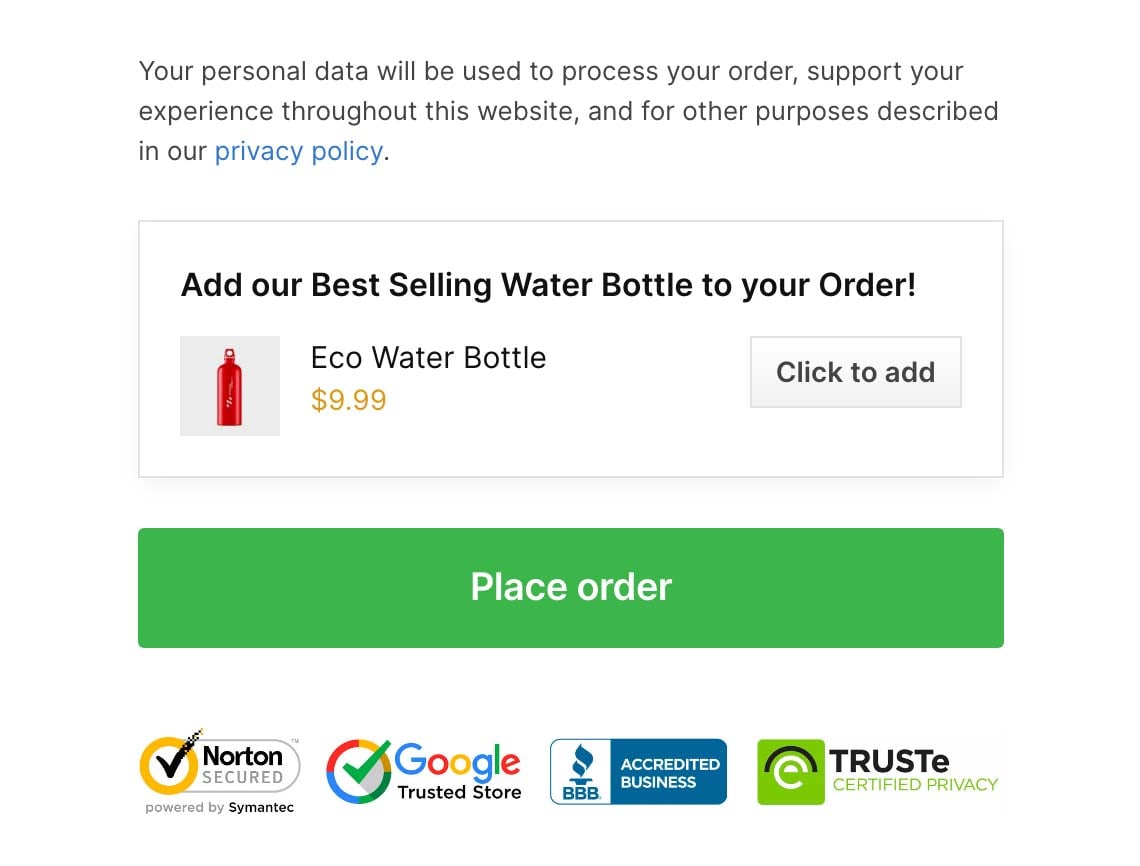
If the order bump product has already previously been added to the cart, it will not appear.
Product Badges
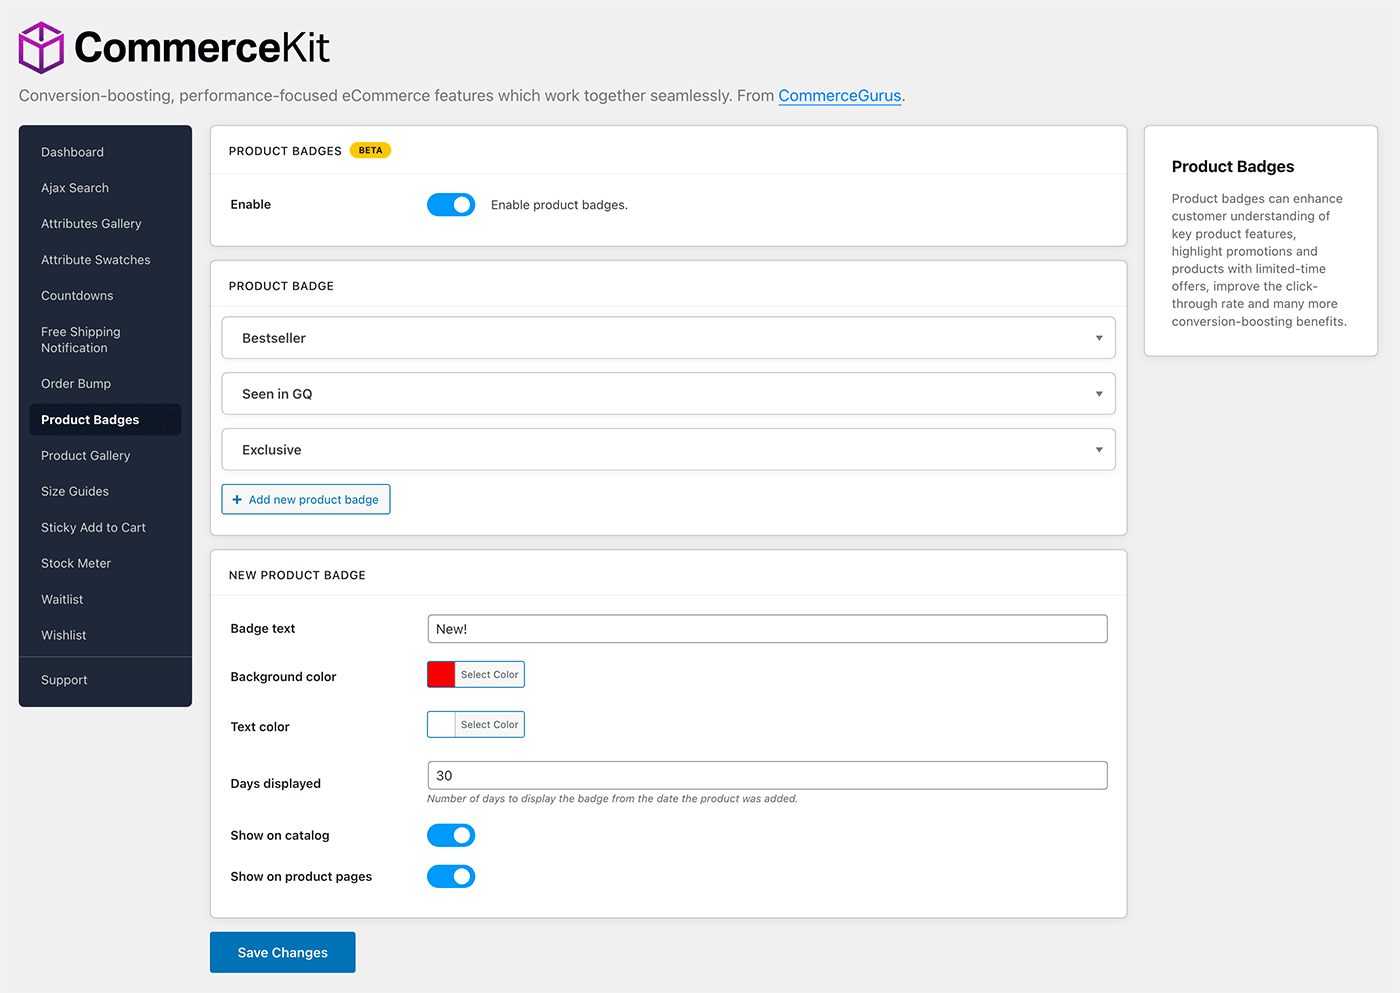
If you’d like to highlight certain products within your catalog and product pages, you can with our Product Badges module. There are two types of badges you can apply.
Custom Badges
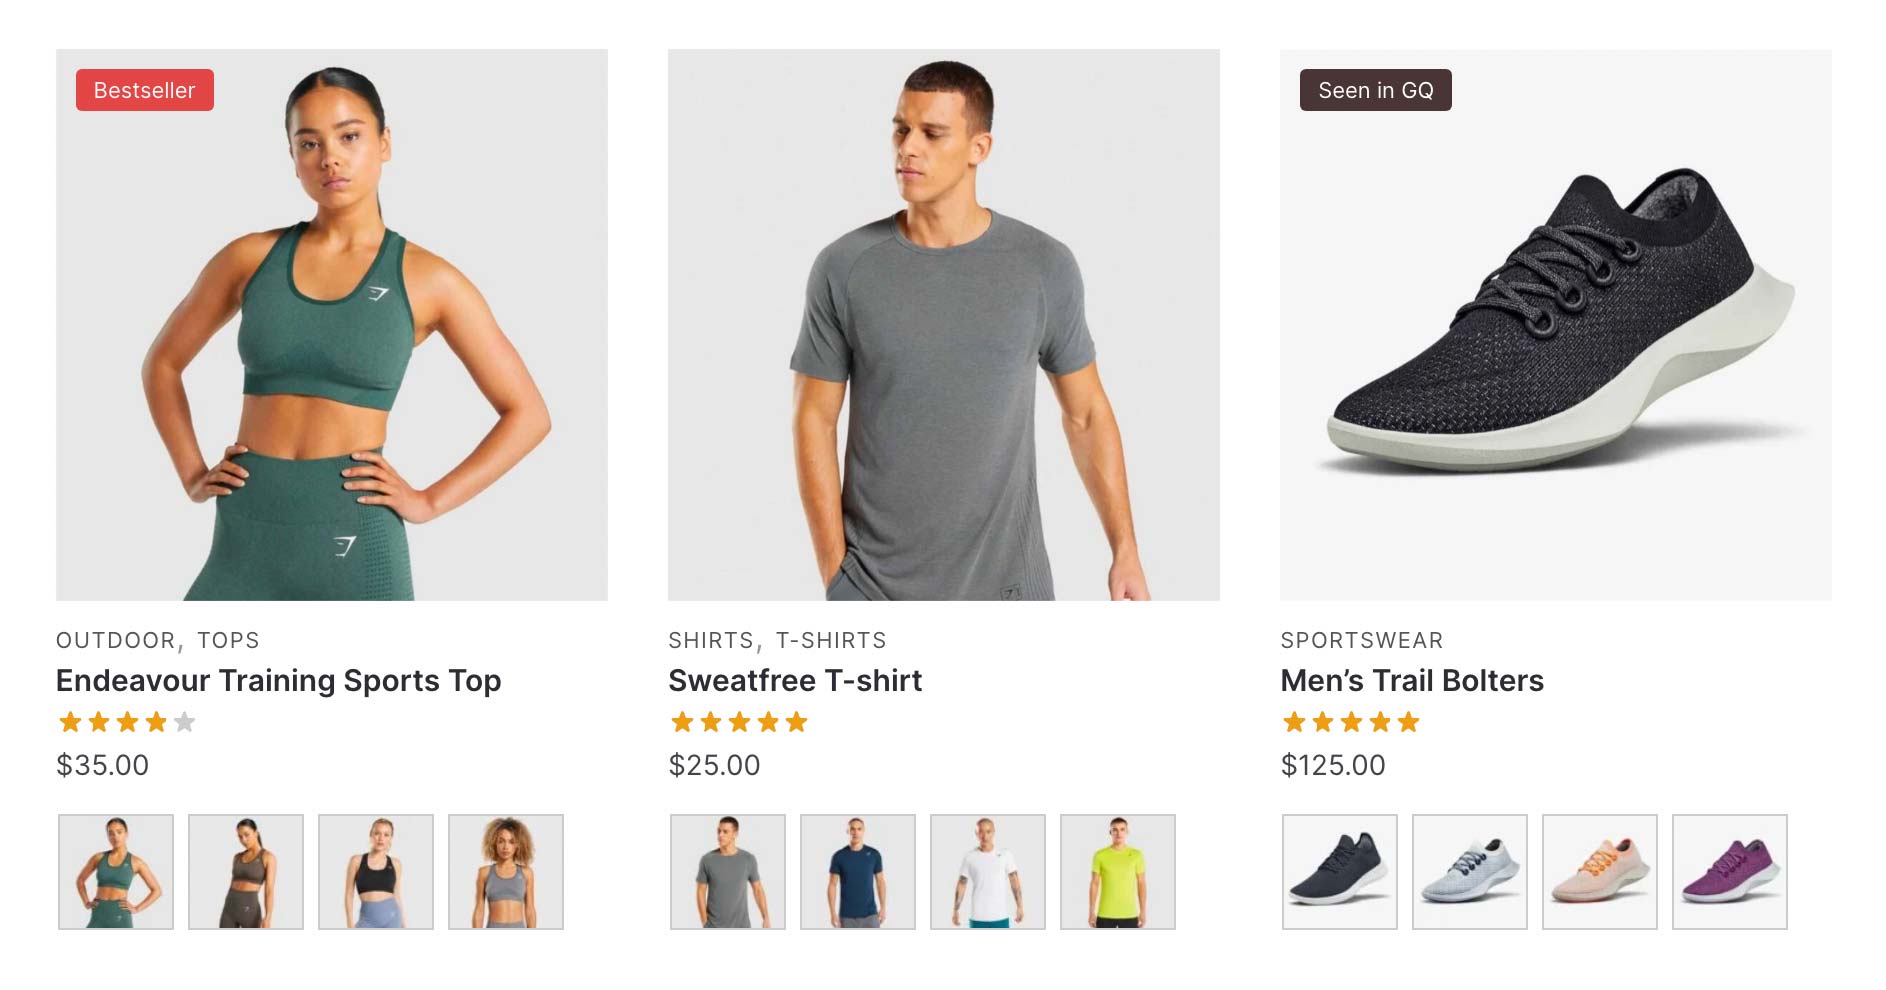
With a custom badge you can add any text label you like, tweak the colors, and specify exactly which products or categories it should be applied to. Common labels could include, “Exclusive”, “Limited”, “As seen on X”, “Bestseller” etc. You can display multiple badges on a product.
New Badge
You can also apply a “New” label to the latest products added to your catalog automatically. With this badge type enabled, any newly added products (after the module is activated) will get a custom badge applied, and you can set how long this “New” label should be displayed for.
Product Gallery
Our Product Gallery provides enormous performance improvements over the core WooCommerce gallery. We’ve included additional gallery layouts and it even supports embedded video! You can also change which gallery is displayed on a product level.
For more instructions about how to implement the gallery see the separate CommerceKit Product Gallery documentation. We’ve also written a blog post about WooCommerce Product Gallery Speed, detailing the reasoning behind building it, and just how fast it is.
Product Attributes Gallery
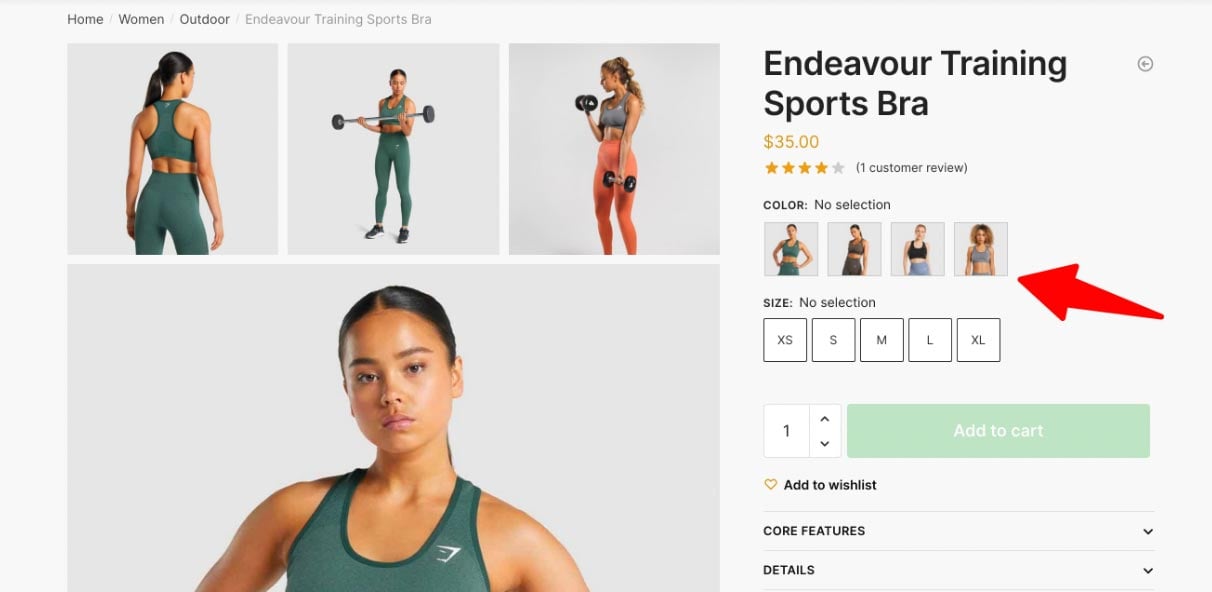
We’re delighted to launch a product attributes gallery module as part of CommerceKit. An attributes gallery allows you to assign a gallery to single attributes.
With our module, you can, for example, create a gallery for a specific color. The gallery will update once the color has been selected without needing to also select a size. This is an incredible improvement for UX over how WooCommerce does things by default.
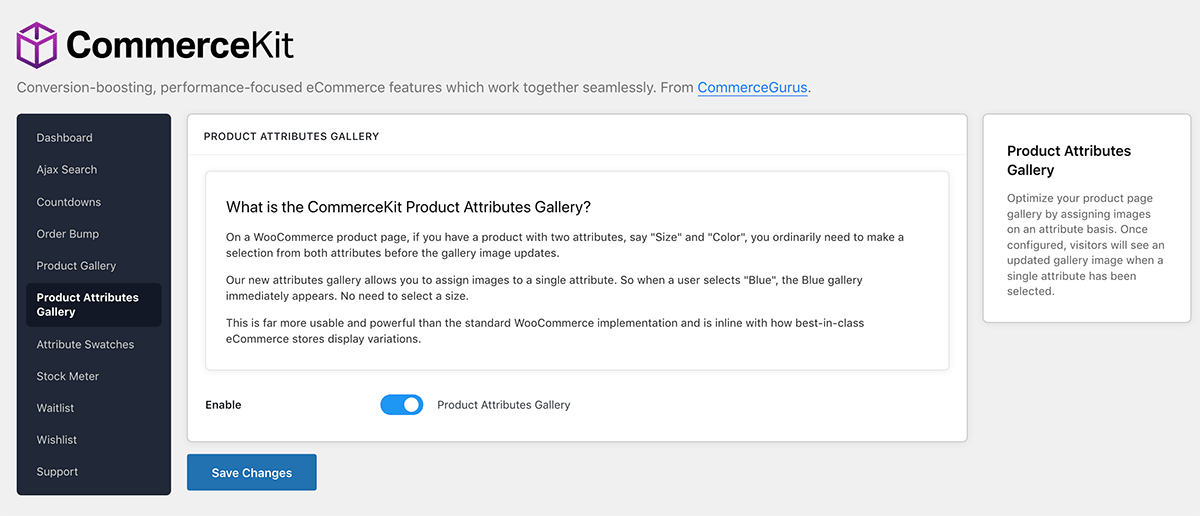
See the CommerceKit Product Attributes Gallery documentation for full details on setting up this module.
Attribute Swatches
WooCommerce’s default method of displaying variations are within dropdowns. This isn’t ideal, as it hides the choices and forces the user the click on the dropdown before they can review choices. Our new attributes swatches module allow you to convert these into beautiful color swatches, images, or labels.
Furthermore you can even display swatches on the product listings pages, and can optionally ‘Quick add to cart’ to make it even faster for your customers to purchase.
To get started with attribute swatches in Shoptimizer, see our CommerceKit Attributes Swatches documentation for detailed setup instructions.
Sticky Add to Cart
We have a built a more advanced Sticky Add to Cart module which includes a number of great features, specifically designed for conversions.
- Choose variations within a sliding panel after clicking the sticky add to cart button.
- An ‘Add to cart’ button is fixed to the bottom of the viewport on mobiles, making it very obvious and easy to access.
- The expand tabs option collapses tab content which makes it much easier to discover, especially on mobile and tablet devices.
- Tabs also act as single page anchors, allowing for easy navigation to sections of the product page. The “Gallery” tab acts as a back to top.
- The tabs are mobile optimized, so you can swipe back and forth horizontally to see additional tab links.
- The “active” tab also switches automatically so it’s always clear which content is being displayed on screen.
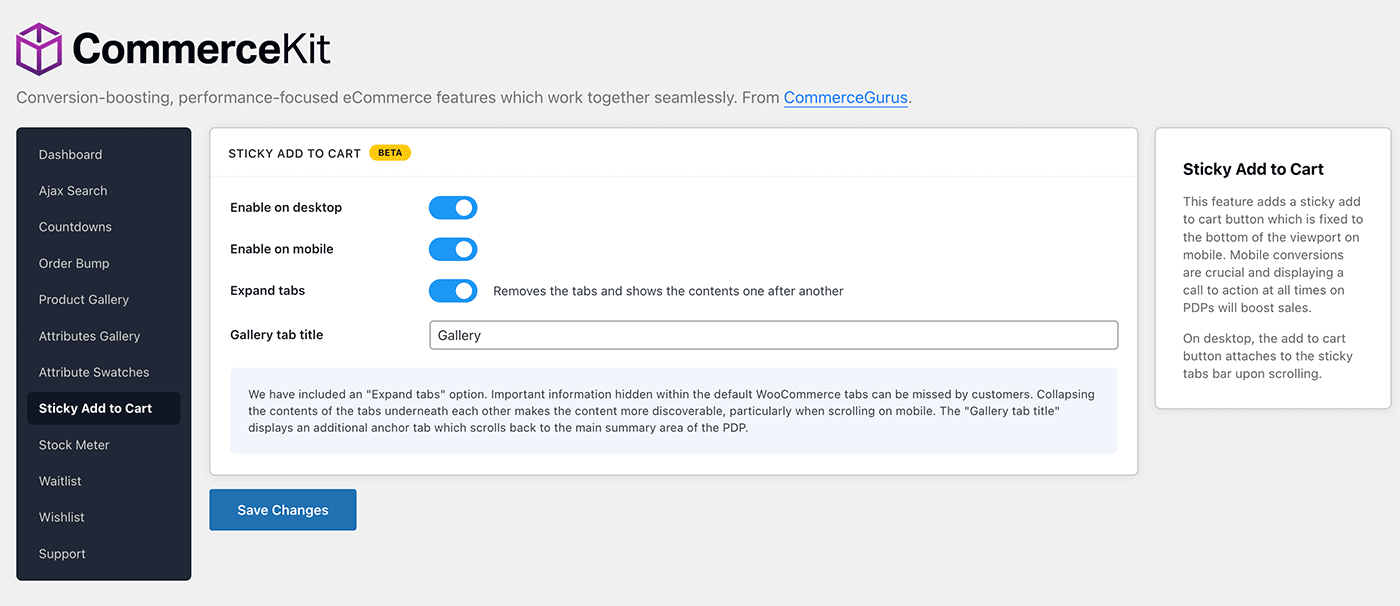
With the admin area you can decide to enable it on desktop, mobile, and use the expand tabs functionality. Within the new fixed bar, anchor links direct customers to the main sections. We have included an additional “Gallery” link which works as a back to top. You can change this label to anything you wish.
Note that with this feature enabled the main navigation bar is no longer sticky on product pages. The focus is shifted to the internal product anchors and the add to cart call to action.
Initially this module will work with simple, variable, external, grouped, and subscription product types. We may include others in future updates.
Size Guides
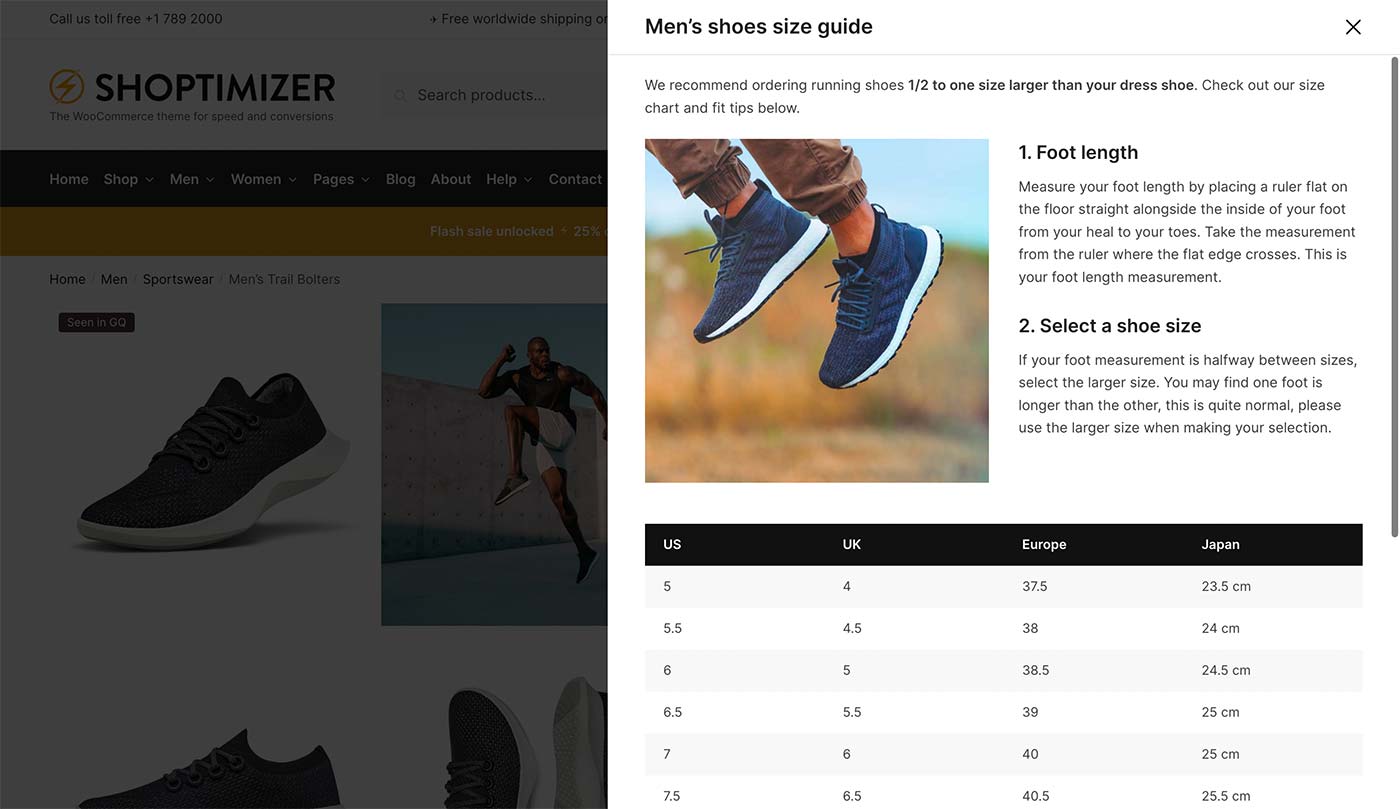
Returns are an increasingly expensive part of eCommerce and for that reason, providing size guides can help reduce a decent proportion of them. If you can provide accurate sizing to a customer it’s less likely they will be contacting you asking for an exchange or a return.
CommerceKit’s Size Guides module creates a separate custom post type so each size guide is effectively its own page. You can add any content you like to each. On this demo product example we add text, images, and a table of data.
You can create as many size guides as you wish and assign them to specific categories, or specific products.
If you have only one size guide and want to add it to every product that’s fine also. There’s an option for this within CommerceKit’s Size Guide settings.
Stock Meter
Replaces: Shoptimizer theme option
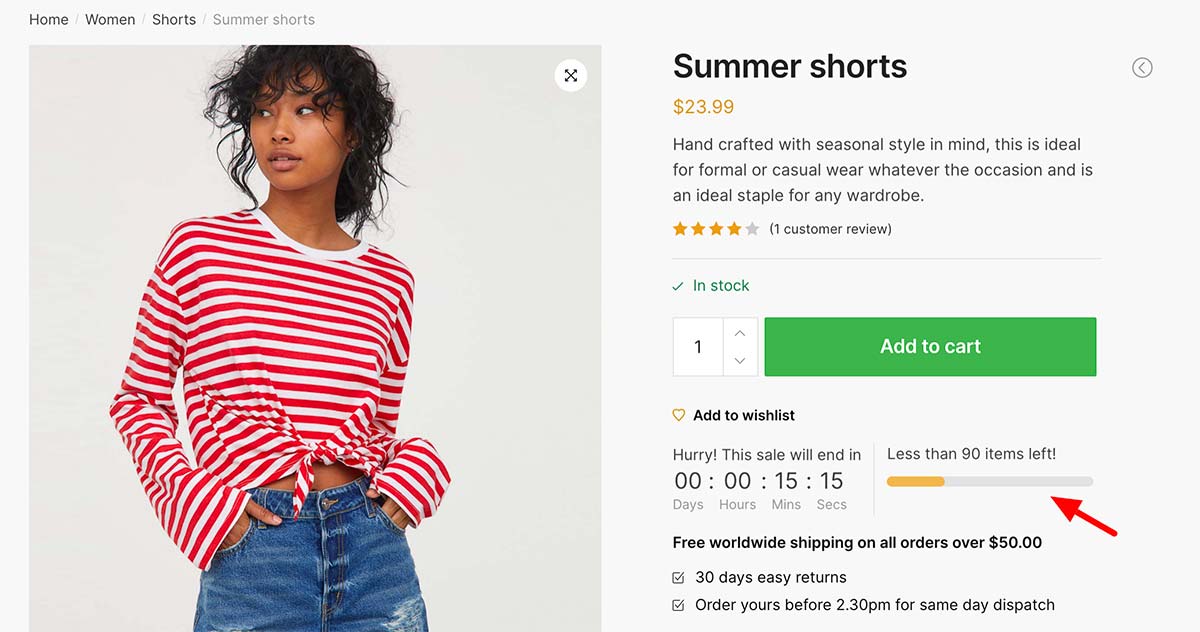
We rebuilt this stock meter module, which was previously a theme option. Now, it shows accurate data on the stock level of an item in increments of 10. It’s a visual metaphor which is particularly effective when the stock level of an item is low.
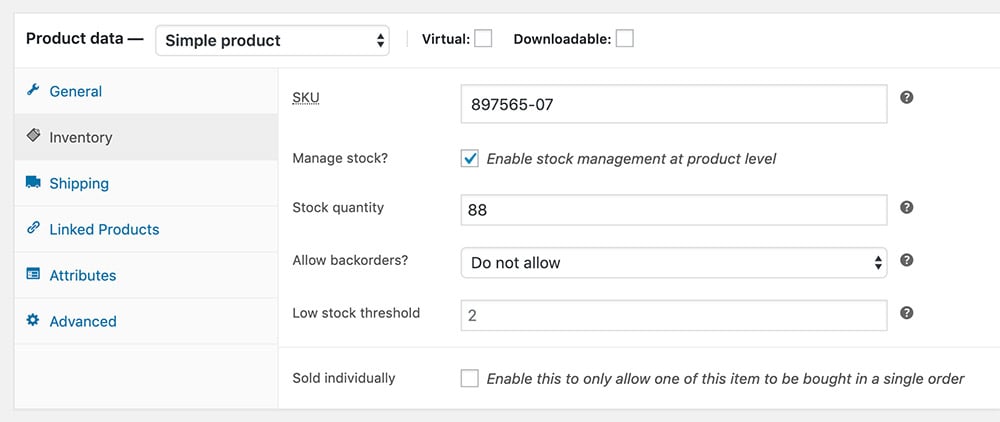
To have this display you must set an individual product’s inventory level. So Manage stock needs to be ticked and a number entered in the Stock quantity field.
Waitlist
Plugin it replaces: YITH Waitlist
A Waitlist is an email collection form which appears on products which are out of stock. It’s very useful to collect the information of customers who want to buy an out of stock item so you can let them know when it is available again. On the frontend it looks like this:
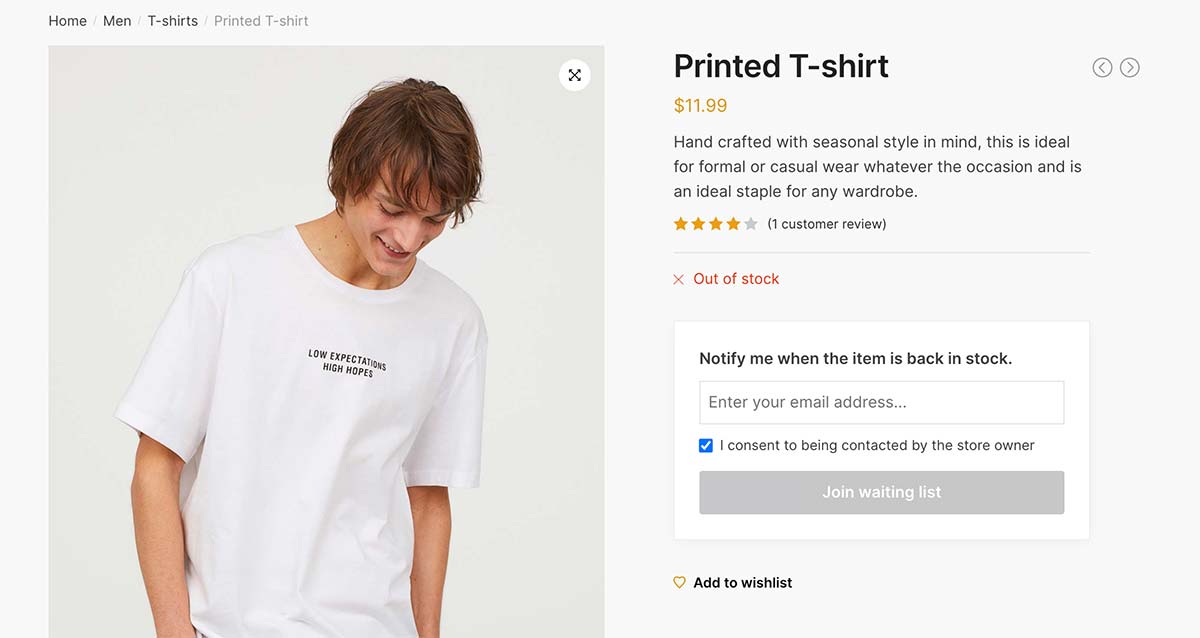
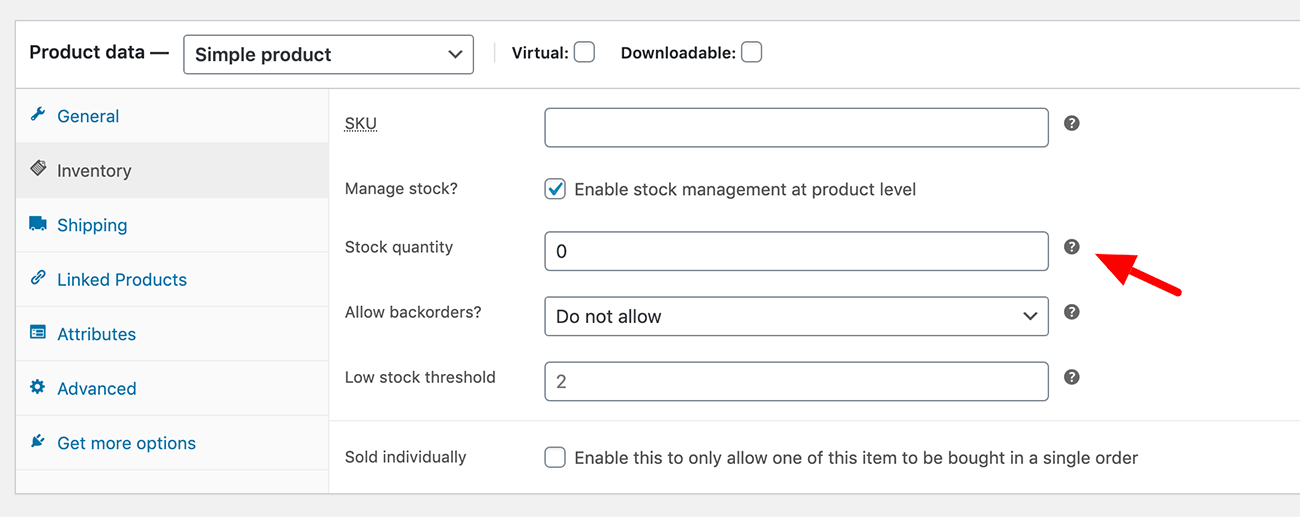
For this to display your inventory must be set to Manage stock. When it drops to 0 the waitlist form will display.
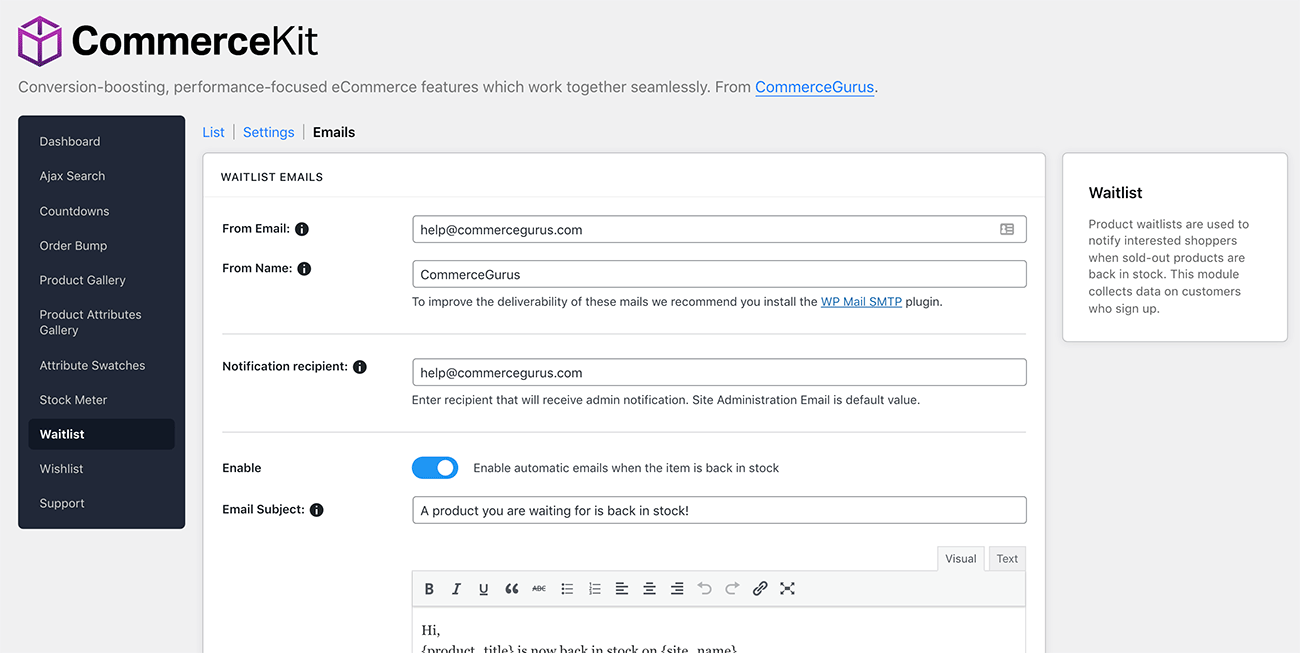
To get started, go to the Settings tab and enable the Waitlist in CommerceKit. You can also change the labels text if you wish.
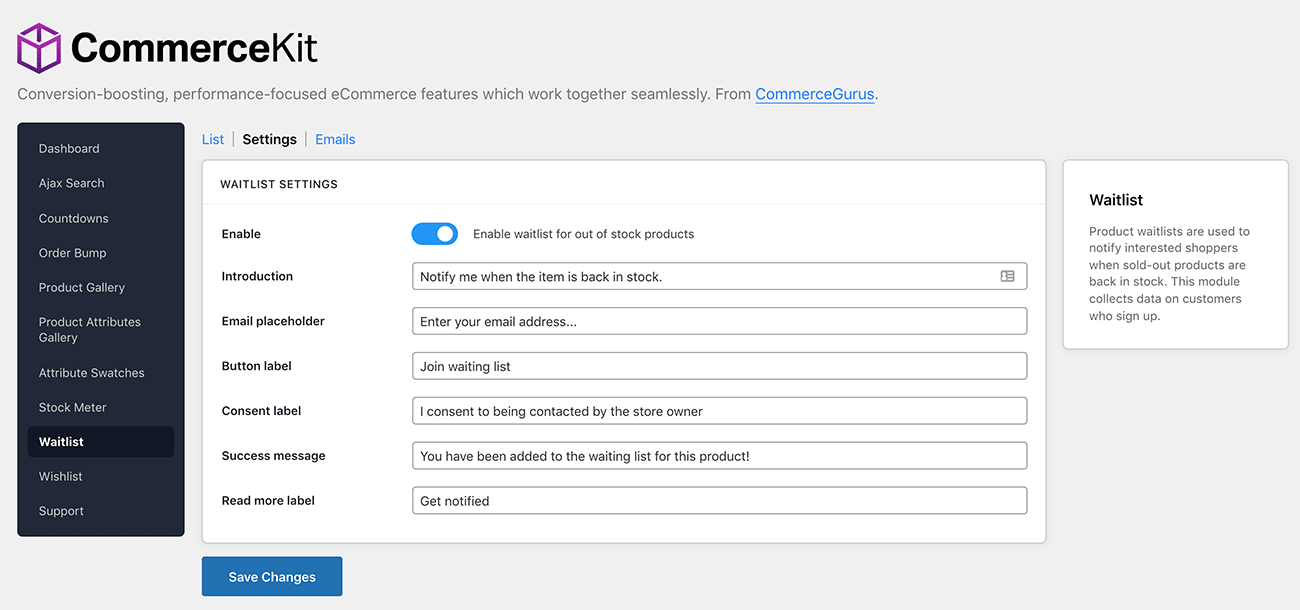
Within the Emails tab you can configure the email copy which is sent to customers who have subscribed to a waitlist. An email will be sent when the product they are interested in is back in stock. This will collect data and you’ll be able to view signups within the List tab.
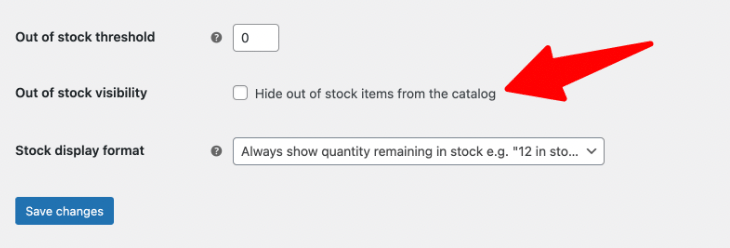
Note: For variable products, the Waitlist will only display if the Out of Stock visibility option is left unticked.
You’ll find this setting within: WooCommerce > Settings > Products tab > Inventory
Also, the waitlist currently does not work for backorders. It’s a feature we may include in a future update.
Wishlist
Plugin it replaces: YITH Wishlist
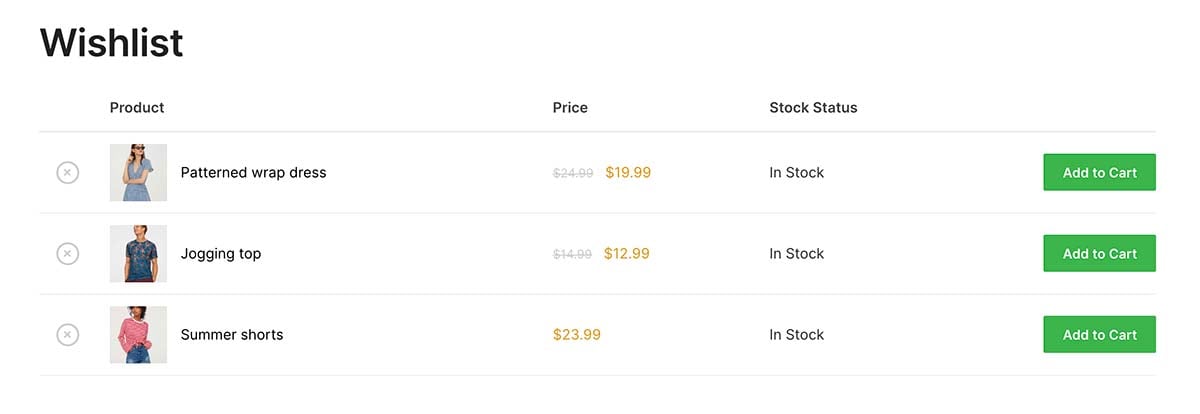
A wishlist is a common feature on many eCommerce sites. Firstly, you’ll need to create a new page, called Wishlist. Under ‘Page Attributes’ on the right-hand side of the WordPress editor change the page template dropdown to be Full width.
Note: If you have a caching plugin enabled, you will need to exclude this Wishlist page from being cached for it to work correctly.
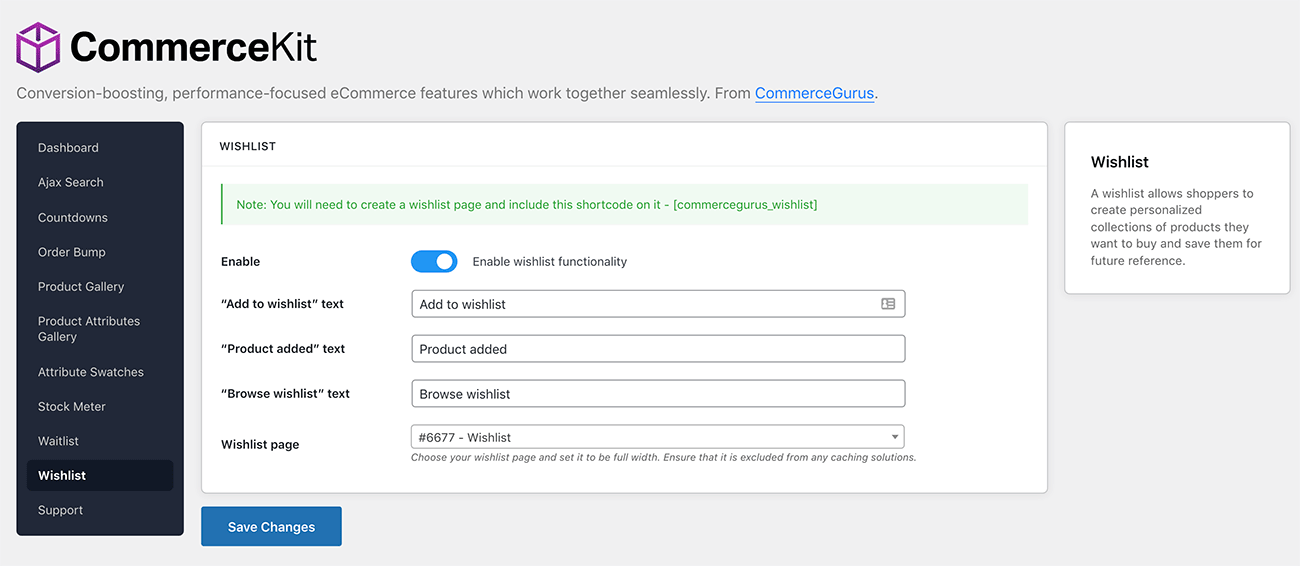
Finally, add this shortcode to the contents of the page and save it: [commercegurus_wishlist]
Next, in the Wishlist settings in CommerceKit – select this new Wishlist page and click Save Changes.
You could include this Wishlist page in your main menu or secondary menu if you like. This is what it looks like when products have been added to the wishlist.