Note: This is a written version of our Shoptimizer performance video. After completing these steps you should be able to achieve a 90+ Google PageSpeed Insights score, even on basic shared hosting, and pass Core Web Vitals.
All in, it takes about 30 minutes to set everything up but it’s well worth it for the performance improvements.
For a more comprehensive article on this topic, check out our guide on How to Speed Up WooCommerce.
Updated recommendation: Our new CommerceGurus Turbo plugin replaces most of what follows. It combines page caching, CSS optimization, JS optimization, lazy loading, preloading, Cloudflare edge caching, and image optimization into a single plugin built specifically for WooCommerce, with safe defaults that protect cart and checkout automatically. Most Shoptimizer users will get a 90+ PageSpeed score by activating Turbo alone.
Any plugin or custom code you add to your site can have negative performance implications. The worse offenders are often plugins which load javascript or CSS files from a domain which is not your own, called third-party scripts.
Ensure that you’ve set up Shoptimizer correctly
Go back over the Install Guide and first ensure that you have followed each step in the process. You’ll also want to make sure you have added a logo.
Once you have setup the theme correctly with the basic set of demo data we can begin.
The plugins
We’re going to set up the following plugins, so before starting you could head over to Plugins, and install and activate each.
- Autoptimize
- Breeze
- Jetpack (just the CDN modules)
- Flying Scripts
- Asset CleanUp
Do a speed test after each step
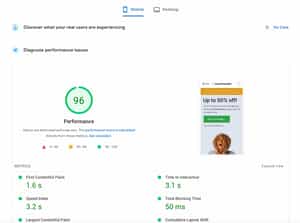
Before beginning, it’s useful to first run Google PageSpeed on your site to see what you are starting with. You should run the test after each step in this process and measure the performance scores each time.
Don’t worry if you see slight fluctuations by a couple of points during testing. By the end you should see an excellent result.
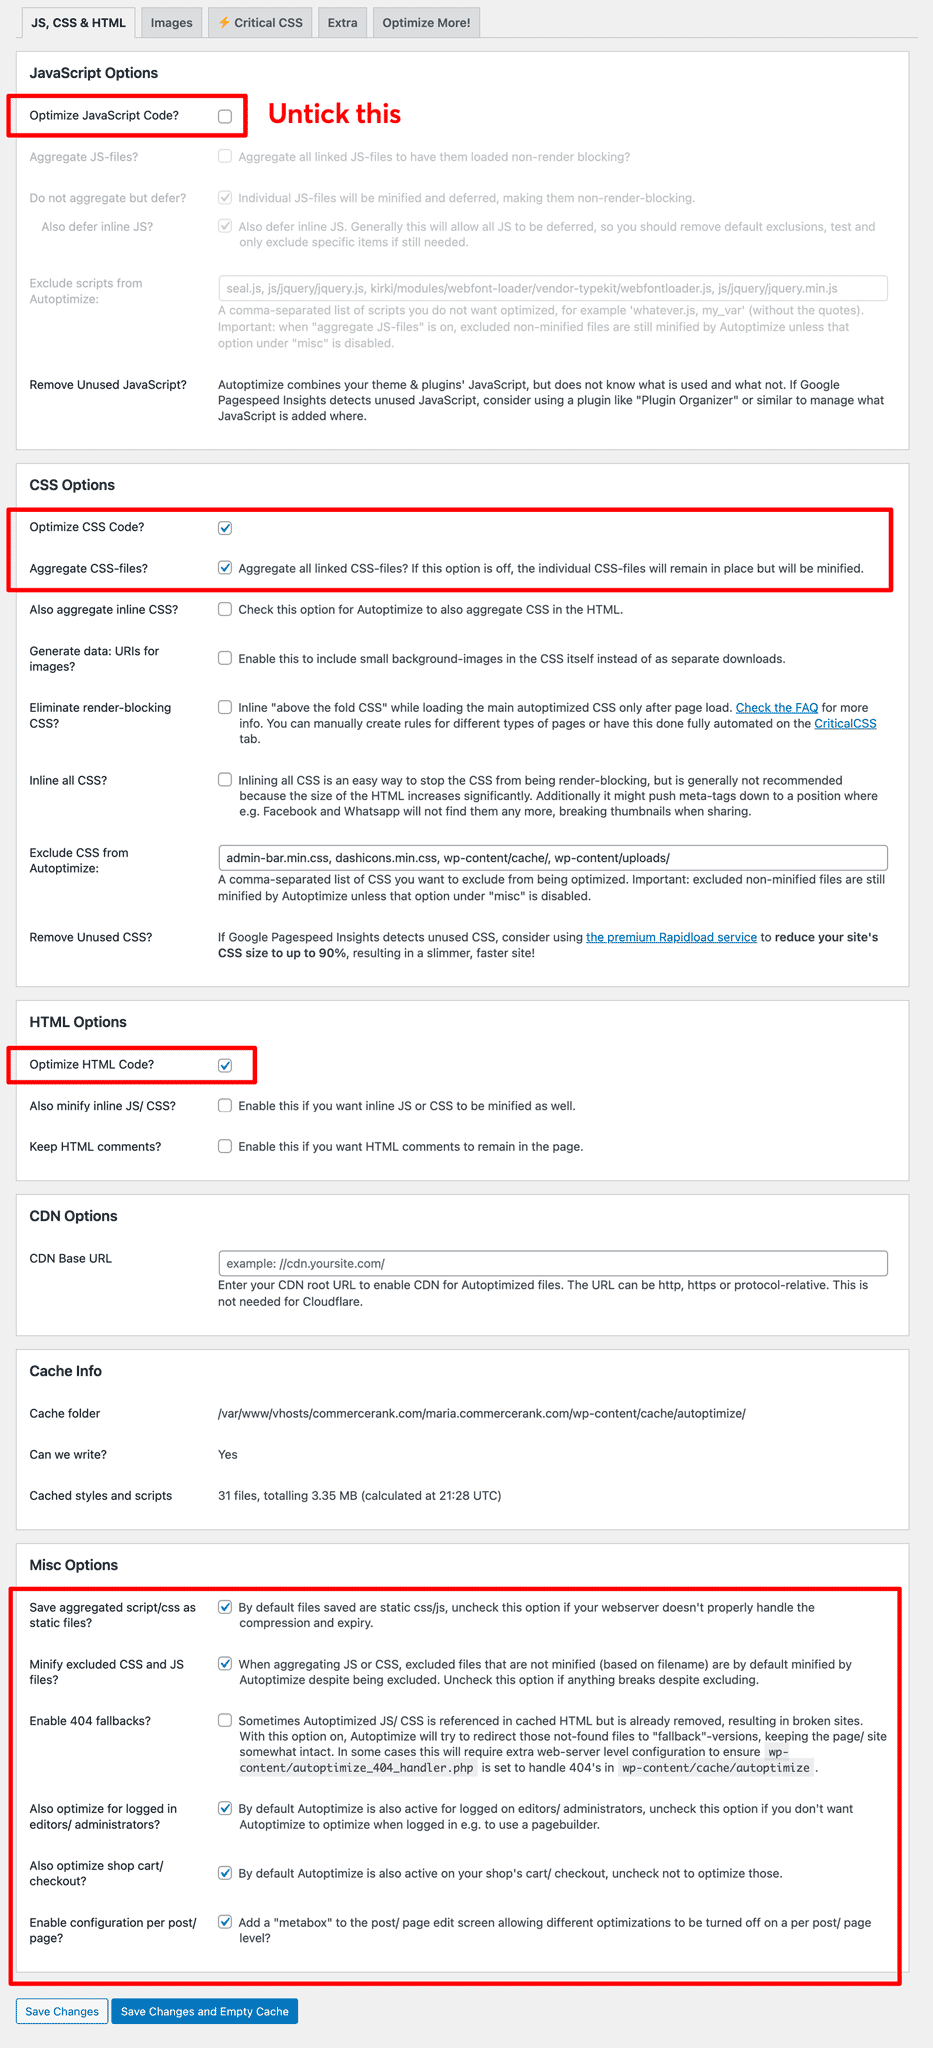
1. Autoptimize
The first step is to install the Autoptimize plugin. So head over to Plugins > Add New – and search for Autoptimize and install it.
Set up the JS, CSS & HTML tab exactly as outlined in the screenshot below.
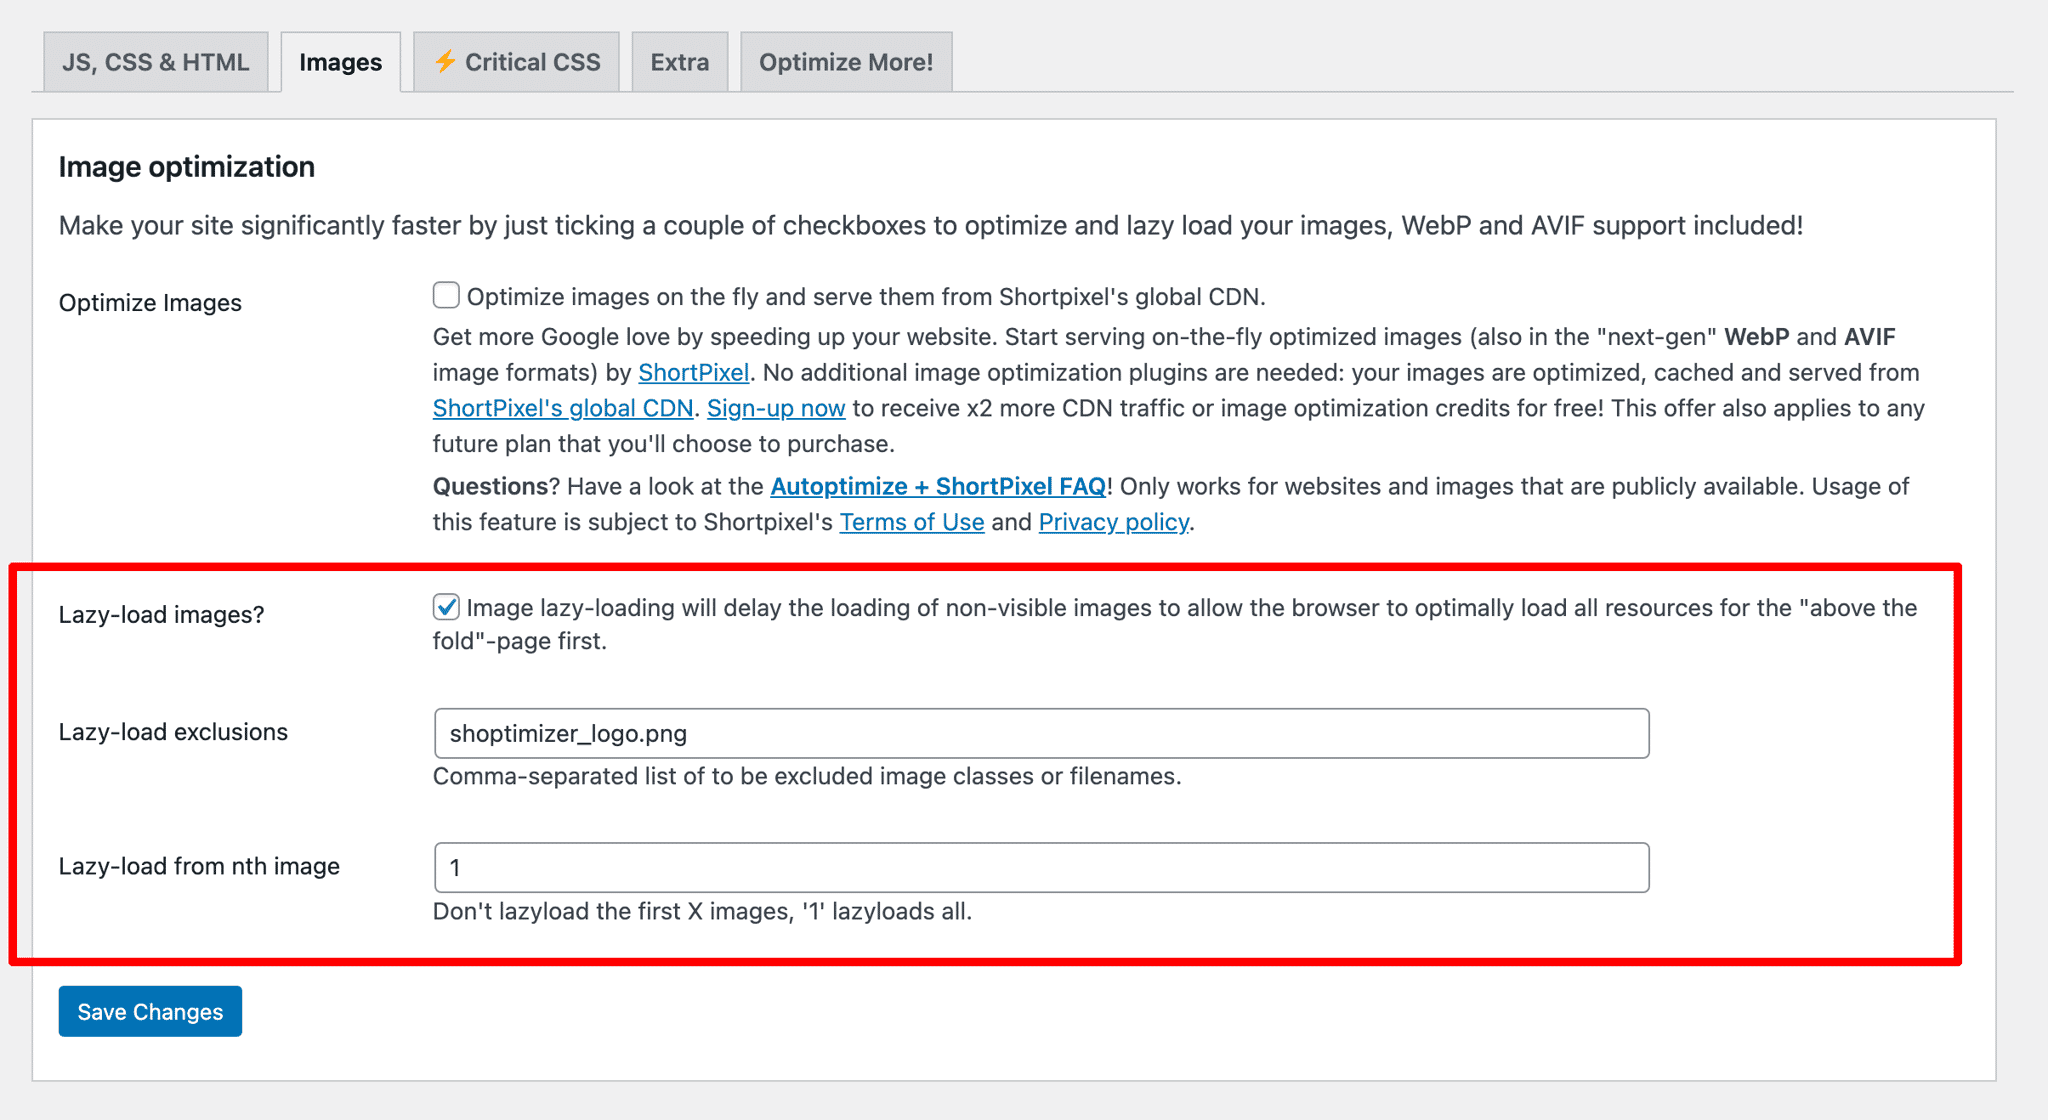
Next, under the Images tab you’ll need to update the settings to look like this.
Under Lazy-load exclusions you need to enter the filename you use for your logo. In the example below it is shoptimizer_logo.png but yours will be different.
Finally, under Extra configure the settings like so.
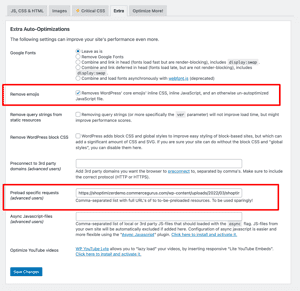
The Preload specific requests should be the full URL of your logo path.
2. Breeze
Next up, install the Breeze caching plugin and activate it.
This step is really easy and you simply activate it and you don’t need to adjust any settings. The defaults are fine. You should see a settings screen which looks something like this.
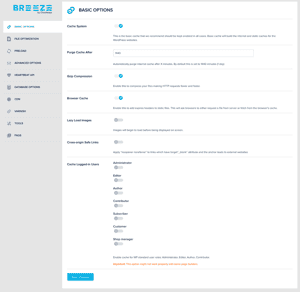
There’s no need to adjust anything here so we can move onto the next step already.
3. Jetpack
Next, install and activate the Jetpack plugin. Many people don’t like Jetpack, saying that it’s a performance hog but we’re going to turn off literally every single unnecessary module apart from two, which are the CDNs.
Go to Jetpack > Settings and click on the Performance tab. Ensure that you toggle the Enable site accelerator options.

Next at the very bottom of this settings page, in tiny text in the footer you should see a link called Modules. Click on that.
Here, you can see all of the Jetpack modules which are enabled by default. We don’t want any of these other features active.
Click Deactivate on all other modules. When you are finished, you should only see two modules active: Asset CDN and Image CDN. If you click the Active tab on the right-hand-side you should just see those two.
4. Flying Scripts
Install and activate the Flying Scripts plugin if you haven’t already. This simple plugin allows you to delay javascript from loading until there has been user interaction, e.g. cursor movement.
Add the following to the Include Keywords section.
gtm4wp-form-move-tracker.js
wishlist.js
ajax-search.js
wp-polyfill.min.js
swiper.min.js
frontend.js
add-to-cart.min.js
elementor/frontend.min.js
share-link.min.js
gtm.js
cart-fragments.min.js
The result should look like this.
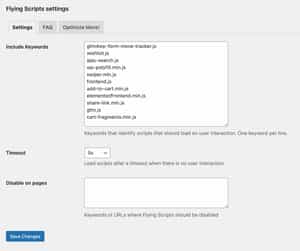
And that’s it. You don’t need to change anything else.
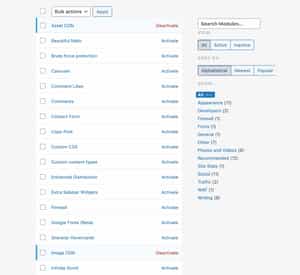
5. Asset CleanUp
The Asset CleanUp plugin is for advanced WordPress users, but is a game changer when it comes to being able to unload files on a page-by-page basis. This can make your pages lighter and more performant as you are removing unnecessary requests.
If you ever hire an expensive performance consultant to improve the page speed of a WordPress site, this is the tool they will likely use.
You do need to thread lightly when using this plugin, if you dequeue the wrong files you’ll quickly break your site!
On the homepage it’s possible to remove certain files from loading. One file you can certainly remove is jetpack.css.
If you’re using Elementor to build the homepage and not the Block Editor, it is safe to dequeue a further two files: wc-blocks-style and wc-blocks-vendors-style.
Just toggle the Unload on this page option next to these.
We won’t unload any other files using this plugin for now.
6. Typography 2.0
A final, optional step is to enable a hidden setting in Shoptimizer called Typography 2.0. This is a more performant method to load fonts and removes the brief FOUT (Flash of unstyled text) as the font renders.
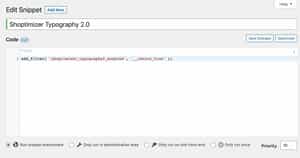
To enable this, you’ll need to first install the Code Snippets plugin.
Create a new snippet and paste in this single line, and activate it.
add_filter( 'shoptimizer_typography2_enabled', '__return_true' );The result should look like this.
This creates a new section in the customizer called Typography 2.0. That is where you can configure your new performance-optimized Shoptimizer font settings.
You’ll find it within Appearance > Customize > Typography 2.0
Final Results
Following these performance adjustments, even on the low-powered development server which we ran these tests on, we regularly scored in the mid 90’s when testing Google PageSpeed Insights.
With decent hosting you can obviously improve these metrics even further!