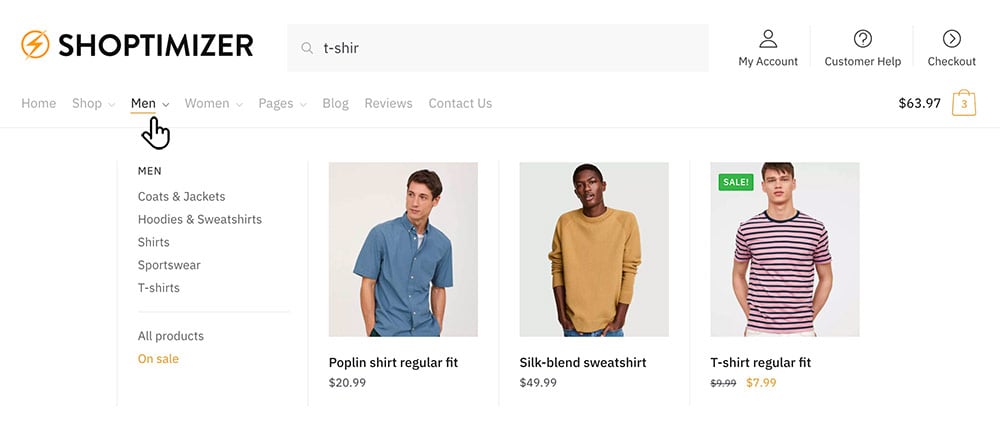
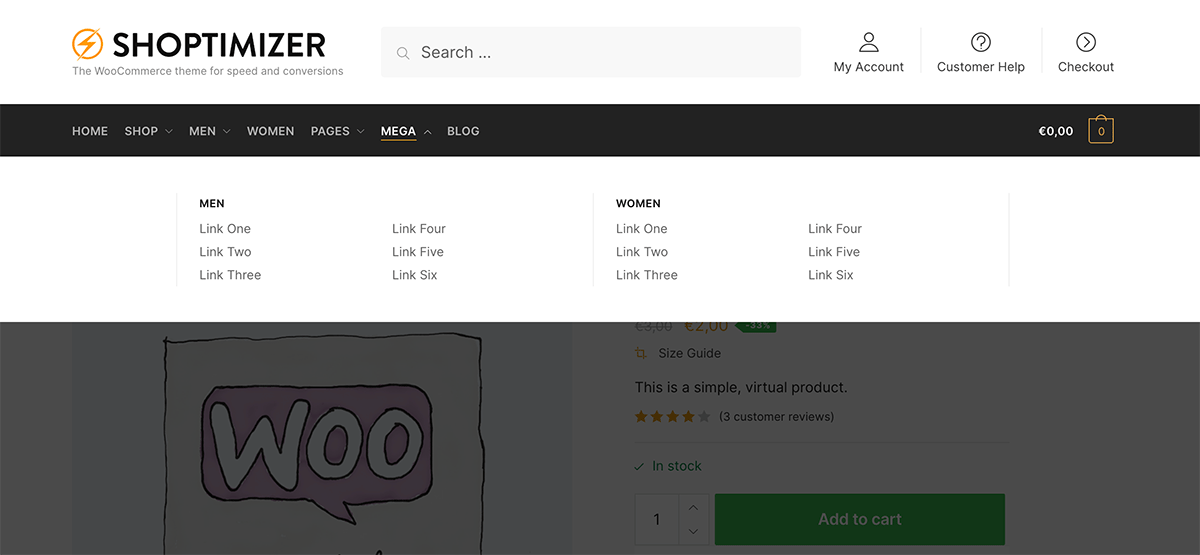
It’s easy to edit or create a mega menu from scratch in Shoptimizer. Mega menus can be a great way to show nested categories and featured products in larger stores.
Appearance – Menus
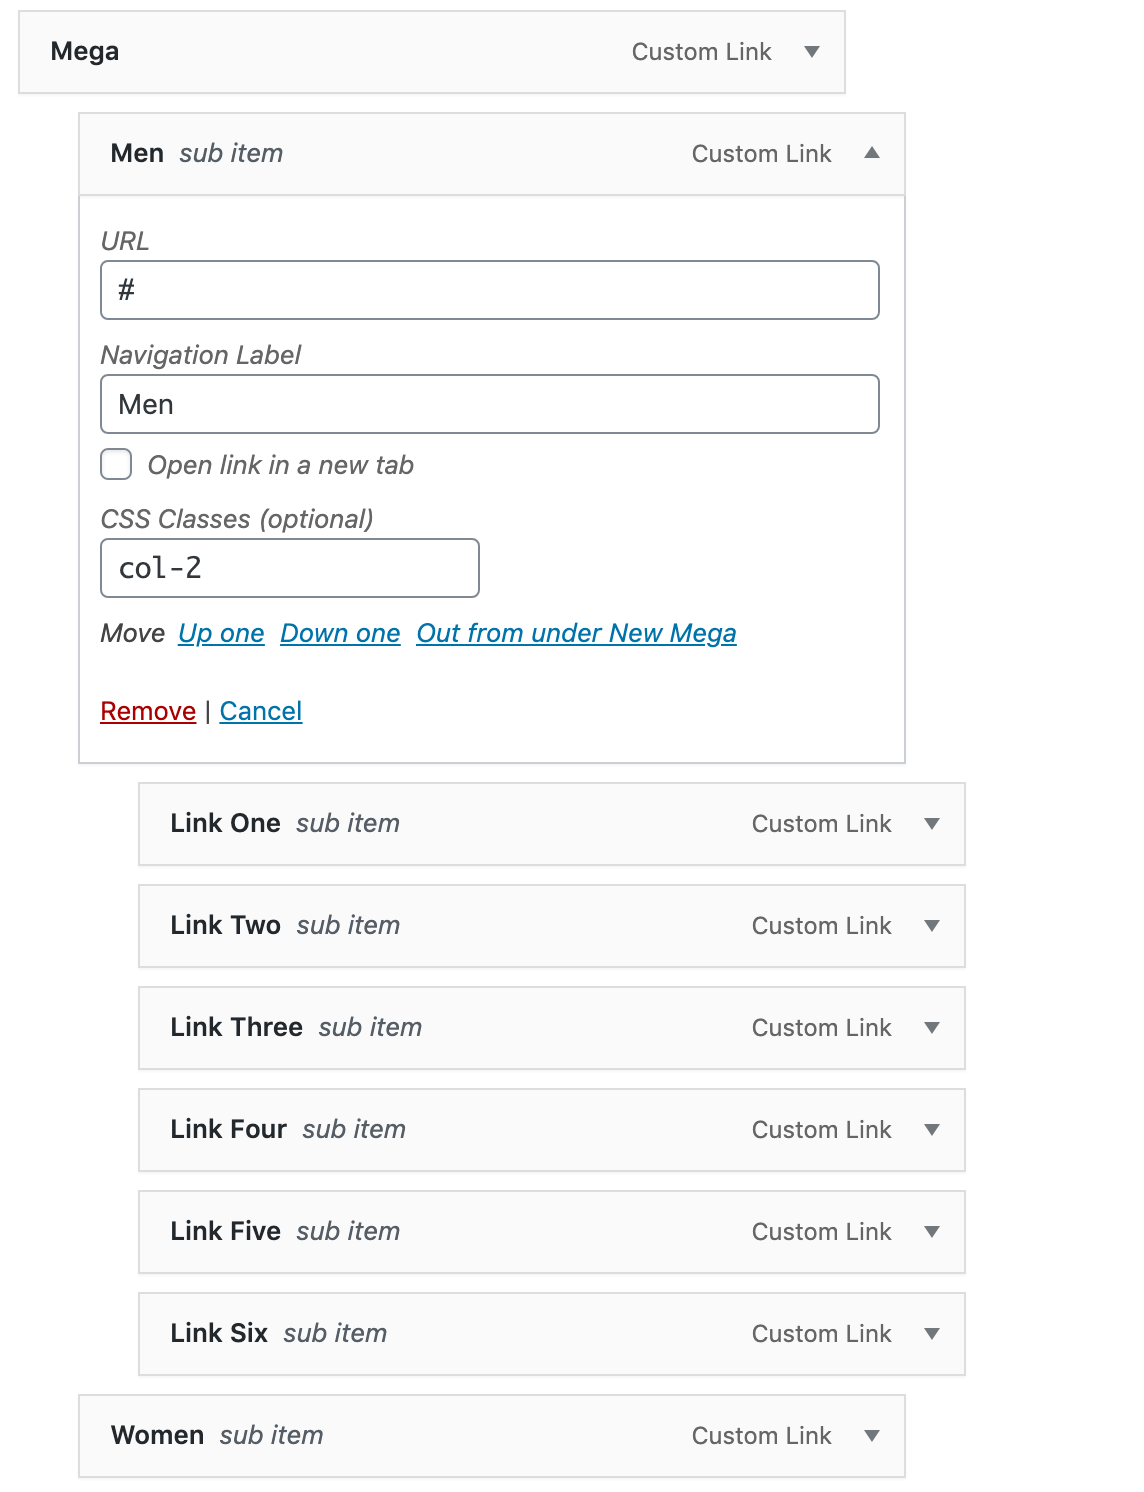
Go to Appearance > Menus and click on ‘Screen Options‘ at the top.
Ensure that CSS Classes and Description are both ticked.
For the menu item you want to turn into a mega down, add the class full-width to the CSS Classes field. In this case, we’re adding it to the Men category.
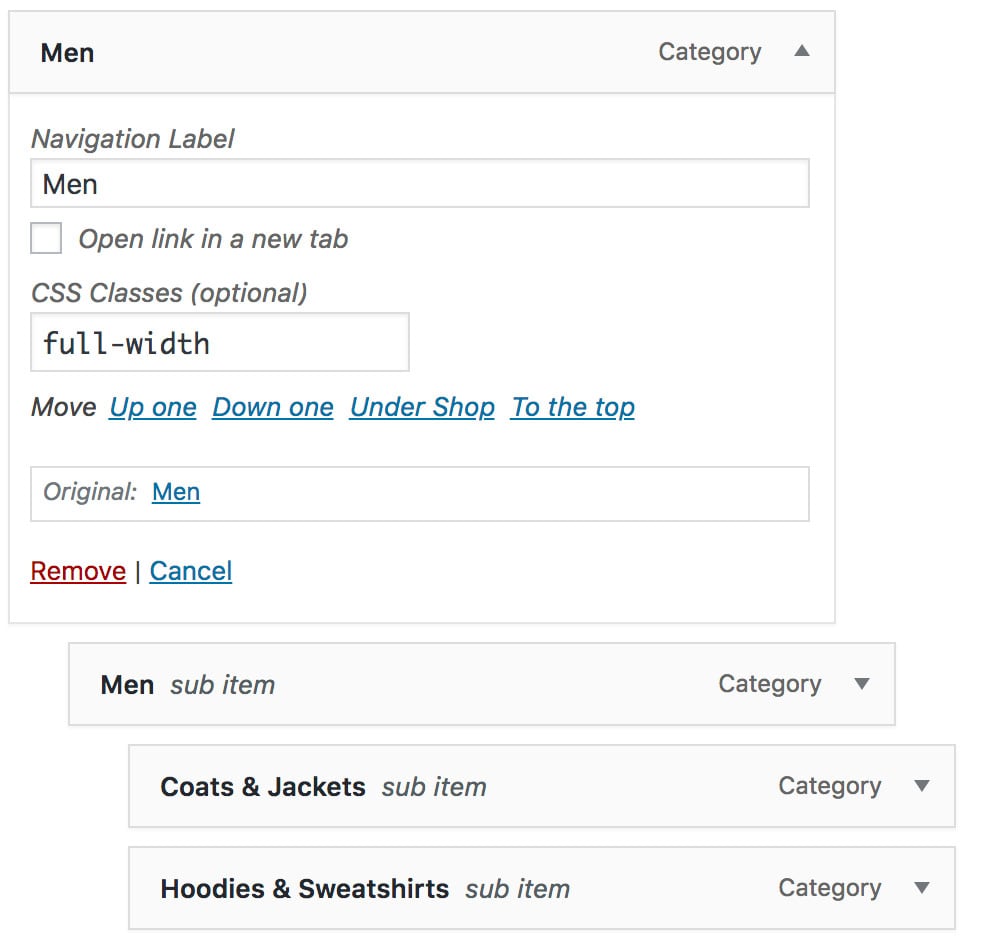
Nest the sub categories under it, like the screenshot above. Each top level link will be in its own column.
Adding Products
We can also add featured products to the dropdown – this is a nice way to showcase certain items within a top level category.
This is done by first adding a Custom Link to the menu.

Replace the Link Text with the item shortcode – it will look like this: and the CSS Classes field with: menu-item-product.
You can leave the URL hashed out with the # symbol.
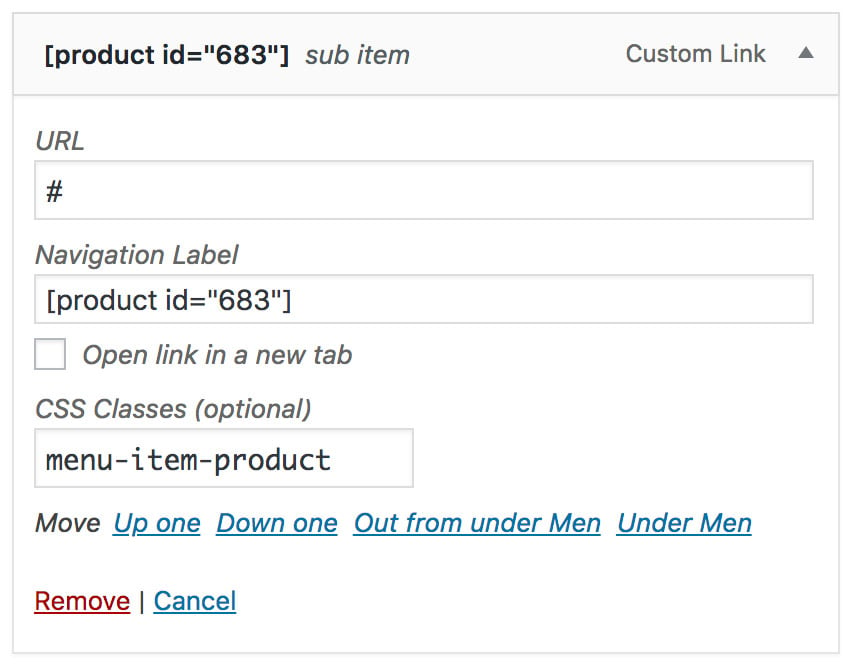
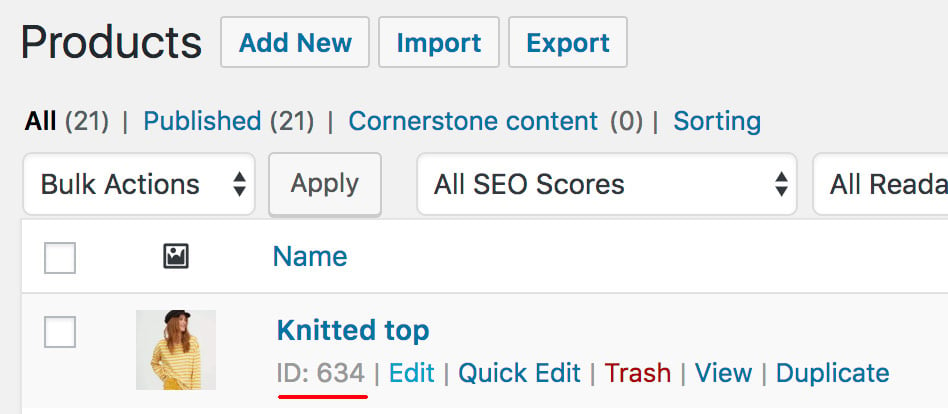
The product id is unique to each product. To find out what id your featured product should have – go to the Products section in WooCommerce and hover over an item – and viola, the id will be revealed. Use this id in your menu label and the item should appear within the mega dropdown.
Adding Images
You can also add images within the mega menu.
Step 1
Enable the theme option. Appearance > Customize > Headers and Navigation > Navigation.
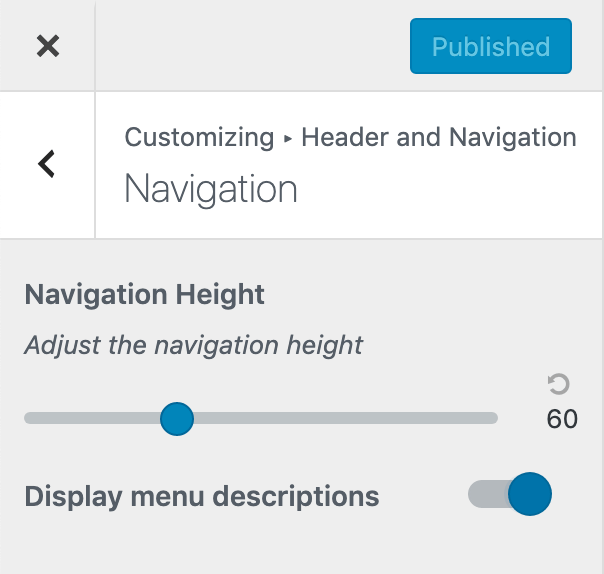
Ensure that ‘Display menu descriptions’ is active.
Step 2
Next, upload the image you want to use to the Media area of WordPress and note the url path.
Step 3
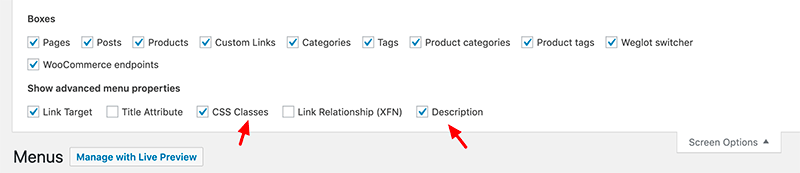
Go to Appearance > Menus – click Screen Options at the top and ensure that CSS Classes and Description are ticked.
Step 4
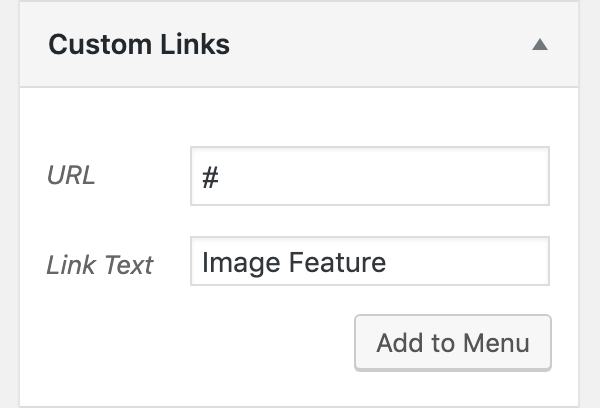
Now, add a Custom Link to the menu. You can call it Image Feature so that you know what it is, but it doesn’t matter. This isn’t displayed.
When you edit this menu item, you need to do two things.
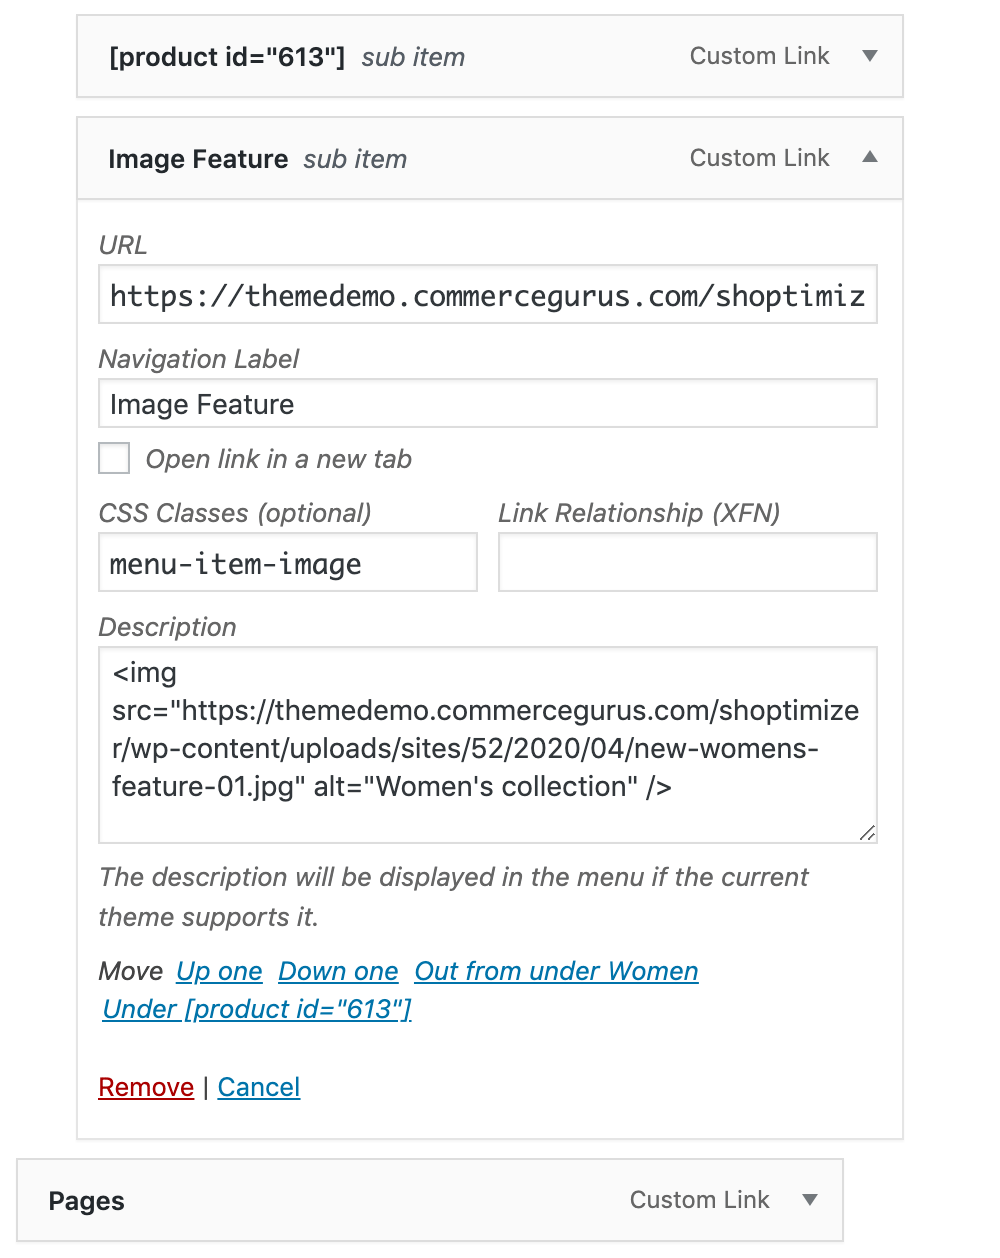
Change the CSS Classes field to menu-item-image
And add this bit of HTML into the Description field.
|
1 |
<img src="https://themedemo.commercegurus.com/shoptimizer/wp-content/uploads/sites/52/2020/04/new-womens-feature-01.jpg" alt="" /> |
Just replace the image URL with your uploaded image path and you’re all set.
If you want to display some text underneath just include it afterwards.
|
1 |
<img src="https://themedemo.commercegurus.com/shoptimizer/wp-content/uploads/sites/52/2020/04/new-womens-feature-01.jpg" alt="" /> Some text here |
Span multiple columns
It’s now possible to span multiple columns in the mega menu. You can span 2, 3 or 4 columns if you have a lot of links. On mobile it will appear as a single column.
To do so, create your sub menu using a single column like so:
On the sub menu add the class col-2 to make the list span 2 columns. You can change it to col-3 to make it span 3 etc. Each column is 20% width.
Separate section displayed below the mobile menu
There’s an additional section you can display only on mobile below the primary menu. This is actually a widget. Appearance > Widgets > Mobile Extra
We did it this way for a bit of extra flexibility. Some people want to display additional text, have phone numbers link etc. A widget allows this.
So to edit it, just add a text widget to the Mobile Extra widget area if there isn’t one already. The headings are <h4>’s and then the links are within an unordered list.
Extra Classes
- Within the mega dropdown, to add a dividing line, use the class divider
- To highlight a link within the mega dropdown, use the class highlight
- Within the mega dropdown, to create a heading within an existing column, use the class heading
- To create a little bubble of text, wrap it in strong tags, like so. <strong>NEW</strong>
- If you want a mobile menu area to be expanded initially, add this additional class dropdown-open
- To add a button to the main menu bar, similar to the theme demo, add this class to the link: menu-button
- To hide a menu item on mobile (but display it on desktop), use the class hide-on-mobile
- To remove link markup around a mega menu item, include the additional class nolink – this is suitable for headings.