It’s possible to use your own custom font files in Shoptimizer if you want something that’s neither a native “web-safe” font or a Google font.
You can find some excellent open source fonts at Fontshare for example.
Note: This approach only works with the standard font loader in Shoptimizer. Not when the Typography 2.0 filter is enabled.
Step 1 – Download a font you want to use
From either Fontshare or any other resource, you need access to the font files on your computer. These would be in woff and woff2 formats. The woff2 format has the smallest file size and is supported by all browsers these days so this would be ideal.
You would need to have a separate font file for each font weight or style. So for example you may have a woff2 file for the regular 400 weight, and another for a bold 700 weight.
It would be best to reduce the number of font files loaded on a page for performance reasons so try and limit them to two weights if possible.
Step 2 – Install the Custom Fonts plugin
Next, install and activate the Custom Fonts plugin from Brainstorm Force. You’ll be able to access this new area within: Appearance > Custom Fonts
Step 3 – Upload font files
Next, within the Custom Fonts area, declare the name of the new font and upload your woff2 (and optionally woff) file.
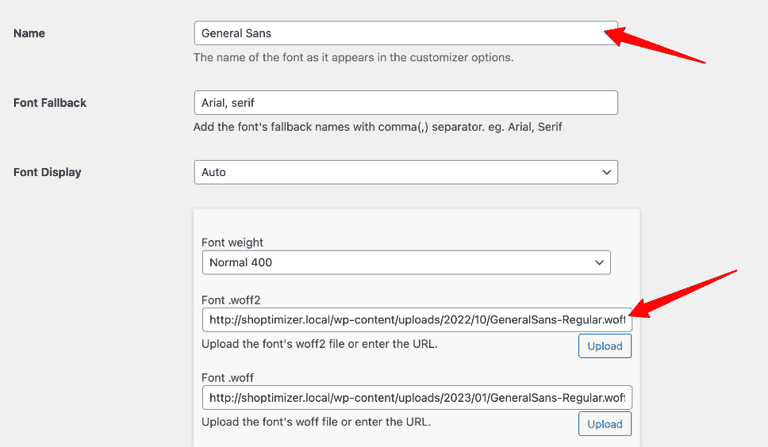
In my example I’m uploading a font called General Sans so have named it so.
Step 4 – Add a custom function
Finally, within your child theme’s functions.php file, or via the Code Snippets plugin you’ll need to include a custom function which references the name of the custom font you have uploaded.
add_filter( 'kirki_font_choices', 'my_custom_optgroup', 20 );

// Custom Font Group
function my_custom_optgroup( $custom_choice ) {

	$custom_choice['families']['custom_fonts'] = array(
		'text' => esc_attr__( 'Custom Fonts', 'textdomain' ),
		'children' => array(
			array( 'id' => 'General Sans', 'text' => 'General Sans' ),
		),
	);

	$custom_choice['variants'] = array(
		'General Sans' => array( 'regular', '700' ),
	);

	return $custom_choice;

}
Note the references to the exact spelling (with a space) to General Sans. It’s really important that this matches with how we have named it within the Custom Fonts area.
The array parameter lists out each of the weights you have uploaded. So if you are using, for example, italics, and a 300 font weight be sure and include them in that list, with commas.
Result
If you’ve completed these steps correctly you should see your custom font in two places. In the customizer, and within the Elementor typography font selector.

Multiple custom fonts
If you are using more than one custom font, you’ll need to tweak the function above to include them. It could look like this.
add_filter( 'kirki_font_choices', 'my_custom_optgroup', 20 );

// Custom Font Group
function my_custom_optgroup( $custom_choice ) {

	$custom_choice['families']['custom_fonts'] = array(
		'text' => esc_attr__( 'Custom Fonts', 'textdomain' ),
		'children' => array(
			array( 'id' => 'General Sans', 'text' => 'General Sans' ),
			array( 'id' => 'Supreme', 'text' => 'Supreme' ),
		),
	);

	$custom_choice['variants'] = array(
		'General Sans' => array( 'regular', '700' ),
		'Supreme' => array( 'regular', '700' ),
	);

	return $custom_choice;

}